Saturday, May 28, 2022
Graphic 45 Let It Bee Birthday Card
12:00 AM
Welcome back and Nancy, here, to share a birthday card with the new arrival of Graphic 45 Let It Bee collection and couldn’t bee more bee-u-tiful full of beautiful sunflowers, golden bees and bright red poppies with bee sentiments just perfect for your card making, mini albums and papercrafts.
My card measures 5" x 7"
Supplies:
Metal bee embellishments
Canvas ribbon Optional May Arts 3/4 Inch Classic Ribbon
Instructions:
- First, create a 5″ x 7″ top fold card base from white heavy cardstock.
- Next, mat 6 3/4" x 4 3/4" Graphic 45 pattern paper on 5" x 7" cardstock and adhere to front of card base.
- Fussy cut the Let It Bee sunflower adhere over the patterned paper.
- Cut out the sentiment border from the paper pad and adhere across the front. I also made sunflowers from an ole die and used the yellow pattern paper to cut out the flowers.
- Cut out a Happy Birthday sentiment with gold metallic paper and black cardstock. Glue the sentiments slightly together with some black showing to make a shadow and adhere to card.
- Use a hot glue gun to adhere metal bees and the handmade flowers to the front of the card.
- Inside Instructions. Cut out a 5" x 7" patterned paper from the collection and adhere to both sides of the inside.
- Cut out 4" x 6" journal images from the collection and adhere to both sides of the inside.
- Cut out sentiment borders to go across the journal images.
- Type the sentiment and print. I used a 12 Font and sponged on Distress yellow and orange ink slightly around the cut out sentiment and adhere it to the center of another cut out journal image.
- I fussy cut around the sunflowers of a journal image and glued the typed sentiment behind the sunflowers.

Graphic 45 Busy Bee
(In the 12" x 12" Graphic 45 Let It Bee paper pad collection or sold separately)
Graphic 45 Let It Bee 12" x 12" paper pad 
Graphic 45 Queen Bee
(In the 12" x 12" Graphic 45 Let It Bee paper pad or sold separately)So get crafting and have a fabulous day and thanks for visiting.The Rubber Buggy has the crafting supplies for your next project. So have fun crafting this weekend with these products. My cards and projects are always posted on Saturday. Keep watching and thank you so much for those wonderful comments as well as suggestions.Enjoy and Happy Crafting!
Thursday, May 26, 2022
Circle Layer Card
6:00 AM
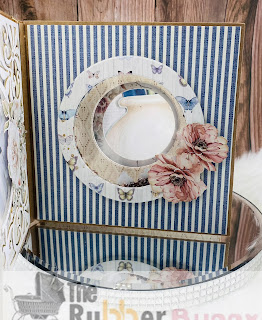
Hi everyone today I am here sharing a layered circle card using papers from Asuka Studio for the Rubber Buggy. I used “Gingham Love” collection and “Dusty Blue Floral” collection. The papers are absolutely gorgeous! 💕
Front of the circle card
I used Mintay diecuts o embellish my circle card and it was amazing how well they matched together.
Each layer has a cut out circle center and I covered two pages with acetate and made ine a shaker window with seed beads.
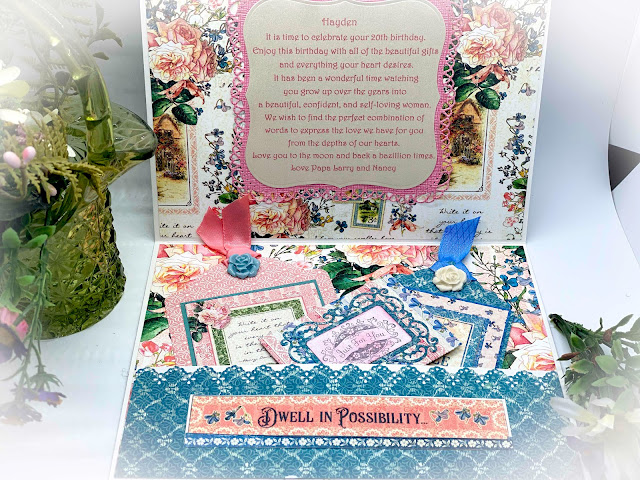
This page I added some diecut floral and created an outlined the circle with additional papers from the set
I hope everyone enjoyed my post and
Thank you for visiting
Labels:Asuka,Mini album,Mintay,Simply Monica | 0
comments
Saturday, May 21, 2022
Graphic 45 Cottage Life Birthday Card
12:00 AM
Welcome back and Nancy, here to share a birthday card using the gorgeous Graphic 45 Cottage Life full of periwinkle blue forget-me-nots and blush pink roses. I just love creating cards with such gorgeous papers like this one so I am excited to share the list of supplies and written tutorial so you can create a card like this one for one of your special friends or family members.
Supplies:
Blue ribbon
4mm Pearl String
Lacey doily die or lacey doily
Graphic 45 Staples Die-Policy & Decorative set for the money pocket
Instructions:
Card measures 5" x 6" when completed.
- Cut out frame using white cardstock at 10" x 12". Score in center and fold for base.
- Cut out pink cardstock at 4 3/4" x 5 3/4" and pattern paper at 4 1/2" x 5 1/2. Center on each other and glue to frame.
- Cut out the image and adhere to card with glue
- Use a hot glue gun to glue ribbon and flowers to card.
- Cut out two 4 3/4" x 5 3/4" pattern paper and glue to inside of card.
- Cut out pocket with pattern paper at 2" x 5 3/4" and glue to white cardstock measuring 2 1/2" x 5 3/4". Glue the side and bottom edge of the white cardstock and adhere to card. This will be your pocket.
- Cut out two Graphic 45 Staple tags and glue paper on each tag and trim off the excess paper. Add ribbon to the top along with an embellishment.
- I cut out one Graphic 45 pocket from the die set, assembled and added money to the inside of this pocket before inserting into the pocket of the card.
- Complete finishing your beautiful card with the tags, etc. found in this gorgeous Graphic 45 Cottage Life paper pad.
So get crafting and have a fabulous day and thanks for visiting.
The Rubber Buggy has the crafting supplies for your next project. So have fun crafting this weekend with these products. My cards and projects are always posted on Saturday. Keep watching and thank you so much for those wonderful comments as well as suggestions. Enjoy and Happy Crafting!
The Rubber Buggy has the crafting supplies for your next project. So have fun crafting this weekend with these products. My cards and projects are always posted on Saturday. Keep watching and thank you so much for those wonderful comments as well as suggestions.
Enjoy and Happy Crafting!
Saturday, May 14, 2022
Lawn Fawn Build A Barn
12:00 AM
Hope you are having a 'Berry' good day. Welcome back and Nancy, here, and I created a cute home for our farm critters by building them a barn and paired this with so many new coordinating Lawn Fawn dies and stamps set for this fun birthday card. You will want to check out all of the new spring Lawn Fawn dies and stamp sets while supplies are available at the Rubber Buggy. Those adorable farm mice are so busy with these strawberries and the new Lawn Fawn Build A Barn with the Lawn Fawn Tiny Farm animals will put a smile on anyone's face.
Supplies:
Lawn Fawn Picket Fence Border
Lawn Fawn Build A Barn
Ranger Distress Tumbled Glass Ink
Copic Markers
5mm flatback pearls and colored with yellow Copic Marker for center of flowers (Substitute for Pinkfresh Studio Metallic Pearls)
Instructions: Card measures 5" x 5"
- Lawn Fawn created a very thorough U-Tube video for assembling the barn by click HERE.
- Cut out 5" x 5" white cardstock. Sponge on Ranger Distress Tumbled Glass ink with Lawn Fawn Cloudy Stencil to create sky.
- Lawn Fawn has dies that coordinate with every stamp set but I had a Scan and Cut machine to cut mine out since I struggle using the small dies.
- Stamp with Lawn Fawn Black ink on white cardstock and color with ink markers
- Cut out the Lawn Fawn Hillside border die with brown cardstock and adhere to cut out of Lawn Fawn Picket Fence Border.
- Cut out Lawn Fawn Grassy Hillside Border and adhere the hillside and picket fence border to the back.
- After assembling the barn, add the Lawn Fawn Tiny Farm pig to window in barn. Cut out 1/4" yellow cardstock and use scissors to cut tiny slits to add to the window in the barn to make it look like hay. Cut off excess.
- Add the Lawn Fawn Berry Special stamp of mice, strawberry fields and sign to the card with glue.
- Adhere the Lawn Fawn Strawberries die set to the top of the card cut out with green, red and black paper cardstock.
- Color 5mm flatback pearls with yellow ink and glue to center of each flower.
So get crafting and have a fabulous day and thanks for visiting.
The Rubber Buggy has the crafting supplies for your next project. So have fun crafting this weekend with these products. My cards and projects are always posted on Saturday. Keep watching and thank you so much for those wonderful comments as well as suggestions.
Enjoy and Happy Crafting!
Thursday, May 12, 2022
Mixed Media Shaker
6:00 AM
Ho everyone welcome back to the Rubber Buggy blog. Today I am here sharing some mixed media sort of pieces using pages from The Mintay window album. I fussy cut flowers amd added some pearls to the center for added decor.
I used the Silver Heart Warrior collection and I fuzzy cut certain images to create this unique piece. I added Angel Wings from Mintay chippie collection to make my fairy mam have wings.
This piece I used the front of the mini and added foam tape so I could add ahaker flakes and fussy cut other elements from Craft O’ Clock collection
I hope everyone enjoyes my post and thanks for stopping by
Saturday, May 7, 2022
Lawn Fawn Mother's Day Cards
12:00 AM
Welcome back and Nancy, here. Happy Mother's Day this weekend and hope you have a wonderful time with friends and family. I am excited to share some Mother's Day cards to be given to my daughter and daughter-in-laws who are mothers to our wonderful grandchildren. The Lawn Fawn Magic Spring Messages along with the Lawn Fawn Magic Iris Floral Wreath Add-On features spring flowers to created these Mother's Day cards. These Lawn Fawn dies and stamp sets work perfectly pair with the Lawn Fawn Magic Iris that opens to reveal a surprise. 
Supplies:
Lawn Fawn Magic Spring MessagesLawn Fawn Happy Mother's Day Border
Lawn Fawn Quilted Heart Backdrop die
Lawn Fawn Scallop Stackable die set
Lawn Fawn Platform Die for the yellow bow and ribbon as well as the pink bow
Copic Markers
5mm white flat back pearls
Instructions
Cards measure 5" x 7" and 5" x 5"
- Cut out Lawn Fawn Magic Iris Floral Wreath with mint green cardstock
- Stamp messages with black ink and cut out center using the Lawn Fawn Magic Iris Floral Wreath die. Center and glue to floral wreath and adhere to card.
- Cut out Lawn Fawn Magic Iris Floral Wreath flowers with a variety of colors and adhere on top of the mint green flowers on the wreath.
- Add flat back pearls to center of some of the flowers or add NUVO White Gloss drops to center and let dry.
- Stamp Lawn Fawn critters and color with Copic Markers. Adhere to cards
 |
| Lawn Fawn Magic Iris Floral Wreath Add-On |
 |
| Lawn Fawn Magic Spring Messages |
So get crafting and have a fabulous day and thanks for visiting.
The Rubber Buggy has the crafting supplies for your next project. So have fun crafting this weekend with these products. My cards and projects are always posted on Saturday. Keep watching and thank you so much for those wonderful comments as well as suggestions. Enjoy and Happy Crafting!
The Rubber Buggy has the crafting supplies for your next project. So have fun crafting this weekend with these products. My cards and projects are always posted on Saturday. Keep watching and thank you so much for those wonderful comments as well as suggestions.
Enjoy and Happy Crafting!
Subscribe to:
Comments
(Atom)


