Tuesday, June 30, 2015
Sweet wishes card (Lawn Fawn)
Hi everyone!
Pi here.
Please, check out the store which is now filled with lots of goodies for the summer. Kellie has been stocking up on lots of new awesomeness from Blue Fern Studios lately :)

Anyhow, back to my card...
I used the same stamp set for this card, that's unusual for me as I love to mix and match amongst the Lawn Fawn love :)
The stamped images are colored with copic markers and then fuzzy cut as I didn't want the white border that shows on the die cut. I die cut circles from the Magnolia paper to act as kitchen tiles and the kitchen counter is just watercolor paper colored with distress ink.
The background is stamped repeatedly with the little hearts that are included in the stamp set.
I toped the card with a satin ribbon from my stash. It was actually bright blue from the beginning, but I changed the tone using a dark brown spray. You can also make your own ribbon using supplies from the store, such as satin string and dylusion spray.
Products used on this card:
Lawn Fawn stamp set Milk & cookies
Copic markers
Distress ink Vintage photo
Memory Box Open studio dies stitched circle layers
Magnolia paper apple & cherries 50's collection 50's kitchen'
Stamping supplies (neenah cardstock kraft, doublesided tape, scissors, archival ink coffee, watercolor paper)
Thank you for visiting!
Friday, June 26, 2015
Welcome Baby Card
Hi everyone!!
Noe here with another card and I hope you like it!
Here is my Friday projetc... A Welcome Baby Card:

A simple and sweet card to give to future baby daddies!!
Supplies list:


See you next Friday!! Have a great day!!

Thank you for visiting
Noe here with another card and I hope you like it!
Here is my Friday projetc... A Welcome Baby Card:

A simple and sweet card to give to future baby daddies!!
Supplies list:
- Early Bird Celebration Doohickey Die
- Wplus9 Love Mom Layers Die
- Wood Grain Kaisercraft Clear Stamp (to make background)
- Picked Raspberry Distress Ink Pad (to make background).
- Clear Embossing Powder (to make background)
- Stamping supplies


See you next Friday!! Have a great day!!
Thank you for visiting
Thursday, June 25, 2015
Create Your Own Sunshine
Hi everyone, Steph Ackerman here today with a Thinking of You card featuring an assortment of products from the store.

Stamping Bella has some wonderful stamps and this one is Sunny is Stylish. She was colored with Copic Markers . The papers are from Graphic 45's Time to Celebrate collection.

The sentiment was adhere to the card and Sunny was fussy cut and place on top.
Thank you for visiting.

Stamping Bella has some wonderful stamps and this one is Sunny is Stylish. She was colored with Copic Markers . The papers are from Graphic 45's Time to Celebrate collection.
The sentiment was adhere to the card and Sunny was fussy cut and place on top.
Thank you for visiting.
Tuesday, June 23, 2015
By the sea card
Hi everyone!
Pi here with another card.

I had a blast with this card, using lots of different techniques. I used distress ink on watercolor paper for my background and then I dropped some water randomly to create the look of pools behind my stamped image.
 I
stamped my Pearl Tilda on super smooth Neenah cardstock, my go to paper
for copic coloring and carefully fuzzy cut her to place on my
background. In order to get all the details from the stamp with the
bubbles I also stamped her on to the background. Saving me some time
with the scissors. I also stamped some beautiful seashells on watercolor
paper and used distress ink and water to color them.
I
stamped my Pearl Tilda on super smooth Neenah cardstock, my go to paper
for copic coloring and carefully fuzzy cut her to place on my
background. In order to get all the details from the stamp with the
bubbles I also stamped her on to the background. Saving me some time
with the scissors. I also stamped some beautiful seashells on watercolor
paper and used distress ink and water to color them.

I then gave them a bit of shimmer with my wink of stella and that really made the image pop. I believe that the distress ink somewhat reacted with the stella marker. But I can't say that for sure.
Products used from the store:
Magnolia Rubber Stamp PEARL TILDA
G45 Cling Stamp set By the Sea #1 (no longer availiable in the store)
Spellbinders nestabilities foliage (no longer availiable in the store)
Copic markers
Distress ink evergreen bough
Distress ink iced spruce
wink of stella clear pen
Stamping supplies (watercolor paper, water color brush, doublesided tape, bonefolder, scissors)
Thank you for visiting!
Pi here with another card.

I had a blast with this card, using lots of different techniques. I used distress ink on watercolor paper for my background and then I dropped some water randomly to create the look of pools behind my stamped image.


I then gave them a bit of shimmer with my wink of stella and that really made the image pop. I believe that the distress ink somewhat reacted with the stella marker. But I can't say that for sure.
Products used from the store:
Magnolia Rubber Stamp PEARL TILDA
G45 Cling Stamp set By the Sea #1 (no longer availiable in the store)
Spellbinders nestabilities foliage (no longer availiable in the store)
Copic markers
Distress ink evergreen bough
Distress ink iced spruce
wink of stella clear pen
Stamping supplies (watercolor paper, water color brush, doublesided tape, bonefolder, scissors)
Thank you for visiting!
Monday, June 22, 2015
The Story using Love Story collection

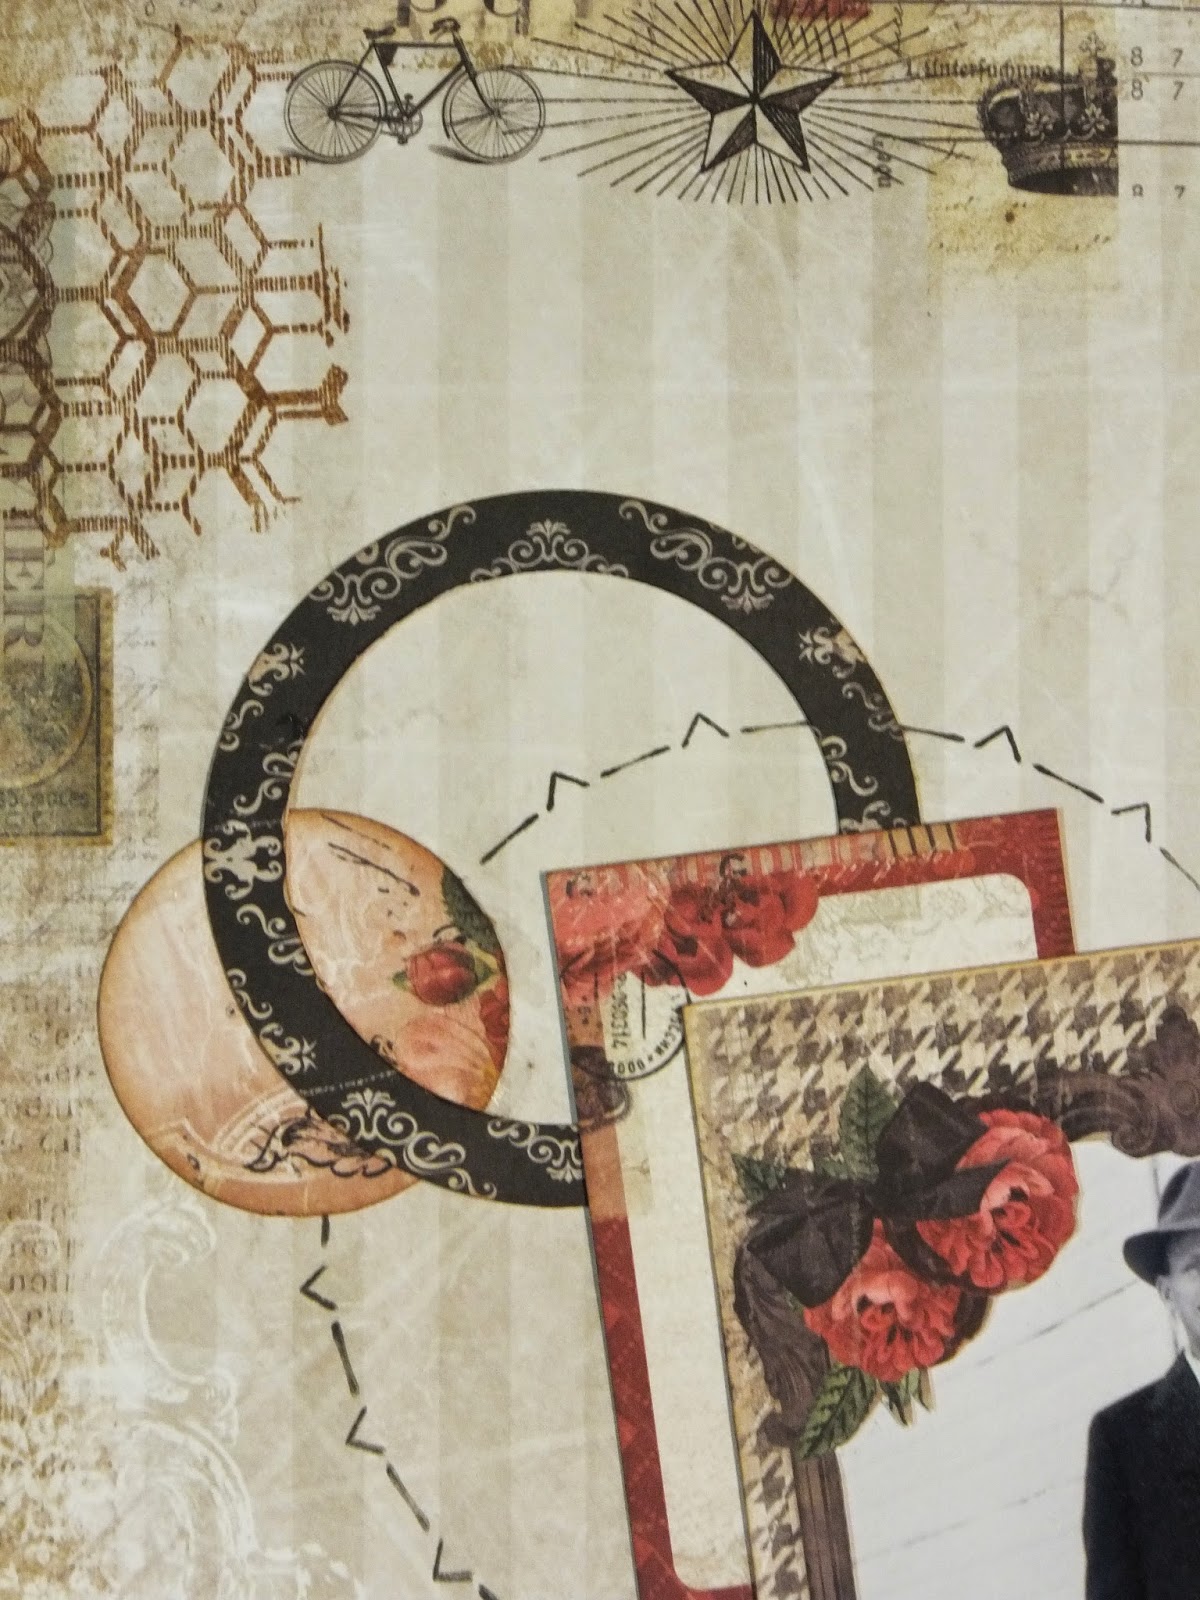
Hi.. it's Bev again and this month at The Rubber Buggy I am showcasing the amazing Blue Fern Studios Love Story Collection. It was the perfect paper for all my old vintage family photos.
What an amazing creative collection of papers with the best colours, patterns and soft elegant images.
Supply List:
The Rubber Buggy Products: Paper: Blue Fern Studios "Love Story"
Chipboard: Blue Fern Studios Tattered Diamond Bits
Marker: Copics
Stamp: Blue Fern Studio Texture stamp
Twine: Bella Creationz Timeless Twine
Punch: Martha Stewart
Sketch: Let's Get Sketchy

I copic coloured the chipboard, clustered the flowers and add a butterfly, leaves and stamped the upper corner.

More stamping and many inked layers of paper to add colour and depth.

Fuller view of this section shows the additional use of some of the card sheet accents. I added ink to the edges, wrapped one with twine add a bird accent.

In this section there was more stamping, layers and also added the title chippie. This one was left plain but added a touch of ink to the outer edges. Also on the lower edge is the fine elegant touch of a lace border.


Thanks for stopping by.. do come again.


Friday, June 19, 2015
Love you Shaker Card (with Foil)
Hi everyone!!


Products used:
Thank you for visiting
Noe here with another card and I hope you like it!
To make this simple card I have experimented with Foil, a discovery for me!... It´s very easy to use and its results are so beautiful!!

On a white piece of bazzil I've put double-sided tape and over I put the foil... Then I choose my die and ready, foil is applied!

To make the background I used Distress Ink and Dylusion Spray in red colors, "love you" die cut with foil applied, MDF and confetti hearts and card ready to give someone special!!


Products used:
- Bazzil Marshmallow
- W9plus Love Mom Layers Die
- W9plus Banner Love Rubber Stamp
- Barn Door Distress Ink Pad (to make background)
- Cherry Pie Dylusion Spray (to make background)
Thank you for visiting
Thursday, June 18, 2015
Moments......
Hi everyone, Steph Ackerman here today with 2 cards featuring an assortment of products from the store.
With pretty papers, your cards come together easily as not much embellishment is necessary. Just focus on the papers.

These gorgeous papers from Maja Designs are sturdy, pretty and double sided so you get the best of both worlds.

The stamps are from Wplus 9 - Guiding Light Sentiments. These sentiments can work for many different occasions.

I've added May Arts ribbon around a panel and added it to the reverse side of the paper for a very different look to the first card.
Hope you like them.
Thank you for visiting
With pretty papers, your cards come together easily as not much embellishment is necessary. Just focus on the papers.
These gorgeous papers from Maja Designs are sturdy, pretty and double sided so you get the best of both worlds.
The stamps are from Wplus 9 - Guiding Light Sentiments. These sentiments can work for many different occasions.
I've added May Arts ribbon around a panel and added it to the reverse side of the paper for a very different look to the first card.
Hope you like them.
Thank you for visiting
Wednesday, June 17, 2015
Simple Card with Netra
Hey everyone !
I hope you all are doing well.
Today I thought about sharing this simple card I made using only a few items.
I like to send cards on a whim and sometimes the more "done up" cards are too hard to send.
They may be too big or the wrong theme.
So, I made a smaller card that still has a lot of character and elegance, which is just my style.
This can be easily massed produced.
Links to what I used will be down below.
Have fun making these simple elegant cards to send out on a whim.
Thank you for visiting


Tuesday, June 16, 2015
Faux laser cut card
Hi everyone!
Pi here.
I've made the faux lasercut style before, but this time I used the technique as a background. And I really think it took a simple card to a new level.
I've heat embossed the sentiment and die cut the stitched circles from memory box.

Products from the store:
Wplus9 design handlettered thanks rubber stamps
Wild rose studio cutting die butterfly burst
Memory box die open studio stitched circle layers
Ranger embossing powder gold tinsel
Bazzill cardstock licorice twist
Stamping supplies
Thank you for visiting!
Monday, June 15, 2015
Remember with Love Story

Hi Bev here...Welcome to my blog post using The Rubber Buggy product....
and multi tasking using the Let's Get Sketchy Monday sketch for this week.
This amazing paper line Blue Fern Studios Love Story is stunning, elegant and
so rich. It is perfect with all my vintage old family photos... add the great sketch below
for inspiration and the page came together.
Supply List:
The Rubber Buggy Products: Blue Fern Studios Love Story
Chipboard: Blue Fern Studios, 7 Dot Studio Illumination
Markers: copics
Sketch: Let's Get Sketchy
Other: Sew Easy ink roller


Pages look fabulous when there is some super fun cluster like the one above.
Every photo section needs some great layers, clusters and accents
to add more colour...especially when your working with black n white photos.
Note the stamping and the rolled ink accents.

Chipboards can be plain or painted, inked or even copic coloured like I did.

This close up gives a view of the copic coloured chipboard and the stamped corner.


Visit the store to view all the amazing products.

Friday, June 12, 2015
Magnolia Doohickey Love
Hi everyone!!
Noe here with another card and I hope you like it!
This is a magazine full of projects with a lot of inspiration and dies so you can´t stop to create and create. It´s a quarterly subscription you must pre-order ... Now, it´s time to pre-order Volume 7... Hurry up!! Don´t miss you it!


Do you know this wonderful magazine??
Thank you for visiting
Noe here with another card and I hope you like it!
I recently discovered Magnolia Doohickey Club and I must say I love it!!
This is a magazine full of projects with a lot of inspiration and dies so you can´t stop to create and create. It´s a quarterly subscription you must pre-order ... Now, it´s time to pre-order Volume 7... Hurry up!! Don´t miss you it!
Well... here is my weekly project!

My friend Cris painted this wonderful Magnolia stamp but I need a stamp more larger so we modify it´s size and draw the outline with a black marker.
Here is my supply list for make this card:
- Ealry Bird Oh La La Vol. 3 Die
- Tilda with Cross Necklace
- Doohickey Rectangle Lace 3 Die Set
- Chrysanthemums White
- Green Mulberry paper leaves.
- Copics Markers
- Distress Inks: Peeled paint, Worm Lipstick and Spiced Marmalade (to make background).
- Stamping supplies.
More photos in detail:


Finally I would like to show you a video where you can see in detail the contents of a Doohickey magazine.
Do you know this wonderful magazine??
Thanks for stopping by... glad to see you.
Have a great Friday!!
Thank you for visiting
Subscribe to:
Posts
(Atom)


