Saturday, March 30, 2019
Happy Birthday Card with Tilda and Her Bunny
Spring will be here soon and The Rubber Buggy has all of the wonderful name-brand products and supplies for your spring and Easter projects and cards. Better get yours soon before these gorgeous dies, stamps, papers, etc. are sold out.
 Welcome back and Nancy here. I am excited to share a springtime birthday card with the adorable Magnolia Stamps, Tilda and Her Bunny with the background Magnolia Stamps, Tilda Tulip Walkway with the gorgeous Pion Design Mister Tom's Treasure Morning Glory paper. I colored the images with Copic Markers and fussy cut Ms. Tilda and glued her in front of the Magnolia Stamp Tulip Walkway. I added some handmade tiny flowers that are similar to the Wild Orchid Craft 10mm roses with a die cut fence behind the flowers. I used doily border and a square doily behind the image. I added the Wild Orchid Craft Chrysanthumums with addition paper leaves behind it. The beautiful sentiment was stamped with Memento Black Tuxedo ink with the Wild Rose Studio Cat and Moon Sentiments stamp set. I love this stamp set and used a 1" punch to punch it out. I added a lace doily paper border around the card. I used Scor-Tape to adhere my handmade bow to the card with a pearl/rhinestone center in the bow. I adhered with a hot glue gun the doily butterfly and Wild Orchid Craft 10mm pink rose to the center of the butterfly. I always use and highly recommend the
Beacon 3 n 1 Advanced glue for gluing paper. It drys clear and very tacky and drys fast.

Beacon 3 n 1 Advanced glue for gluing paper. It drys clear and very tacky and drys fast.
 |
| Pion Design Mister Tom's Treasure Morning Glory |
 | |
Magnolia Stamps, Tilda and Her Bunny Magnolia Stamps, Tilda Tulip Walkway
Wild Rose Studio Cat and Moon Sentiments
Brighten someone's day and send your springtime birthday card today using the name-brand products on The Rubber Buggy on-line store.
I hope I have inspired you try out these products available at The Rubber Buggy on-line store. My cards and projects are always posted on Saturday. Keep watching and thank you so much for those wonderful comments as well as suggestions.
Enjoy and Happy Crafting!
|
Thursday, March 28, 2019
Quick and Easy Graphic 45 Notecards
Hi everyone, Steph Ackerman here today with lots of fun products from the store. Please visit the store for all the fun products I've used today.
I've got a set of notecards to share today. This Graphic 45 Flutter paper collection is lovely, as usual.

My first card uses the lovely Memorable floral sheet. Since these papers are doubled sided, I could use both sides and die cut each layer with Lawn Fawn Rectangle Dies.


The second card uses the Graphic 45 Flutter - Vivacious Paper for the background along with a panel from the Graphic 45 Flutter - Exquisite Paper.

The Graphic 45 Memorable Pattern was also cut using assorted Lawn Fawn Rectangle Dies along with a panel cut from the Graphic 45 Flutter - Exquisite Paper.

As all the panels had phrases, this last card needed a sweet Hello to finish it off.

Wednesday, March 27, 2019
Beautifyl Day featuring Lemoncraft
Hello Rubber Buggy friends! Debbie here today sharing a layout of my daughters wedding a few years ago. Lemoncraft's new paper collection Grow Old With Me and their Vintage Time butterflies are so perfect for a elegant wedding layout.
I started this layout by using some Art Basics Clear Gesso and then added some dimension with a stencil from my stash and some modeling paste. I gave it a quick spray with some glimmer mist.
Add your photo and matting to your layout. I added some chipboard from my stash for a title and more embellishment and dimension. I also added flowers from my stash and then finished off with
some Art Stones, in all 3 sizes, which can be found in the Rubber Buggy Store.
Cut 3 butterflies and add them randomly to your layout.


I have one more project to share that I wanted to share. It's super easy card but I love the shabby feel.
This card was made with Prima's Poetic Rose Collection.

In the flower pack it has a sheet of scripted vellum, I used this for the die cut doily in the rolled edges of the card. I added some chipboard from my stash and the highlighted it with Say it in Crystals.

I hope you enjoyed my projects!
Thank you for stopping by the Rubber Buggy Blog today!!
Debbie
Tuesday, March 26, 2019
Happy Easter

Hi it's Jennifer here and I am getting ready for Easter.
So I chose this Gorgeous Bunny Girl from Stamping Bella
to colour up in
Copics
So I chose this Gorgeous Bunny Girl from Stamping Bella
to colour up in
Copics
Skin - E0000, E000, E00, E01, E11, R20
Hair - E51, E53, E55, E57
Lime - YG000, YG00, YG01, YG03, YG23
Pinks - RV00, RV17, RV52, RV55
Yellow -Y00, Y06, Y15, Y17, YR23
White - C0, C01, C03
Hair - E51, E53, E55, E57
Lime - YG000, YG00, YG01, YG03, YG23
Pinks - RV00, RV17, RV52, RV55
Yellow -Y00, Y06, Y15, Y17, YR23
White - C0, C01, C03
I have 3D taped each layer using Lawn Fawn Dies
Stamping Bella - Uptown Girl Bunny Loves Daffodils


Stamping Bella - Uptown Girl Bunny Loves Daffodils
Hoping you all have a Wonderful
Crafting Week
Jennifer
Monday, March 25, 2019
Captured Adventures 49 and Market project at The Rubber Buggy

Hi... Bev here today at The Rubber Buggy. I am sharing this page showcasing Jules playing soccer when she was little. For this project I am using 49 and Market products - Captured Adventures paper Collection - their chipboard set - their stamp and flowers.
The Rubber Buggy Products:
- Paper: 49 and Market Captured Adventures
- Stamp: 49 and Market Going in Circles
- Ink: Momento Tuxedo Black
- Markers: Copics
- Chipboards: 49 and Market Laser Cut Shapes Happy Moments
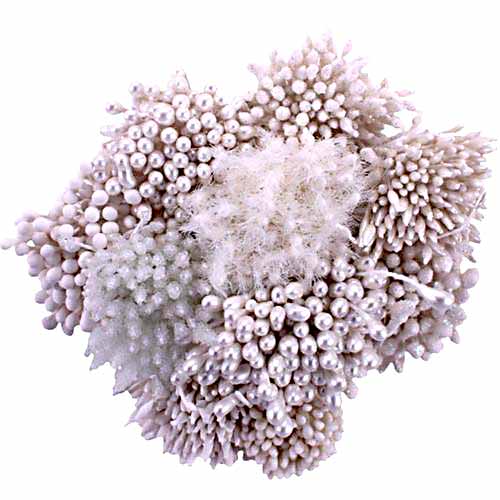
- Flowers: 49 and Market Botanical Pot pourri Marina
- Glue: Beacon 3-in-1 Glue,
- Accents: Scrapbook 3D foam
- Machine/ tools: EK success cutter bee scissors, Fiskar Paper Trummer,
- Pen: uniball white gel pen
- Other: cardstock, Ink roller stars, High Hopes Stamp
- Sketch: Let's Get Sketchy

For this page I am using the Let's Get Sketchy sketch so I worked on the base background following the sketch below.


From there I laid out the proposed positioning of the photos and the image and also placed some accent pieces where I hoped they would suit.

I did some stamping in the areas around the photos - above and below.

In the close ups you get a better view of the details.

Chippies and flower cluster.

Central section with lots of accents but the photos are still front and centre.


Thanks for stopping by... hope to see you again soon
.... but in the mean time be sure to stop by the STORE where these items and so many others are available. Also take note of all the products that aren't carried in our regular local stores. ... AND the service is A1. 
Saturday, March 23, 2019
Magnolia Stamp Spring Birthday Card
Spring will be here soon and The Rubber Buggy has all of the wonderful name-brand products and supplies for your spring and Easter projects and cards. Better get yours soon before these gorgeous dies, stamps, papers, etc. are sold out.


I cut out the Lawn Fawn Happy Birthday To You with pink glitter cardstock and adhered the sentiment to the Lawn Fawn Outside In Stitched Rectangle small die. I handmade the flowers cutting the flowers out with the Heartfelt Creations Arianna flower die set with the Heartfelt Creations Botanical Orchid paper. Since the Heartfelt Creations Arianna flowers are not available, I would highly recommend using the Heartfelt Creations Classic Rose die set.
I used the Heartfelt Creations 3D Basic Shaping Flower mold to shape the flowers and used the Beacon 3 n 1 Advanced glue to assemble the flower. First cut the flowers out. Second, set in the mold and lightly sprint the back of the petals. Third, run the mold through the Sizzix Die Cutting machine. Fourth, take the flowers out of the mold and poke a hole in the center of the flowers, folded the string of the pearl stamen found in the Heartfelt Creations Bridal Bouquet stamen, pull through the hole and use a hot glue gun on the back of the flowers to adhere the stamen on the flower. I cut out the excess glue and string and used a hot gun to adhere the flowers on the Heartfelt Creations Leafy Accent die cut out. I adhere flowers and leaves using the Beacon 3 n 1 Advanced glue on the card. The gorgeous border is also in the Heartfelt Creations Botanical Orchid paper collection. I cut it out and framed the bottom of the card.
|
| Magnolia Stamps, Tilda and Her Bunny Magnolia Stamps, Tilda Tulip Walkway |
 |
| Heartfelt Creations Leafy Accent Die Set |
 |
| Lawn Fawn Outside In Stitched Rectangle |
 |
| Heartfelt Creations 3D Basic Shaping Flower mold Heartfelt Creations Classic Rose Beacon 3 n 1 Advanced |
 |
| Heartfelt Creations Bridal Bouquet |
I hope I have inspired you to make your paper flowers with this simple technique. My cards and projects are always posted on Saturdays. Keep watching and thank you so much for those wonderful comments as well as suggestions.
Enjoy and Happy Crafting!
 |
Subscribe to:
Posts
(Atom)


