Showing posts with label Attic Charm Collection. Show all posts
Showing posts with label Attic Charm Collection. Show all posts
Monday, November 7, 2016
"Beautiful' using Blue Fern Studio Attic Charm

Hi Bev here today at The Rubber Buggy I am sharing a photo of my eldest Grand Daughter. With the colouring in the photo I went to Blue Fern Studios Attic Charm for the soft elegant colours to make the photo pop. So many other amazing accents and my page came together.
Supply List
The Rubber Buggy Products
Paper Blue Fern Studio Attic Charm
Accents: Art C Lace ephemera collage kit,
Flowers: Wild Orchid flowers open Roses mixed
Ink: Tim Holtz ink
Marker: copics
Other: Creative Embellishments Chipboard and Stamp paint splat trio, lace, beads, metal accent
The Rubber Buggy Products
Paper Blue Fern Studio Attic Charm
Accents: Art C Lace ephemera collage kit,
Flowers: Wild Orchid flowers open Roses mixed
Ink: Tim Holtz ink
Marker: copics
Other: Creative Embellishments Chipboard and Stamp paint splat trio, lace, beads, metal accent

For this page I started by ripping, inking and gluing back together the pieces to 12x12 size. I did some stamping and inking on the background for depth and texture.
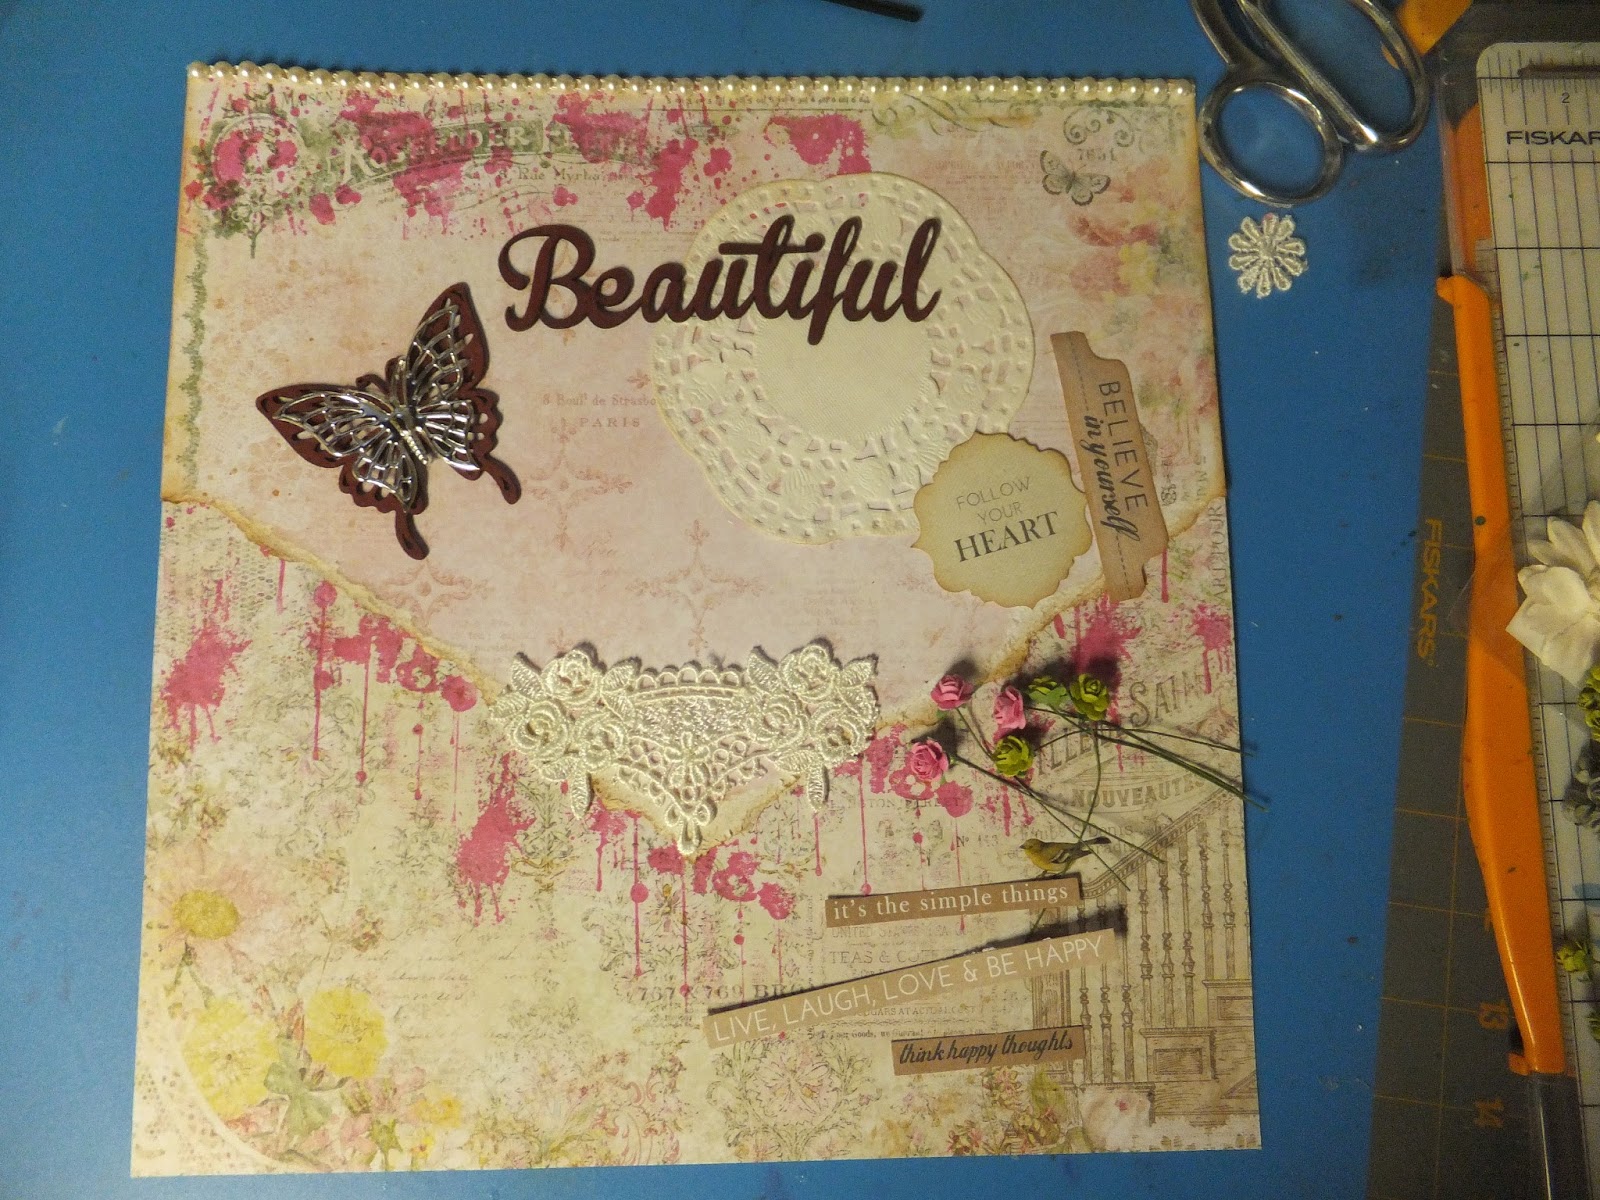
Estimating the placement of the photo... I worked around that area and pulled some accents .... chipboard and metal butterfly, chipboard title, some lace, cluster of flowers and some strips of paper and beads.

In these photos you will see up close the fabulous accents and their placement. The chipboards are copic coloured and the metal butterfly is placed over the chipboard one..

On this section we see some Art C empheria, the ribbon wrapped floral cluster, a tag and inked edges.

This section showcases some lace and ribbon accent along with a closer look at some of the stamping and inking.


Thanks for stopping by.. hope to see you again soon.

Monday, October 24, 2016
Family using Blue Fern Studio by Bev Code

Hi.. it's Bev here today. Welcome to my post for The Rubber Buggy. It is a page for my son when his wife's family got together. Each visit between US family and Canadian family is precious. For this page I used Blue Fern Studios Attic Charm Collection.
Supply List:
The Rubber Buggy Products
Paper: Blue Fern Studio Attic Charm - Haberdashery
Flowers: Blue Fern Studios Tranquil Blooms
Ink: Tim Holtz ranger
The Rubber Buggy Products
Paper: Blue Fern Studio Attic Charm - Haberdashery
Flowers: Blue Fern Studios Tranquil Blooms
Ink: Tim Holtz ranger
Markers: copics
Stencil: The Crafters Workspace TCW455s love post
Accents: Lace, beads, Little Yellow Bicycle Burlap Alpha, Stickers
Stencil: The Crafters Workspace TCW455s love post
Accents: Lace, beads, Little Yellow Bicycle Burlap Alpha, Stickers
In the close ups you'll get a better view with some details.


In the above photos I fussy cut the florals from a 2nd sheet of paper and inked the edges.
They are then pop dotted onto the same spot on the background paper to give depth and dimension.

Next I added all the elements, accents and stenciled the hearts around the main photo and the word Love down the side of photo.

In this section you see the matted photo, the work love done with copic markers and below the photo is a border of lace and beads.

This section showcases the fabulous stickers that shine and the fabulous flower cluster.

This section shows the ink stenciled hearts, the family title and a section in the upper right corner.


Thanks for stopping by... see you again soon.

Monday, September 5, 2016
Selfie by Bev using Blue Fern Studio Attic Charm Collection

Supply List:
The Rubber Buggy Products:
Paper: Blue Fern Studio Attic Charm Collection
Chipboard: Blue Fern Studio Selfies
Ink: Tim Holtz ranger, mini pad
Markers: copics
Stencil: The Crafters Workshop TCW554s mini butterfly collage
Die: Memory Box Lenora Bloom
Other:
Punch: We R Memory Keeper vine mini 8
Sketch: Creative Inspiration by Bev Code
Accents: Shabby is Chic Boutique flatback pearl flowers, lg silver metal filigree butterfly, heart charms, white rose trim, dangle trim, 50mm white lace butterflies




Instructions:
1: start by using the sketch below from Creative Inspiration (by me). Pick some mix and match papers to create your page.


2. cut some shapes using papers chosen. Die cut a fence accent (but didn't end up using it... it was too overpowering for photo.) Pulled the floral accents and the chipboard title.

3. With the background papers somewhat organize for positioning... I added the stenciling to the page. I copic marked the Title and also note the strip of lace trim on side of paper strip.

4. this is my proposed layout. .. not totally glued down so I can still make some changes.
5. Inked the paper edges. Added more lace instead of fence and found a metal charm and journal tag that would work with the rest of page.

6. Die cut the green follage to compliment the floral cluster section.

7. Punched and inked the doily, added a lace and metal butterfly together as 1 accent. Also added some pearl bling to the corners of the doily.

8. The upper right corner has a cute cluster of paper and piece of lace.

9. The central section in photo above shows more close up details of the page. Notice the pearl floral accents added to the lace border.

10. This close up gives you the perfect view of the layers and accents that make the photo pop and still remain the feature of the page.


Thanks for visiting ........see you again soon.

Subscribe to:
Posts
(Atom)


