Saturday, April 2, 2022
Prima Marketing Golden Desert Birthday Card


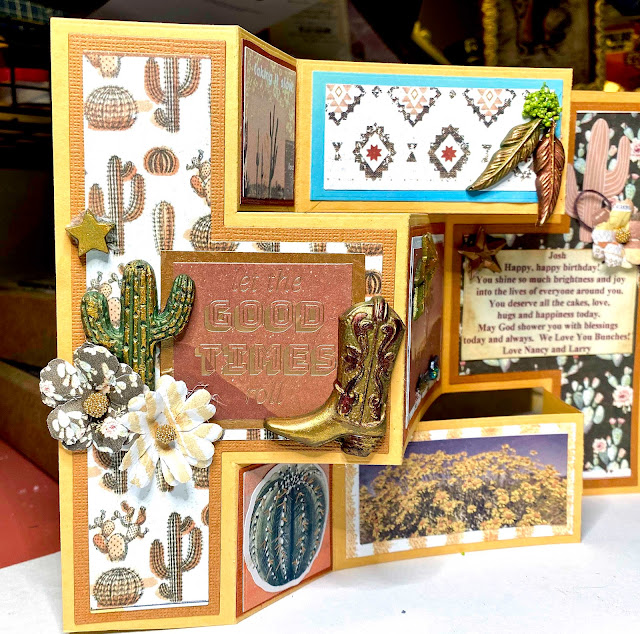
Welcome back and Nancy, here, to share my tri-fold shutter card made with the beautiful Prima Marketing Golden Desert collection and Prima Marketing Desert Mold with acrylic paints and waxes available at The Rubber Buggy.
I grew up in the Southwest and loved my desert adventures through the gorgeous flowering cactus, red rocks, and desert flowers. I think of the colors of turquoise, coral and rich reddish brown, golden yellow colors so the Prima Marketing Golden Desert collection inspired me to make this tri-fold shutter card. The Prima Marketing Golden Desert mold has the adorable desert cactus with the stars and beautiful cowboy boot which made me want to use this for a Southwestern card.
Supplies:
Prima Marketing-Redesign-Element Wax
Beacon 3-n-1 Advance Glue & Hot Glue Gun
Epoxy Resin (non-toxic)
NUVO Glitter Drops-Auburn and Blue Lagoon
Tim Holtz Metal Arrow Adornment

GATHER YOUR EQUIPMENT
Epoxy resin comes in two bottles. Make sure you get the non-toxic epoxy resin, otherwise, the entire house will smell like this resin
- Disposable latex or reusable rubber gloves
- Clean mixing cups
- Clean mixing sticks
- Small plastic (measuring cup)
Ensure you are always starting with clean cups and brushes to avoid any dirt or debris from falling into the resin mixture. Next, dispense the resin and hardener into a clean plastic cup. An accurate ratio is essential for epoxy to fully cure and develop its physical properties.
Wear rubber gloves and I like the reusable surgical or hospital gloves. The epoxy is sticky and hard to get off the hands after a few washes. If I get some on my hands, I use a farmer's soap to clean my hands as much as possible and then put lotion on to get rid of the left over stickiness.
- After the two parts are poured at the correct ratio, mix them together thoroughly for a full 2 - 3 minutes with a mixing stick. Mix longer for larger quantities.
- Be sure to scrape the sides, corners, and bottom of the container several times during mixing. This will ensure that all the hardener is thoroughly mixed with the epoxy and should prevent the resin from having an improper cure.
- Make sure to scrape both sides of the mixing cup also. If the mixture doesn't have a single consistency (streaks remain), continue mixing until fully blended
- I mixed about a teaspoon of mica powder in the resin and stir. If you get bubbles in the resin while stirring, just tap the bottom of the cup before pouring and you can also use the scalping tool to pop the bubbles.
- I lay my mold on a flat surface but I have an ole tile covered with a plastic store bag to throw away the next day if I get too much resin on it. Try not to pour over the mold castings but this is when I get the expire credit card, or Mod Podge scrapper to get all of the excess resin on top of the mold. Let dry over night but for larger deep mold, I let dry up to 18 hours.
- With a silicone mold, it is easy to pop out each mold/casting. I still do it gently on moldings with fine detail. Occasionally, you will have extra resin on the edges of the moldings. I use scissors to cut the extra away.

The fun part begins by using your fingers or a Prima Marketing brush to apply the Prima Marketing waxes or acrylic paint to the resin. I use a hot glue gun to adhere the castings on any card or project.

So get crafting and have a fabulous day and thanks for visiting.
The Rubber Buggy has the crafting supplies for your next project. So have fun crafting this weekend with these products. My cards and projects are always posted on Saturday. Keep watching and thank you so much for those wonderful comments as well as suggestions.
Enjoy and Happy Crafting!
 |
Subscribe to:
Post Comments
(Atom)


0 comments:
Post a Comment