Showing posts with label Heartfelt Creations Eyelet Oval die. Show all posts
Showing posts with label Heartfelt Creations Eyelet Oval die. Show all posts
Saturday, August 4, 2018
Wild Rose Studio Mouse on Bluebells
Welcome back and Nancy Hill from The Rubber Buggy Design Team. I am excited to share another card made with the adorable Wild Rose Studio stamp. This adorable stamp set is called the Wild Rose Studio Mouse on Bluebells. I am always to excited to get the Wild Rose Studio stamps because of the fun and joy of coloring these happy little critters. I try to order at least one of the Wild Rose Studio stamps each month and love the new arrivals at the Rubber Buggy on-line store.

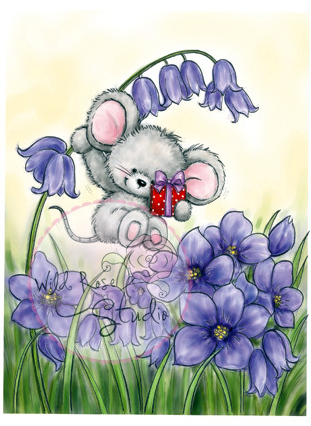 |
Wild Rose Studio Mouse on Bluebells |
The Heartfelt Creations Blushing Rose paper is so gorgeous behind the image and I love how the colors went to well with the colored image. I adhered the image to the Heartfelt Creations Eyelet Oval die frame. Also, I used the LeCrea Design Blue/Violet Foam Flower cut with the Heartfelt Creations Cascading Fuchsia flower die to make these flowers. Also, I added some Wild Orchid Craft Wild Cosmos flowers by the handmade bow. I used the
Prima Marketing - Memory Hardware - Artisan Adhesive Tape - 1" behind the bow.
 |
| Wild Rose Studio Mouse on Bluebells LeCrea Design Blue/Violet Foam Flower Heartfelt Creations Cascading Fuchsia flower Heartfelt Creations Eyelet Oval |
I hope I have inspired you try out these products available at The Rubber Buggy on-line store. My cards and projects are always posted on Saturday. Keep watching and thank you so much for those wonderful comments as well as suggestions.
Enjoy and Happy Crafting!
 |
| Nancy Hill The Rubber Buggy Design Team |
Saturday, January 6, 2018
Wild Rose Studio Mummy Fox and Baby

 |
| Wild Rose Studio Mummy Fox and Baby |
I stamped the image with Memento Tuxedo Black ink and colored the image with Colorfin Pan Pastels and cut it out with the oval die in the Heartfelt Creations Eyelet Oval die set. It was framed it with the decorative die in this set and Scrapbook Adhesive 3D foam to adhere it to the card.
The flowers were colored with yellow Colorfin Pan Pastel and the center of the daisy, US Artquest Mini Heart-Gold Prills were added.


I can't wait to see the possibilities that you will create making using the beautiful Wild Rose Studio Mummy Fox and Baby stamp on your cards or projects. You can purchase these dies and supplies from The Rubber Buggy on-line store.
Enjoy and Happy Crafting!
|
| Nancy Hill The Rubber Buggy Design Team |
Saturday, December 2, 2017
Happy Birthday Easel Card

Welcome back to The Rubber Buggy blog for Nancy Hill, Design Team member. I love personalizing my easel cards with the drawer for each person. Sometime the drawer is filled with chocolates, dies, gift cards or money and on top of the drawer could be a Post-It or calendar. The sentiment is inside the drawer. I have samples of other cards similar to this one in my tutorial. To see my tutorial on how to make an easel card with a drawer, click HERE.
The easel card with the drawer measures 7" x 7". I used a heavy weight 110 lb cream cardstock and adhered the drawer and easel card with Scor-Tape. This card was made mostly of the Heartfelt Creation collection All Glammed Up stamps and die sets besides other Heartfelt Creation dies and stamp sets from The Rubber Buggy.
On top of the drawer is a Post-It. I made a cover for it with the Heartfelt Creations All Glammed Up paper. I cut out a sentiment found in this paper collection and adhered it to a banner that was glued on top of the cover.
The background behind the photo is the Heartfelt Creation Fashionista stamp that was embossed with NUVO Gold Enchantment Glitter embossing powder. I cut out the shoe from the Heartfelt Creations Lift Your Sole die and stamp set and used 3D foam dots to stick on top of identical shoe in the Heartfelt Creations Fashionista stamp set. I used Copic markers on the flowers of this shoe.

Using the Heartfelt Creations Classic Rose die and stamp set, I stamped and embossed the flower with the NUVO gold embossing powder and cut the petals out. I used a flower shaping tool for the flower before gluing it together. I cut out the Heartfelt Creations Classic Rose leaf with gold metallic cardstock and glued it on back of the rose. I took a branch die cut and added glue to the tip of the branches and dipped it in a small packet of star foam balls. I glued this behind the leaf. I made the bow from seam binding ribbon and glued it on the back. I cut out the label "Treasured" from the Heartfelt Creations All Glammed up paper collection and glued it next to the ribbon.
I stamp the inside drawer with the Heartfelt Creations Botanic Orchid Wish Stamp and colored it with colored pencils. I added a decorative brad in front of the drawer.


This is when the easel card is folded down on the drawer. The photo of my grand daughter was adhered to an oval that was cut out with gold metallic cardstock. I used the Heartfelt Creations Eyelet Oval die and cut it out with gold metallic cardstock and trimmed the scallops off of the die cut. I cut out another Heartfelt Creations Eyelet Oval die cut that is shown behind the photo with the Heartfelt Creations All Glammed Up paper and glued the photo with the gold oval on top.
Supplies:
Heartfelt Creations All Glammed Up paper collection
Heartfelt Creations All Glammed Up Shoe die
Heartfelt Creations Lift Your Sole stamp set
Heartfelt Creations Fashionista stamp
Heartfelt Creations Eyelet Oval die set
Heartfelt Creations Classic Rose die
Heartfelt Creations Classic Rose stamp
1" wide Scor-Tape
Scrapbook Adhesive 3D Foam Tape
NUVO Gold Enchantment Glitter Embossing Powder
I can't wait to see the possibilities that you will create making an easel card with a drawer. wreath. You can purchase these dies and supplies from The Rubber Buggy on-line store.
Enjoy and Happy Crafting!
|
| Nancy Hill The Rubber Buggy Design Team |
Saturday, November 25, 2017
Christmas Bunny

Nancy Hill for The Rubber Buggy Design Team. I am excited to share my Christmas card made with the wonderful products at The Rubber Buggy Design Store. I made a small tutorial on how I made the 3D frame. This technique can also be used to made shadow boxes. I tried other techniques of using 3D foam behind each rectangle frame but the 3D foam just was too large and difficult to cut out for the 1/2" frame border.
Tape two Spellbinder Nestabilities or Sue Wilson rectangle frames together as shown below. If you want a wider frame border, use the size larger and tape the two dies together.


I applied blue ink inside and outside the frame with a sponge. As you can see below, the inside and outside frame color matches the top patterned paper frame.

I like using the Scor-Pal Tape 1" wide to tape the picture behind the green Heartfelt Creations patterned paper. I use the same 1" Scor-Pal Tape to tape this to my folded cardstock.

I colored the Wild Rose Studio Christmas Bunny stamp with Copic Markers and cut this out with the plain oval die in the Heartfelt Creations Eyelet Oval die set. I cut out the Heartfelt Creations Eyelet Oval decorative die with white cardstock and glued the bunny image on top. I used Scrapbook 3D foam adhesive tape to glue the decorative die to inside of the frame.

I applied drops of Aleene Fast Grab glue around the Christmas Bunny and sprinkled on Stampendous Chunk White Deep Impression Embossing Enamel. After shaking off the embossing enamel that wasn't stuck to the glue, I used an embossing gun to the embossing enamel. I love this embossing enamel when I want to make the snow appear to be 3D.

 |
| Poppy Stamp Merry Christmas Banner Heartfelt Creations Eyelet Oval Die Wild Rose Studio Christmas Bunny Heartfelt Creations Celebrate The Seasons |
I can't wait to see the possibilities that you will create making a wreath. You can purchase these dies and supplies from The Rubber Buggy on-line store.
Enjoy and Happy Crafting!
|
| Nancy Hill The Rubber Buggy Design Team |
Subscribe to:
Posts
(Atom)


