Sunday, November 24, 2019
Tutorial for Scallop Easel Card with Traditional Card
Nancy, here. Back to today's inspiration for a scallop circle easel tutorial that I created for you as well as I am showcasing Stamperia Blue Land paper collection for the next couple weeks which should be in everyone's stash for cards this winter season as well as for Christmas!


Step 7: I glued on a snowflake and then glued the label with the "Merry Christmas" that was embossed with NUVO Embossing Silver powder. Note: Adhere some 3D foam pads or foam dots to act as a stopper for the front panel of the easel card to lock in behind the Merry Christmas Label when the card is being displayed.
 When closed, this cheery circle easel card will fit into 5" square envelope
 |
| Sample page found in the Stamperia Blue Land Paper Collection |


This is actually a scallop circle easel card but my easel card will also have a traditional part for a Christmas sentiment on another layer. This style of easel card is very simple to make with my step-by-step tutorial. I am a visual person and like to see step-by-step pictures plus I added a lot of photos to guide you through this since words in these instructions can't always describe well for everyone. There are other tutorials of a scallop circle easel card but I think my tutorial with a scallop doily may be easier for beginners to follow along. So let's get started!
Putting Together The Circle Easel Card


Step 1: Choose your card base 8" x 11" and and score it in half and fold. Do this again for the second card base. Use a Bone Folder to sharpen the score line. Any size circles will work and a couple sizes smaller so you can layer patterned paper on top and decorate.
Place the circle die which my circle was 4 1/4" diameter and lay the circle die slightly overlapping the folded cardstock and cut through your press (as below). Make sure the fold of the card base is not cut within the die, so as to leave a card "hinge". Cut two of these bases which one for the easel card and one that will be glued on the bottom of the easel card for the traditional inside of a card with your sentiment.

Step 2: Open your card base and fold one side of the circle in half, back into the center (as below on left side). Stamp your Christmas sentiment for the inside of the card (as below on right side). I used two stamps on the right photo below to give the sentiment a background.

Step 3: Cut two single circle (circle size 4 1/4") one from white cardstock and the other one from a glitter cardstock and two doily dies.

Step 4: I used a 3 3/4" circle die to cut the Stamperia Blue Land patterned paper out and adhered it to the glitter circle that was cut with the 4 1/4" circle die which will be glued together and then glued to a doily (See sample above photo of the circle on top right of photo of patterned paper glued to glitter circle. This will be on the easel section of the card. Add adhesive to the folded half of the circle you just scored down and glue this doily to it (see photo below).

Step 5: Adhere the other doily behind the bottom of the easel card. Align the other card and glue the two cards together.

Photo below is another sample of the other card.


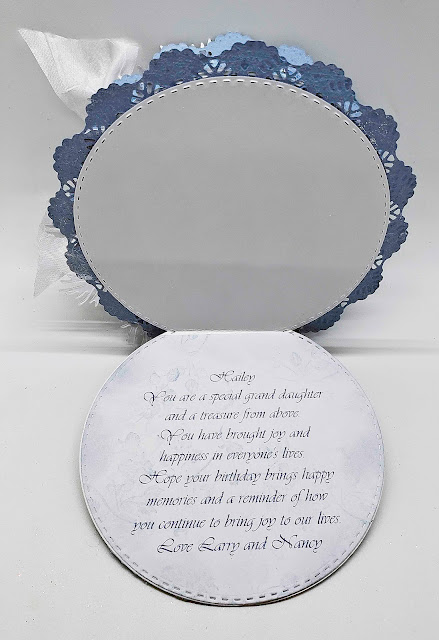
Sample of scoring and folding. Birthday sentiment was typed and printed and then die cut and adhered to the last layer of this easel card.

Step 6: Using the 4 1/4" circle die slightly over lapping on top (see section 1 as a sample), cut out a blue patterned paper from the Stamperia Blue Land paper collection and glue to the inside of the easel card.


Step 7: I glued on a snowflake and then glued the label with the "Merry Christmas" that was embossed with NUVO Embossing Silver powder. Note: Adhere some 3D foam pads or foam dots to act as a stopper for the front panel of the easel card to lock in behind the Merry Christmas Label when the card is being displayed. 

This is the easel card turned sideways so that you can see the layers as well as the 3D foam tape behind the label. I can mail this card this way but will continue to add more embellishments to finish this project which will cost more to mail. I figure that if I make a card for a special person, the extra cost of mailing is a no-brainer.


If you have any questions, don’t hesitate to leave me a comment below. I would love to hear from you. And do share with me your very own handmade Easel Card photos.
So get off your computers and start making one of these fun scalloped circle easel card like these! I hope I have inspired you try out these products available at The Rubber Buggy on-line store. My cards and projects are always posted on Saturday. Keep watching and thank you so much for those wonderful comments as well as suggestions.
Enjoy and Happy Crafting!
 |
Subscribe to:
Post Comments
(Atom)


0 comments:
Post a Comment