Saturday, January 20, 2018
Lord's Unfailing Love

 |
| Lemon Craft Violet Silence 12 x 12 paper Lemon Craft Violet Silence Vintage Time 017 Lemon Craft Violet Silence Vintage Time 016 NUVO Shimmer Glitter Gloss |
 |
| Heartfelt Creations Courage and Strength Stamp Set Scor-Tape 1/2" wide Heartfelt Creations Sunrise Lily Die Set Venise Lace |
This card measures 5" x 7". I used a distress tool to distress the edges of the paper. I folded one corner of the paper and adhered a pearl brad and added pearl embellishments below the flowers. I cut out the butterfly from the Lemon Craft Violet Silence Vintage Time 016 with all of the butterflies and adhered it to the card. I added additional purple flower stamens behind the two lily flowers. I used Scor-Tape to adhere the lace to the card. I stamped half of the sentiment on one stamp in the set of Heartfelt Creations Courage and Strength Stamp set. I plan on stamping the other half of this stamp to the inside of the card.
 |
I cut out the foamiran foam with the Heartfelt Creations Sunrise Lily die set. There are tutorials on how to mold flowers made with foamiran foam. I studies a few on-line foamiran flower tutorials before cutting out these flowers. I used Elizabeth Craft Pan Pastels to color the flowers and stamen. I used a black Copic maker to make the dots on the inside of each flower.
I hope I have inspired you to make your next projects using the coordinating Lemon Craft Violet Silence papers as well as the Heartfelt Creations Sunrise Lily die set. You can purchase these dies and most of the supplies from The Rubber Buggy on-line store.
I hope I have inspired you to make your next projects using the coordinating Lemon Craft Violet Silence papers as well as the Heartfelt Creations Sunrise Lily die set. You can purchase these dies and most of the supplies from The Rubber Buggy on-line store.
Enjoy and Happy Crafting!
 |
| Nancy Hill The Rubber Buggy Design Team |
Thursday, January 18, 2018
Windows to the World
Hi everyone, Steph Ackerman here today using products from the Rubber Buggy Store. If you haven't visited the store recently, you are missing out on a lot of fun products.


Bazzill Licorice cardstock was cut to fit the card and Bazzill Banana Split was cut a little smaller. May Arts ribbon was wrapped around the panel which was then added to the card. The window was then added to the card with foam adhesives. The sentiment was stamped and then punched out.
Thank you for visiting

I used another wonderful Stamping Bella stamp - Winnie Peeking out the Window and colored it with Copic Markers. Winnie was my grandmother's name so I had to have this stamp! I fussy cut the image, then matted it with Bazzill Licorice cardstock and fussy cut it again.

Bazzill Licorice cardstock was cut to fit the card and Bazzill Banana Split was cut a little smaller. May Arts ribbon was wrapped around the panel which was then added to the card. The window was then added to the card with foam adhesives. The sentiment was stamped and then punched out.
Thank you for visiting
Wednesday, January 17, 2018
Bible Journaling in a Planner with Netra featuring Tim Holtz Products
Today I am sharing how to use a ring bound planner to write bible journal notes
or scriptures or even quotes.
So, planner. You can use any. You can even use a Travelers Journal.
I just took a blank page and started with stencils, then stamps, then die cuts and washi.
NO fuss. But soo fun.
Hope you enjoy the rest of your day.


Distress Inks (love them)
Travelers Journals (in case you like these more)
Thank you for visiting
Tuesday, January 16, 2018
Butterfly Love

Hi it's Jennifer here today with a card I have created for
and the theme being
so pop on over and add your entry. There are also
Rubber Buggy Dollars to be won.
So for this Card I have layered Mauve and aqua papers on a card
base then the next layer used white paper and smooshed Tim Holtz
I then used Memory Box Wrapped Scallop Rectangles. Using
the largest I then used Memory Box Distressed
Addington Collarge and cut out the lacey corner. I 3D'd
it on to the Inked layer. I then inked some spare paper using the
same colours and cut out Butterflies from
Poppy Crafts Stitched Trio. I layered them up poping a
pearl in the centres. I next used Lawn Fawn Scripty Love
and cut out one in Mauve and 3 in white. I layered 2 white 1 mauve
and 1 white off centre. I then sprinkled a few Sequins on the card and
glittered the Butterflies with Wink of Stella.
I hope you enjoyed this Card Design.

Hope you all have a Great Crafting Week.
Jennifer
Sunday, January 14, 2018
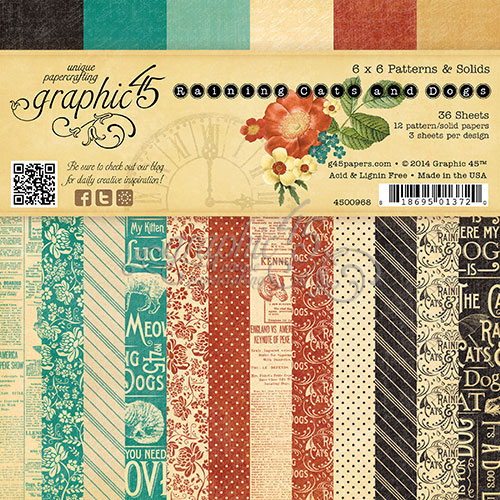
Cat Mini Album using Graphic 45 Raining Cats and Dogs

The Rubber Buggy has amazing product lines and for this mini album I am using Graphic 45 Raining Cats and Dogs Collections with all the amazing accents.
Creative Embellishments has amazing mini albums.... I am sharing my CAT mini album with you.
Be sure to visit both stores to see this one and the many others. ALBUM available here
and Graphic 45 Raining Cats and Dogs Collection. available here.
The Rubber Buggy products mixed together with Creative Embellishments was amazing, beautiful and fun allowing me to create a fabulous Cat Mini Album.
Supply List:
The Rubber Buggy Products
Glue: Beacon 3-in-1 glue
Flowers: Wild Orchid
Creative Embellishments Products
Chipboards: - Cat mini Album, Personal Journal covers, Happy Words Set, Square Grunge Frames, Square Doodle Frames
Other: Colorbok Transparency Frames, Ribbon, Cardstock

Start your base letters with papers.

Mix and match your base letters with great paper choices.

The unfinished base letters.

Get some of the trims, accents and photos ready.

Amazing photos and accents including lots of fun frames.

Video of finished Cat mini album for your viewing.


Thanks for joining me.... can't wait to see you again soon,

Saturday, January 13, 2018
Valentine Box with Foamiran Flowers
Welcome and I would love to share with you my latest love and that is making foamiran flowers. Foamiran is special kind of foam dedicated to flower making. I make a lot of foam flowers and it's much quicker with dies.
To make these flowers, you will need foam, iron, flower centers or anything you wish to stick in the middle, scissors and hot glue. These are the basic. I use a lot of white foam as it's very easy to color it . I use a ball tool to help with shaping my flowers on a foam mat.


 I made my bow and used hot glue to adhere the heart and bow to the front of the drawer.


So I hope I have inspired you and maybe foamiran flowers are something you would like to try with the Heartfelt Creations flower dies. You can purchase these dies and most of the supplies from The Rubber Buggy on-line store.
To make these flowers, you will need foam, iron, flower centers or anything you wish to stick in the middle, scissors and hot glue. These are the basic. I use a lot of white foam as it's very easy to color it . I use a ball tool to help with shaping my flowers on a foam mat.

Previously, I created a tutorial on how to make the main frame for the easel card with a drawer. To view my tutorial, please click HERE.
My foamiran ( foam ) flowers are crafted with Heartfelt Creations flower die sets and colored with Pan Pastels. I would encourage you to check out a variety of tutorials by Heartfelt Creations and a few other companies that have posted their ways to make foamiran flowers out of their supplies. In the near future, I will post how I made these foamiran flowers.

Supplies:
Heartfelt Creations Classic Rose die set, Heartfelt Creations Sunrise Lily die Set, Heartfelt Creations Arianna Blooms die set, Heartfelt Creations Botanic Orchid Paper, Heartfelt Creations Classic Wedding Paper, Heartfelt Creations Decorative Medallion die, Heartfelt Creations Classic Wedding Wishes Stamps, Susan's Garden Flower Pan Pastels, Hot Glue, Scrapbook Adhesive 3D Foam, Resin Angel, String Pearls and Miniature Pearl Hearts, Bazzill Pink, Green and White Paper, May Arts 1.5 Wide White Ribbon, Rhinestone Heart, Aleene Tacky Fast Grab Spray Adhesive glue.

The box measures 6" x 6 1/4". I won't go into detail on the steps to make the easel and box since it is in my Easel Box With Drawer tutorial.
You will need the measurements of the paper to make this exact project. Starting on top in the first layer, white cardstock 6 1/4" x 6 1/4",pink cardstock 6" x 6", green cardstock 5 3/4" x 5 3/4", Heartfelt Creations Botanical Orchid pattern paper 5 1/2" x 5 1/2". After adhering these layers, use hot glue to adhere the foamiran flowers and resin angel.
Inside of card: Pink cardstock 6 1/4" x 6 1/4". In the Heartfelt Creations Classic Wedding paper, I cut out the pinkish orange frame around this label in this paper pad and stamped the sentiment with orchid color ink. I applied 3D foam on the top of this label and glue on the bottom of the label before sticking it to the pink cardstock. I cut one Heartfelt Creations Decorative Medallion die and then cut it in half. I used spray adhesive on the back on each half and adhered it as shown below.


So I hope I have inspired you and maybe foamiran flowers are something you would like to try with the Heartfelt Creations flower dies. You can purchase these dies and most of the supplies from The Rubber Buggy on-line store.
Enjoy and Happy Crafting!
|
| Nancy Hill The Rubber Buggy Design Team |
Thursday, January 11, 2018
Thank You Card
Hi everyone, Steph Ackerman here today using products from the Rubber Buggy Store. If you haven't visited the store recently, you are missing out on a lot of fun products.


Thank you is from Poppy Stamps - Hope and Thanks - a stamp set that contains 18 words and phrases.
Thank you for visiting


The Spellbinders Tool 'n One was perfect for removing all the little holes in the die cut panel.

Prima Marketing flowers were scattered around the card.

Thank you is from Poppy Stamps - Hope and Thanks - a stamp set that contains 18 words and phrases.
Thank you for visiting
Subscribe to:
Posts
(Atom)


