Showing posts with label Gabi's Hibiscus Stamp. Show all posts
Showing posts with label Gabi's Hibiscus Stamp. Show all posts
Thursday, October 8, 2020
Thank You Daisies Shaped Card
Hi everyone, Steph Ackerman here today with lots of fun products from the store. Please visit the store for all the fun products I've used today.

I began by creating a 5" x 6 1/2" card from Bazzill Licorice cardstock. Then I used the Scor-Pal to score at 5" and 2 1/2". Starting from the center fold of the card, I cut off the top portion on an angle stopping about 2" from the bottom.

Once folded, the card takes on it's shape.


I thought about adding some color to the daisies, but I decided I liked the contrast against the backgrounds so I left them as is.
I love creating shaped cards and this card was no exception.

I began by creating a 5" x 6 1/2" card from Bazzill Licorice cardstock. Then I used the Scor-Pal to score at 5" and 2 1/2". Starting from the center fold of the card, I cut off the top portion on an angle stopping about 2" from the bottom.


I cut Maja Design Vintage Summer Basics 1914 to fit the card panels, then inked each with Distress Oxide Ink.
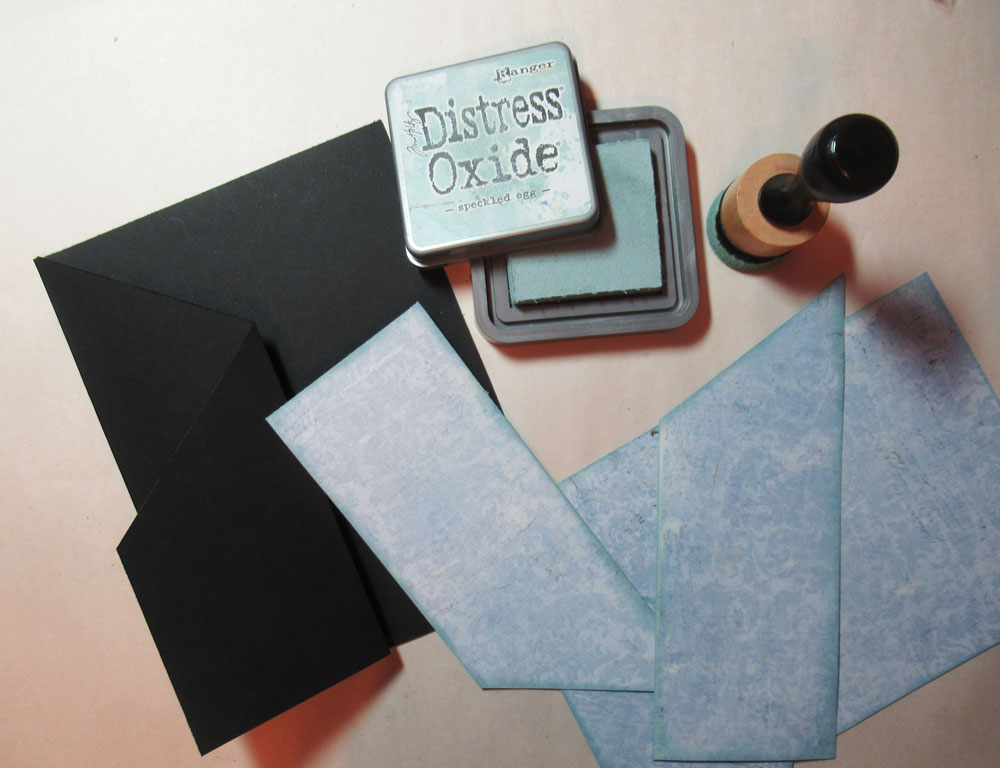
Then I adhered each panel to the card.

For the 2nd layer, I cut Maja Design Vintage Summer Basics 1904 slightly smaller and also inked the edges with Distress Oxide Ink. Using stamps from 49th and Market - Gabi's Daisies - I stamped 2 stems and 2 daisies on the card base with Lawn Fawn Black Licorice Ink. Then I stamped just the daisies on the smaller front panel.

Thank you - from 49th and Market - Gabi's Hibiscus - was stamped and then matted using scraps of the same Maja Designs papers. I added another phrase behind the fold.

What do you think?
Thank you for visiting
Thursday, September 12, 2019
Thanks You Card with Gabi's Hibiscus
Hi everyone, Steph Ackerman here today with lots of fun products from the store. Please visit the store for all the fun products I've used today.


Thank you for visiting

I came across a piece of Bazzil cardstock in Gumball which I had previously die cut. Since it was the approximate size of a card, I decided to work with it.

Cutting Lawn Fawn White cardstock the same size, I stamped 2 flowers and the sentiment using the 49 and Market stamp set - Gabi's Hibiscus behind the opening using Memento Tuxedo Black Ink. This stamp set includes 5 floral stamps and 3 sentiments that can be mixed and matched for a variety of projects. The panel was then matted with Bazzill Candy Bar cardstock before being added to the card.
I stamped and fussy cut the largest image, placing it slightly off center on the card. The script phrase was stamped with Memento Tuxedo Black Ink on white cardstock and matted with Bazzill Candy Bar cardstock before being added to the card with foam adhesives for dimension.

To finish I painted Liquid Pearls Blush randomly about the flowers then added dots of Liquid Pears Platinum for the flower center.
Thursday, August 22, 2019
Cards with Mintay Marina Collection
Hi everyone, Steph Ackerman here today with lots of fun products from the store. Please visit the store for all the fun products I've used today.

Have you seen the Mintay papers yet? These papers are heavy stock and come in a wide variety of colors and styles. This is the Mintay Marina Collection.


Thank you for visiting

Have you seen the Mintay papers yet? These papers are heavy stock and come in a wide variety of colors and styles. This is the Mintay Marina Collection.

Using Bazzill Licorice Twist, I cut to 5 1/2" x 11, then used the Scor-Pal to create 5 1/2" square card. Then I aded a layer of Bazzill Wax Lips. Next, I added a panel from the Mintay collection. Selecting another sheet from the collection, I die cut it with Lawn Fawn Small Stitched Circle die and matted with a Lawn Fawn Large Stitched Circle die. For a fun effect, I cut off the right edges of each.

My next card uses more papers from this collection. I've added a strip of black cardstock between the layers. Then I fussy cut another panel and added it to the card with Scrapbook Adhesives 3d foam adhesives.

And my third card uses mini tags cut from the collection, a circle panel using Lawn Fawn Small Stitched Circle die and matted with a Lawn Fawn Large Stitched Circle die. Again, I cut the edges for a fun effect.
Thank you for visiting
Thursday, August 8, 2019
Sweet Hammock Cards
Hi everyone, Steph Ackerman here today with lots of fun products from the store. Please visit the store for all the fun products I've used today.

Lawn Fawn has some amazing dies and I've use the Hammock and Trees set and the Stitched Rectangle set.

How fun are these cards. I've used Bazzill Jaw Breaker for the base of my cards, cutting it to 4 1/4" x 5 1/2", then used my Scor-Pal to score the cards.

Bazzill Icy Mint was used for the backgrounds. Then Bazzill Peanut Cluster and Gumdrop were die cut to create the trees. The hammock was created from scraps of papers I had on my desk.

Bazzill Gumdrop was torn for the grass and then die cut giving it the same stitched edging as the sky. The sentiment is from 49&Market Gabi's Hibiscus, which was stamped with Memento Tuxedo Black Ink, then matted with a scrap of Bazzill Jaw Breaker cardstock and added to the card with Scrapbook Adhesives 3D foam adhesives for dimension.

Monday, October 23, 2017
Super fun card using lots of stamps and die cuts

hi... Bev here today....welcome to The Rubber Buggy. I am sharing a card made using both stamps and die cuts. It is a bright fun card created to put a smile on your face.
Supply List
The Rubber Buggy Products
Stamps:49 and Markets Gabi's Hibiscus and Gabi's Square Stitch
Stamp Tool: My Sweet Petunia Mini misti
Ink: Ranger die ink
Markers: copics
Glue: Beacon 3-in-1
Other Twine, brads, cardstock

Using the mini misti I stamped the main front images. I coloured it with copic markers in fun bright colours.

The main section was worked into layers.

I did a negative die cut corner and I then added a verse and some added stamped images.

By adding the cardstock background it now pops through to the inside of the card.


I twine wrapped and tied a bow, die cut the "smile" sentiment and added some brads to the card front.

Here is a close up of the inside of the card for your viewing.


Thanks for joining me today... and hope to see you again soon.

Subscribe to:
Posts
(Atom)


