Showing posts with label Tutorial. Show all posts
Showing posts with label Tutorial. Show all posts
Monday, August 5, 2019
Explosion Box with Bev

Hi.... it's Bev here today. I am sharing a version of an Explosion Box... this one has 3 layers to decorate or add photos ... or both.
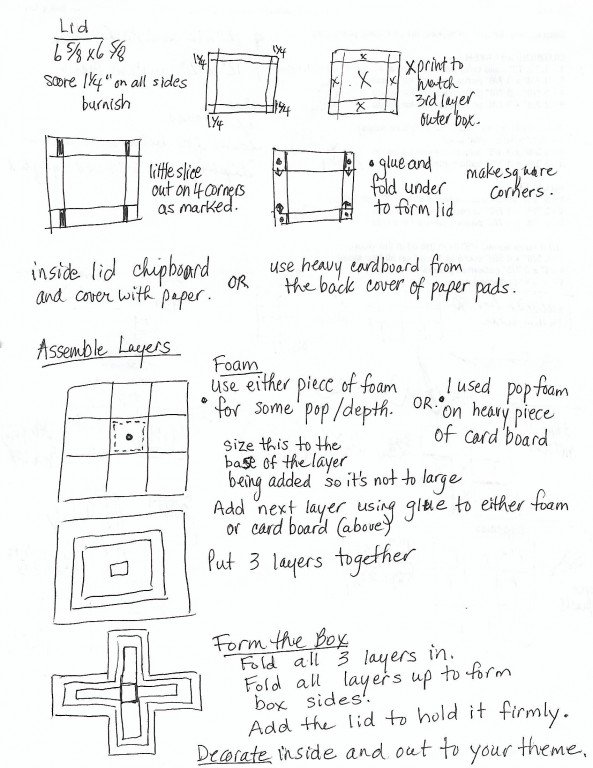
I used alot of products from The Rubber Buggy Instructions included so you can make one too.

I mixed and matched some amazing prints.

It folds up so small and compact... and these fabulous boxes can be designed to accommodate so many different themes and occasions...... just change up the paper with themed prints along with cardstock and accents. I used alot of products from The Rubber Buggy
For the instructions ... so you can follow along .. save to your computer and then print on 8.5" x 11" .
page 1
Page 2
The Rubber Buggy Products
Paper: Prima Zella Teal Collection
Foam Pop Ups: Scrapbook 3D foam squares
Glue: Beacon 3-in-1
Other: cardstock
This is the card folded up ready for the envelope. It is super fun ..... and hope you'll take the time to try this different shaped card too.


So glad you took time to visit. Hope to see you again soon. Take time to visit the STORE to view these and so many other products.

Monday, June 10, 2019
Triple Panel Standing Card Tutorial

Hi... Bev here today at The Rubber Buggy. I am sharing this super card today using Lawn Fawn papers purchased at The Rubber Buggy. Lots of fun bright colours and layers with super cute accents. ... and it's so easy.
- Paper: Lawn Fawn Sring Fling
- Stickles: Diamond
- Glue: Beacon 3-in-1 Glue,
- Accents: Scrapbook 3D foam
- Machine/ tools: EK success cutter bee scissors, Fiskar Paper Trummer
- Other: twine, dies, cardstock, bling, brads
Instruction Sheet (print for future reference)


Thanks for stopping by... hope to see you again soon

Monday, December 11, 2017
Concertina Card Tutorial video with Bev
hi Bev here with a video tutorial Be sure to watch this video... details on how to make the Concertina Card are included.
Here is my finished card for your viewing.


Monday, March 20, 2017
Heartfelt Creations Watering Can with tutorial from Bev

Hi... it's Bev here today and I am super excited to share. I had a chance to create with amazing products from The Rubber Buggy. Here is a watering can project I made using Heartfelt Creations products from the store. Below you will find a template and instructions for making this cute project.
Supply List:
Heartfelt Creations Products
Glue: Art Glitter Dries Clear Adhesive
Other: Spellbinders Labels 46 die, accents, beads, stickles, lace, ribbons, string
Template: see photo attached and original link:
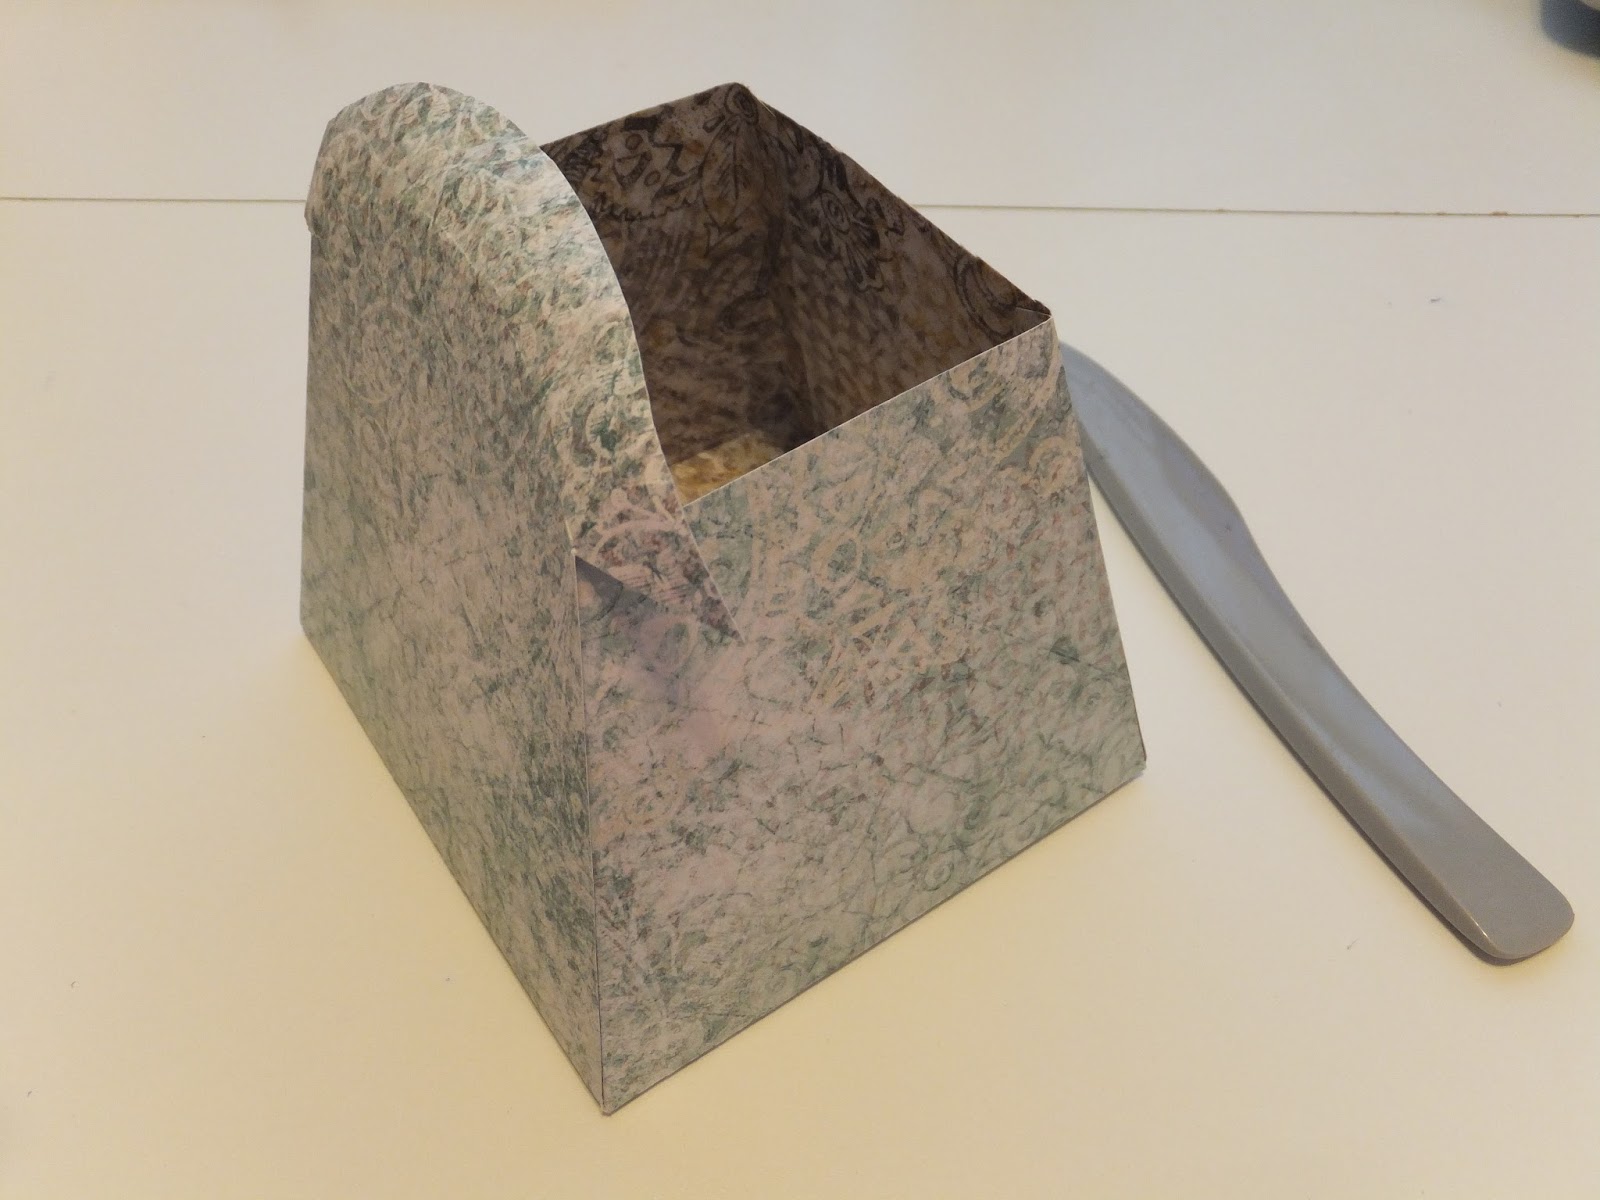
Instructions:
Watering Can Project
Template can be printed and cut
on 8.5x11” or enlarged to fit 12x12 paper for larger size. I enlarged the main
base to fit 12x12 and estimated size of the handle and spout with adjustments
to close in the pieces.
This template originates
from: http://www.splitcoaststampers.com/resources/tutorials/wateringcan/
1. Using the templates trace and cut the pieces to your
watering can.

Fold your watering can, spout and handle pieces.


TIP: to make the curvature on the upper lid edge of
watering can I using the flower shaping kit to bevel the outer edge instead of
adding the extra strip of paper. It worked perfectly especially with the high
quality of Heartfelt Creations paper.

2. Using the Ornate
Borders & Pockets die cut in coordinating paper and apply to the
upper lid section fitting into the rounded concave grove. If your making the
smaller size watering can you’ll have decorate this section to fit the size
your working on.

3.Using the Spellbinders Label 46 smallest die cut 2 of
them to fit on the front and back panels under where you placing the sprout and
handle section… for added décor.
4. The upper lid section on the outer sides need to be
bend and glued into the outer edges.
5. Form your spout and handle ready to apply to the front
and back panels. On the handle section I used a large stapler to add extra
strength to it. Otherwise just glue it firmly. The spout was glued only.


6. Using the Border Essentials die I cut 4 of them and
glued and cut them to fit the 4 bottom sides.

7. On top of this border I glued some thinner lace all
the way around.

8. Next using the Wildwood Floral Dies I cut and layers
some flower and added some accents to the centres. I also took print flowers
off the Sun Kissed paper Collection and fussy cut both small and larger flowers
to add to the shaped floral cluster for
the main section of the watering can.
I die cut both the bird and the butterfly from the
Garden Romance die collection. I cut 2 of each so I could pop them up giving 3D
look for dimension.

9. Now taking all the flowers, 3D accents and adding some
beaded accents I started gluing on and clustering the main section.

10. I die cut a few more flowers and also a leafy piece to
accent the side of the spout.
11. I now went back into my stash to find a few more
beads, stones, hearts etc to decorate the upper lid, the spout and a few more
accents added to the main floral cluster.

12. Last but not least was the cute small clustered
ribbons and bead accents is added to the back handle. Tie them off and glue the
beads and your done.


Monday, April 25, 2016
Heartfelt Creations stamp and die set to create a beautiful swirl card with tutorial

I am using my newest Heartfelt Creations products from The Rubber Buggy. It prompted me to get out my copics again, use Delightful Daisy stamps and dies along with the Tim Holtz ranger mini ink pads to create some cards.
Instructions:
I started by stamping the images and the sentiment as per above. I then coloured this section using Tim Holtz ranger mini ink pads and a finger sponge.

These stamped and die cut flowers are coloured with some Tim Holtz ranger mini ink pads with finger sponge.. but then accented the shading with copic markers.

Using my Heartfelt Creations Deluxe Flower shaping tool kit I mold my flowers.

You start on the back side and work them until they curl to you liking.

You can see some signo white gel pen accents on these pieces also.. they were added before sculpting the flowers. Above are 3 different sizes.

Here is a double layer flower. When you turn them over you mold and shape just the centre piece to flatten the flower. If you want double or triple you glue the centres inside each other.

On my finished card you can see some background flat inked flowers, some single shaped flowers and some double layered sculpted flowers. It great to mix them up. Some flowers are placed on top of the background coloured flowers.. some left plain. On this back ground I used a tan ink to lightly colour the white background, I inked the outer edges and cut the slanted shape for dimension. A print pattern is in the background and lots of fun ribbon accents this card.

You can also see the liquid pearl dot trailer in this photo.

Here is the photo shot showing the fabulous 3D depth in this card.
I enjoyed sharing with you today.

Monday, December 28, 2015
Double Diamond Fold Card

HI.. Bev here today at The Rubber Buggy I am excited to share with you this fabulous card using Maja Design A Gift for You collection. I thought we'd step
out of our comfort zone and try a new card shape. This is the Double Diamond
Fold Card.
Supply List:
The Rubber Buggy Products:
Paper: Maja Design A Gift for You
Cardstock base:misc
Dew Drops: Robin's Nest
Twine: Bella Creations Timeless twine
Here is the link to the instructions and template to make it.
http://www.allfreepapercrafts.com/Birthday-Cards/Happy-Birthday-Fancy-Fold-Card
and here is the template link: https://castleparkdesigns.files.wordpress.com/2014/12/double-diamond-fold-template.png
Here is a close up of my card.

**Please note the start
template is 7"x12" (not marked on template that I could see)**

and here is the closed version for viewing and this would be the
envelope size required 6x7"
Thanks for visiting..see you again soon.

Subscribe to:
Posts
(Atom)


