Thursday, October 22, 2020
Merry Christmas Card
Hi everyone, Steph Ackerman here today with lots of fun products from the store. Please visit the store for all the fun products I've used today.


Thank you for visiting

This sweet stamp from Wild Rose Studio is Mia with Cracker. She was colored with Copic Markers, then die cut with Lawn Fawn Stitched Rectangle Dies.

I added Nuvo Crystal Drops to her hat and Ranger Liquid Pearls to the berries.

The card was created from Bazzill Sour Lemon cardstock. Wrapping May Arts Ribbon around the card, I tied it on the left side. Once dry, the stamped panel was adhered to 2 larger layers and added to the card with Glue Dots for dimension.

Merry Christmas is a Lawn Fawn die which was adhered across the card with Art Institute Clear Adhesive.
Isn't she just the sweetest?
Saturday, October 17, 2020
Lawn Fawn Sweet Den Happy Birthday Card
Hope your weekend will be beary cozy with this cute set of bears! Welcome back and Nancy, here, and I am just loving the Lawn Fawn Sweet Den stamp set and so will you! I am so excited to share with you available at The Rubber Buggy of the new arrivals of Lawn Fawn Sweet Den bear stamp set with the coordinating cozy den from the Lawn Fawn Stitched Dens die set. Pair these sets with Lawn Fawn Snow Much Fun to add more bears to your scene!

Share a tip I use for Lawn Fawn stamps:
I used my stamp tool and stamp all of the critters on a 5" x 8 1/2" cardstock. I color all of the critters. I adjust my printer setting to a higher density level and print out several copies using the Neenah Smooth White 80lb. cardstock. I save the original and store it in a folder behind the stamp set. That way, I don't have to color it over again for awhile. Since I struggle with die cutting super small images due to poor lighting in my craft room and problems with my back, I cut out all of my stamps with my Brothers Scan and Cut machine.
First, I used the Lawn Fawn Stitched Wood Grain Background die set on brown cardstock. I sponged on Tim Holtz Distress Oxide Espresso ink and Tim Holtz Distress Black Soot ink on the stitched wood grain. I center the large Lawn Fawn Bear Den die on the woodgrain background paper and die cut. I found some woodgrain cardstock and cut it out for the floor. I used the small stitched den in the set to cut out the window. I cut a 2" blue cardstock and die cut the Lawn Fawn Starry Sky Star die. I cut out 1" of silver glitter paper and adhere behind the falling star. I used the white Uniball pen to add the small stars and then stamped the Lawn Fawn stars with Lawn Fawn white ink on the blue cardstock.
I colored the bears with Copic Markers. Additionally, I stamped and cut out the rug with orange cardstock and presents from the Lawn Fawn Christmas Dream stamp set. I cut a banner from the Lawn Fawn Simple Wavy Banner die set and stamped the sentiment found in the Sweet Den stamp set.
 I used a woodgrain embossing folder for the inside of the card. I typed and printed out the sentiment and used the Lawn Fawn Stitched Den die set to frame around it. I added some of the adorable bears to the inside of the card.

Thanks for your visit today! The Rubber Buggy has the crafting supplies for your next project. So have fun crafting this weekend with these products. My cards and projects are always posted on Saturday. Keep watching and thank you so much for those wonderful comments as well as suggestions.
Enjoy and Happy Crafting!
 |
Thursday, October 15, 2020
Fall cards with Photo Play
Hi everyone, Steph Ackerman here today with lots of fun products from the store. Please visit the store for all the fun products I've used today.
As we head into our next season, I want to wish everyone Happy Fall.

I created 4 cards using this paper pad and I still have some remaining sheets left to create with.


I die cut additional papers using Lawn Fawn Stitched Circle Dies. As I wanted it off the edge of the card, I cut the edge off the circle.
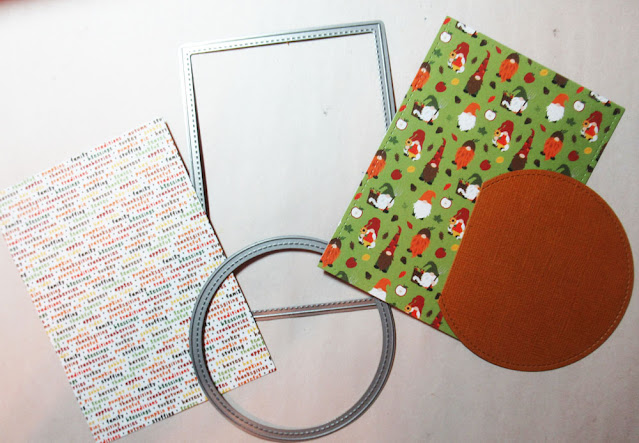


Have you seen the Photo Play Gnome for Thanksgiving paper pad? This paper pad is 24 double sided papers of pure fall. Not only is it filled with fall colors and designs, it also includes fall photos and phrases that can be the focal point of your cards.

I created 4 cards using this paper pad and I still have some remaining sheets left to create with.

Using Lawn Fawn Rectangle Dies, I die cut several of the papers as well as coordinating Bazzill cardstock in Gold Coins and Candy Corn.


2 cards were created from Candy Corn cardstock and papers from this collection were placed on the cards.

2 cards were created from Gold Coins cardstock and different papers from this collection were placed on the cards.

The next layers were assembled, then wrapped with twine. The turkey gnome was added to one card with foam adhesives for dimension. The pinecone was fussy cut and placed atop the circle die cut which was also added to the card with foam adhesives for dimension.

Selecting another gnome and fall phrase, I die cut them for the next 2 cards. I place strips of left over scraps on one of the cards before assembling. For the gnome card, I die cut Lawn Fawn's Happy Fall and placed it on the card using Art Institute Glue.

Aren't they adorable? Hope you try out this paper pack.
Thank you for visiting
Saturday, October 10, 2020
Stamperia Seaworld Gift Box with Mould
Welcome back and Nancy, here, to share a mixed media gift box for my brother filled with Huckleberry goodies from our Idaho Huckleberry bushes which are found in our mountains nearby. I tried doing the huckleberry picking but ended up eating more than what I brought home.
This gift box was made from the Stamperia Seaworld paper pad and Stamperia Seaworld mould. I found this a challenge for me since the gift was for a male, my brother, and I am not really acquainted with the colors of the sea creatures so I did a lot of research before coloring the seahorse and starfish using the gorgeous new arrivals of the Prima Marketing Metallic waxes.
 |
| Stamperia Seaworld paper pad |


Prima Marketing Metallique waxes to these before using a glue gun to adhere to the inside of the box.
 I used this paper in the Stamperia Seaworld collection for each side of the wooden box. I just used the this side of the cardstock for the top and bottom on each side. I love the 3D rustic appearance of the rusted out tin on this paper with the metal steal.


 Of course, the gift box will have a variety of handmade Idaho Wild Huckleberry goodies. Our area is very known for its Huckleberries that are picked from small bushes in our mountains nearby.
 I created the Stamperia Sea Horse from the Stamperia Seaworld Soft Mould using the Stamperia Extra Soft Clay. You can take this out immediately to let dry overnight or let the castings dry in the mould. I covered the dry castings with a coat of clear gesso and then used my fingers to apply the


Prima Marketing Finnabair Metallic wax Firebird and Prima Marketing Finnabair Metallic Mint Sparkle wax.


I applied a coat of Clear Gesso and Prima Marketing Metallique waxes on the vintage gears and used a hot glue gun to adhere on the box. I colored some cheese cloth with Ranger Distress Antique ink using a sponge and lightly dampen the cheese cloth and stretched it to appear like fish net. I used a hot glue gun to adhere the cheese cloth and then used the hot glue gun to adhere the sea horse. I added glue around the seahorse and dabbed on the Stamperia Glamour Sparkles Burnt Amber which looks like antique colored glass - very gorgeous and there are more colors available at The Rubber Buggy.
Thanks for your visit today! The Rubber Buggy has the crafting supplies for your next project. So have fun crafting this weekend with these products. My cards and projects are always posted on Saturday. Keep watching and thank you so much for those wonderful comments as well as suggestions.
Enjoy and Happy Crafting!
|
Thursday, October 8, 2020
Thank You Daisies Shaped Card
Hi everyone, Steph Ackerman here today with lots of fun products from the store. Please visit the store for all the fun products I've used today.

I began by creating a 5" x 6 1/2" card from Bazzill Licorice cardstock. Then I used the Scor-Pal to score at 5" and 2 1/2". Starting from the center fold of the card, I cut off the top portion on an angle stopping about 2" from the bottom.

Once folded, the card takes on it's shape.


I thought about adding some color to the daisies, but I decided I liked the contrast against the backgrounds so I left them as is.
I love creating shaped cards and this card was no exception.

I began by creating a 5" x 6 1/2" card from Bazzill Licorice cardstock. Then I used the Scor-Pal to score at 5" and 2 1/2". Starting from the center fold of the card, I cut off the top portion on an angle stopping about 2" from the bottom.


I cut Maja Design Vintage Summer Basics 1914 to fit the card panels, then inked each with Distress Oxide Ink.
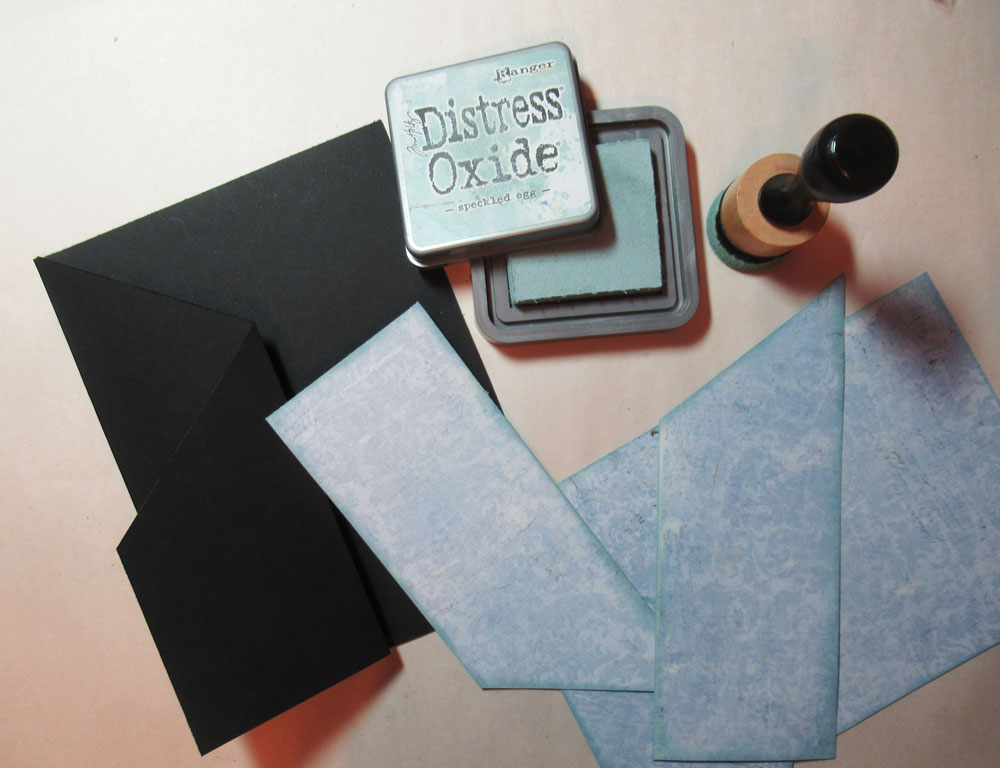
Then I adhered each panel to the card.

For the 2nd layer, I cut Maja Design Vintage Summer Basics 1904 slightly smaller and also inked the edges with Distress Oxide Ink. Using stamps from 49th and Market - Gabi's Daisies - I stamped 2 stems and 2 daisies on the card base with Lawn Fawn Black Licorice Ink. Then I stamped just the daisies on the smaller front panel.

Thank you - from 49th and Market - Gabi's Hibiscus - was stamped and then matted using scraps of the same Maja Designs papers. I added another phrase behind the fold.

What do you think?
Thank you for visiting
Saturday, October 3, 2020
Photoplay Gnomes for Halloween Treat Box
Welcome Fall and Nancy, here, and excited to share a very fun paper craft Trick or Treat box made with the fun Photoplay Gnomes for Halloween collection for celebrating with the little Halloweeners the spookiest night of the year.
Capture all of your holiday crafts, Halloween, Thanksgiving, Christmas and 4th of July with Photoplay Gnomes for the Holidays all available at The Rubber Buggy. Each Photoplay Holiday collections feature interchangeable patterned papers, die cuts and stickers.


Follow the instructions below for creating the box. Additionally, I used 5/8" wide Scor-Tape to take the orange plaid ribbon around the box to tie the box shut. I handmade the flowers using various flower dies and a Heartfelt Creations flower molds.


 Inside: Sample of scoring as per instructions above. I used a purple colored cardstock for my project.


 Inside of the box using the paper and stickers in this pack.

Tutorial


For this candy box, I am using a two-sided cardstock but you can cover the front with a separate.
Inside:

 Inside of the box using the paper and stickers in this pack.
Thanks for your visit today! The Rubber Buggy has the crafting supplies for your next project. So have fun crafting this weekend with these products. My cards and projects are always posted on Saturday. Keep watching and thank you so much for those wonderful comments as well as suggestions.
Enjoy and Happy Crafting!
|
Thursday, October 1, 2020
Stamperia Friendship Card
Hi everyone, Steph Ackerman here today with lots of fun products from the store. Please visit the store for all the fun products I've used today.


I'm using Stamperia Decorative Chips - Garland with Birds. I used Copic Markers to color the decorative chip. Using Lawn Fawn Large Stitched Circle Die, I die cut Bazzill Candy Bar Cardstock to use under the decorative chip. I adhered the chip to the circle with Art Institute Clear Adhesive.

To add dimension, I used Ranger Liquid Pearls in Raspberry or the berries and to fill in some of the flowers, along with Copper. I also use Nuvo Crystal Drops to fill in several other flowers.

I created an easel card from Bazzill Candy Bar Cardstock and Craft O'Clock's Hazy Street pattern papers. Stamping a phrase from Art Impressions with Lawn Fawn Black Licorice Ink, I die it with Lawn Fawn Small Stitched Circle Die and matted with a larger die before adding it to the card with Glue Dots. This helps the easel stand upright.

Thank you for visiting
Subscribe to:
Posts
(Atom)


