Showing posts with label twine. Show all posts
Showing posts with label twine. Show all posts
Thursday, July 22, 2021
Ciao Bella Stenciled Cards
Hi everyone, Steph Ackerman here today with lots of fun products from the store.


The Cia Bella Fern Stencil measures 5" x 8" and is perfect to use as a background for your projects.

Using the Ranger Ink Blending Tool, I inked the stencil with Distress Oxide Ink in Bundled Sage and Mowed Lawn.

Once the first panel was inked, I flipped over the stencil, and, using a baby wipe, inked up a 2nd panel. This process creates a negative, watercolor effect.

Next, I took several tags from the Scrapaholics - Chipboard - ExploreTag Set, and inked with Distress Oxide Ink.

Wrapping May Arts Sheer Celery Ribbon lengthwise around one panel, I tied the tag to the ribbon with Baker's Twine.

I wrapped the same ribbon horizontally around the second panel, also tying the tag to the ribbon with Baker's Twine.

The panels were added to cards created from Echo Park - Let's Go Camping cardstock. The panels were added to the cards with EK Success 3D Dots for dimension.
Thank you for visiting
Thursday, October 15, 2020
Fall cards with Photo Play
Hi everyone, Steph Ackerman here today with lots of fun products from the store. Please visit the store for all the fun products I've used today.
As we head into our next season, I want to wish everyone Happy Fall.

I created 4 cards using this paper pad and I still have some remaining sheets left to create with.


I die cut additional papers using Lawn Fawn Stitched Circle Dies. As I wanted it off the edge of the card, I cut the edge off the circle.
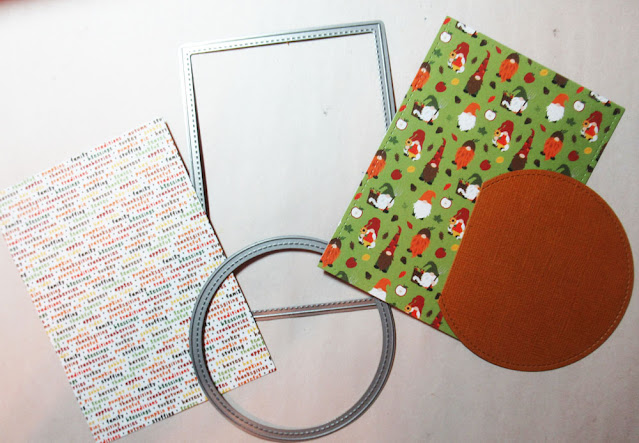


Have you seen the Photo Play Gnome for Thanksgiving paper pad? This paper pad is 24 double sided papers of pure fall. Not only is it filled with fall colors and designs, it also includes fall photos and phrases that can be the focal point of your cards.

I created 4 cards using this paper pad and I still have some remaining sheets left to create with.

Using Lawn Fawn Rectangle Dies, I die cut several of the papers as well as coordinating Bazzill cardstock in Gold Coins and Candy Corn.


2 cards were created from Candy Corn cardstock and papers from this collection were placed on the cards.

2 cards were created from Gold Coins cardstock and different papers from this collection were placed on the cards.

The next layers were assembled, then wrapped with twine. The turkey gnome was added to one card with foam adhesives for dimension. The pinecone was fussy cut and placed atop the circle die cut which was also added to the card with foam adhesives for dimension.

Selecting another gnome and fall phrase, I die cut them for the next 2 cards. I place strips of left over scraps on one of the cards before assembling. For the gnome card, I die cut Lawn Fawn's Happy Fall and placed it on the card using Art Institute Glue.

Aren't they adorable? Hope you try out this paper pack.
Thank you for visiting
Thursday, September 24, 2020
Bird Cage Slimline Cards
Hi everyone, Steph Ackerman here today with lots of fun products from the store. Please visit the store for all the fun products I've used today.


I started by adhering Lawn Fawn Knock on Wood papers to Sizzix Mat Board, then running it through my Big Shot with Tim Holtz Alterations Cage Bird Die by Sizzix.

Since I die cut 3 sets, I moved the birds around till I liked how they looked on the cages. I then glued them to the cages using Art Institute Glue.

I inked the cages with Tim Holtz Distress Oxide Ink in Ground Espresso using a Ranger Ink Blending Tool. Add some twine to the bird cages.

I used Lawn Fawn Large Slimline Dies and Lawn Fawn Small Slimline Dies to create my layers from Maja Design papers - Vintage Summer Basics 1936, Vintage Summer Basics 1943 and Vintage Summer Basics 1903.


Using Penny Black Stamps - Special Thoughts - I chose the phrases I wanted to use, inked them with Lawn Fawn Black Licorice ink and stamped them on scraps of the same papers.

Creating cards from Bazzill cardstock, I used a Scor-Pal Scoring Board to create the creases in the cardstock, so the cards folded easily. Then I assembled the cards, mixing the layers. Using Mat Board elevates the bird cages to a 3 dimensional look on your cards.

This card could be sent to someone who is not feeling quite well.

This card could be sent to someone you are missing.

This card could be sent to someone to cheer them up.

There are lots of possibilities when you mix and match your stamps, dies and papers.
Thank you for visiting
Thursday, September 3, 2020
Hello Friend - Thinking of You
Hi everyone, Steph Ackerman here today with lots of fun products from the store. Please visit the store for all the fun products I've used today.

I used the Memory Box Bird Sanctuary Clear Stamp set for my card, stamping one of the birds with Lawn Fawn Black Licorice Ink on Bazzill Marshmallow Cardstock. Use an art dauber to add a touch of Ranger Tea Dye Ink to the bird's wings.

Because I wanted the bird to sit along the bottom edge of the card, I first die cut it with Lawn Fawn Stitched Circle Die then matted with a larger scalloped die. I cut off the bottom edge so it would sit along the bottom edge of the card, then stamped the phrase, also from this stamp set, in red ink. I also stamped a second phrase in Black Licorice Ink on a strip of white cardstock.

The card was created from Bazzill Candy Bar Cardstock and a sheet of wood grain paper was added as the base layer. The die cut bird was added to the bottom edge. After matting Hello Friend with brown cardstock, I wrapped twine around the panel then added it to the card with Scrapbook Adhesives 3D Foam Adhesives.

Finally, I used Ranger Liquid Pearls in Oyster around the card.
Thank you for visiting
Thursday, June 4, 2020
Summer Travel Treats
Hi everyone, Steph Ackerman here today with lots of fun products from the store. Please visit the store for all the fun products I've used today.


Thank you for visiting

Using Scor-Pal, I created a set of cards from Bazzill Jawbreaker Cardstock and Lawn Fawn Kraft Cardstock. I used papers from the Maja Design Life by the Sea and Sommartider collections to complete the cards. The top layers of the cards were die cut using Lawn Fawn Stitched Rectangle Dies.

I also created a coordinating set of gift bags which I'll fill with little odds and ends for the traveler. The top layers were die cut using Lawn Fawn Stitched Rectangle Dies.

I used Sizzix Thinlit Dies by Tim Holtz, die cutting the words from scraps of the pattern papers I used for the cards and gift bags. The mats were die cut from Bazzill Jawbreaker Cardstock.

Tattered Lace Detail Glue with it's fine tip was used to adhere the word layers together.
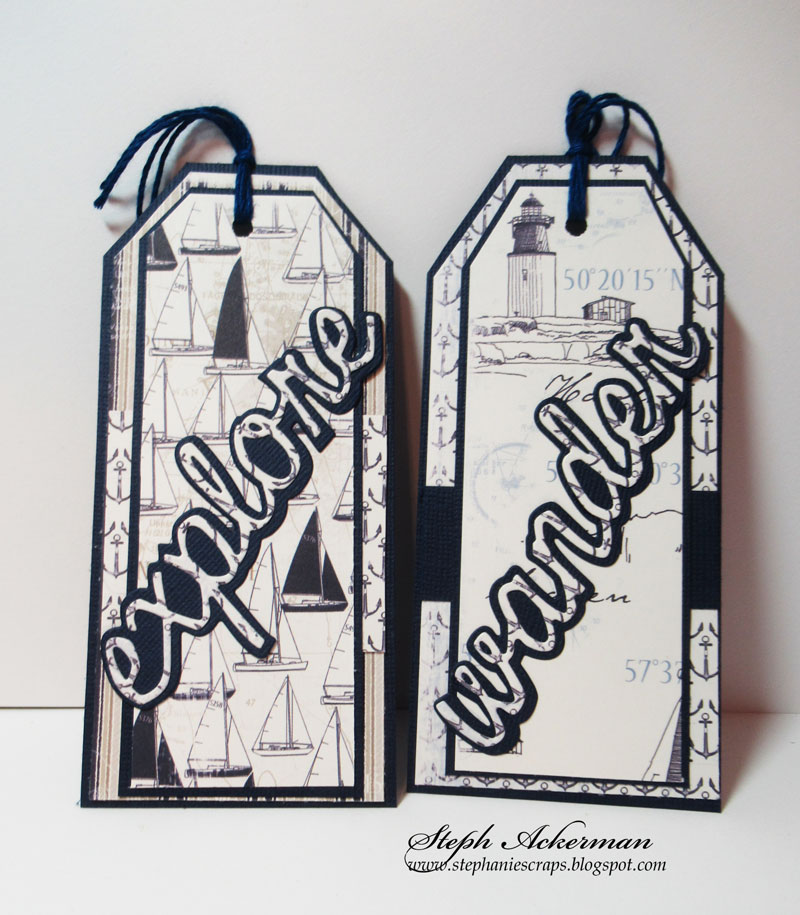
Creating tags from Bazzill Jawbreaker Cardstock, I added assorted layers and placed words on top. Twine was added to each tag.

Happy Summer from Lawn Fawn was die cut from Jawbreaker Cardstock and adhered across each card using the Tattered Lace Detail Glue.

This would be a nice set to give to someone planning on traveling this summer.

Fill the gift bags with little treats, or perhaps a pad and paper for doodling.
Thursday, May 14, 2020
Stamperia Enjoy Cards
Hi everyone, Steph Ackerman here today with lots of fun products from the store. Please visit the store for all the fun products I've used today.

Sprinkle Stamperia Glamour Pigments in Gold and Ancient Pink on Strathmore Watercolor Paper then spritz with water and let the colors mix. Rotate the papers so the colors run. Spritz more water as needed then heat set.

Mat each panel with Bazzill Gold Coins Cardstock then wrap with assorted ribbons and twine.

Create a pink card for card #1 and adhere the ribbon wrapped panel. Stamp the rose and pot using Stamperia Rubber Stamps using Memento Tuxedo Black Ink on Bazzill Marshmallow Cardstock. Color with Copic Markers. Die cut using Lawn Fawn Stitched Circle Dies. Mat with Lawn Fawn Zig Zag Circle Dies. Add the image on the card with Scrapbook Adhesives 3D Foam Adhesives for dimension.

Mask the word Enjoy from the same stamp set and ink with Memento Tuxedo Black Ink. Mat and add to the edge of the card.

Create a 2nd pink card and adhere the 2nd panel. Use the same rose and pot, stamp on Bazzill Marshmallow Cardstock, color with Copic Markers, then cut the edge of the stamped image. Mat with a Zig Zag die and cut off the edge. Add to the card with Scrapbook Adhesives 3D foam adhesives for dimension. Stamp Enjoy as above and add to the corner of the card.

Tie twine to the ribbon and add Enjoy to the corner. Add a little bit of glimmer to the rose using Ranger Ice Stickles.
Thank you for visiting
Thursday, February 6, 2020
Bird Sanctuary Cards
Hi everyone, Steph Ackerman here today with lots of fun products from the store. Please visit the store for all the fun products I've used today.


Thank you for visiting


Using Memento Tuxedo Black Ink, stamp a 5 1/2" x 11" panel of Bazzill Alpaca Cardstock with the 3 birds included with the Memory Box Bird Sanctuary stamp set. This stamp set includes 3 birds, 4 phrases and 4 geometric designs for lots of card making ideas.

Stamp the dots with Ranger Distress Ink in Iced Blue randomly around the birds.

Cut the panel to create 2 cards and mat each panel with Bazzill Jelly Bean Cardstock. Stamp 2 phrases on Bazzill Marshmallow Cardstock and die cut with Lawn Fawn Stitched Circle Dies.

Place white ribbon on the Ranger Distress Ink in Iced Blue and pull it across the pad picking up the color.

Wrap ribbon around the panels.

Add the phrases to the cards using Scrapbook Adhesives 3D Foam Squares for dimension.

Thank you for visiting
Subscribe to:
Posts
(Atom)


