Showing posts with label Tim Holtz. Show all posts
Showing posts with label Tim Holtz. Show all posts
Thursday, September 23, 2021
Stained Glass Poinsettia
Hi everyone, Steph Ackerman here today with lots of fun products from the store.

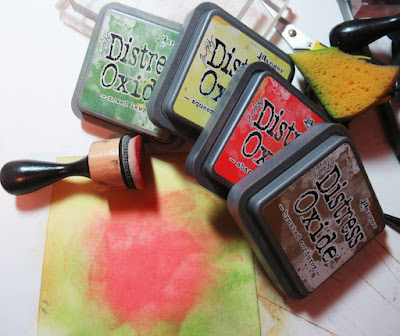


This Poppystamps Stained Glass Poinsettia die allows you many options to create.
Using assorted Distress Oxide Inks in Squeezed Lemonade, Brushed Corduroy, Abandoned Coral and Mowed Lawn - I created the first background.

Using Tim Holtz Idea-ology Kraft Cardstock, I die cut the poinsettia and placed it over the inked background.

The panel was then die cut using Lawn Fawn Stitched Rectangle dies, then added to another panel of Ranger Kraft Cardstock. The left over inked panel panel was added to a black card.

I used the die again with Ranger Kraft Cardstock and adhered it to green cardstock.

I die cut the poinsettia a second time and filled in the petals. The 5 prominent petals were added to the panel with Scrapbook Adhesives 3D Foam Adhesives for dimension.

The panel was matted on brown cardstock, then onto a torn panel from the Simple Stories Simple Vintage Farmhouse Garden paper pad, then finally onto Ranger Kraft Cardstock before being added to the card.

Finally I die cut Lawn Fawn Border Line Dies - Happy Holidays and Merry Christmas - and adhered them to each card.
Thank you for visiting
Thursday, May 27, 2021
Collect Beautiful Moments
Hi everyone, Steph Ackerman here today with lots of fun products from the store.


This beautiful floral stamp is a Magnolia Stamp - Meadow Daisy - and is a perfect size for a card front. I stamped it with Lawn Fawn Black Licorice Ink, then colored it with Copic Markers. I used Ranger Distress Ink in Speckled Egg to add color to the sky using Ranger Mini Domes Ink Blending Foams, and used Copic Markers to add the ground. The image was die cut with Lawn Fawn Stitched Rectangle Dies, then matted on Lawn Fawn Kraft cardstock.

Collect Beautiful Moments is from Stampers Anonymous Tiny Text stamp set and it was also stamped with Lawn Fawn Black Licorice Ink directly on the card.

Using Ranger Ice Stickles in Twinkle, I added dimension to the Daisy petals. Next, I added Ranger Liquid Pearls in Copper to the Daisy center.

What beautiful moments will you collect today?
Thank you for visiting.
Thursday, December 3, 2020
How to use Slimline Dies
Hi everyone, Steph Ackerman here today with lots of fun products from the store. Please visit the store for all the fun products I've used today.


Thank you for visiting

I've created 2 cards today using Tutti Designs Slimline dies - Stitched Scalloped Rectangle and Stitched Rectangle in 2 different ways.
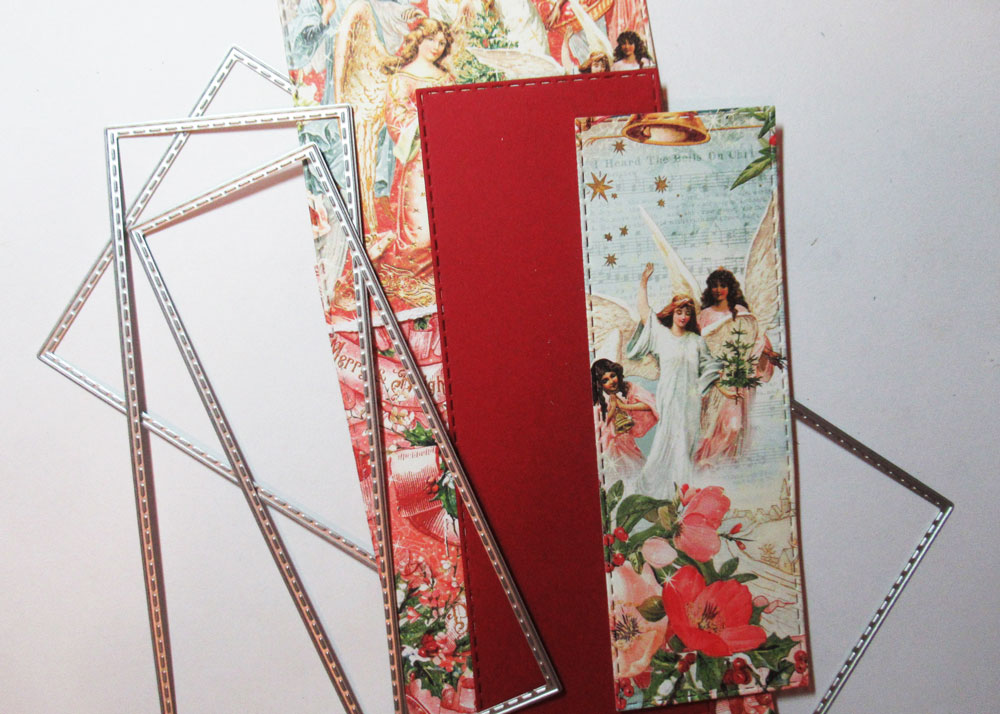
My first card was created from Bazzill Lollipop cardstock. Using papers from the Graphic 45 Joy to the World collection, along with Lollipop and green cardstock, I die cut the layers to create a true slimline card.

Prima poinsettias were added to to the layers with brads, along with a metal phrase from Tim Holtz Christmas Words collection. Glue Dots were used to provide dimension.

My next card is an A2 sized card and I used the same Tutti Designs Slimline dies to die cut the elements from Bazzill Lollipop cardstock and Graphic 45's Joy to the World papers.

I placed the scalloped layer on the card, cutting off the sections I did not need. Then I die cut the angel layer and cut off the sections I did not need. A poinsettia was added to the upper corner and a Tim Holtz Christmas Word was added along the edge. This is a great way to use slimline dies in another way with left over papers.

Thursday, September 24, 2020
Bird Cage Slimline Cards
Hi everyone, Steph Ackerman here today with lots of fun products from the store. Please visit the store for all the fun products I've used today.


I started by adhering Lawn Fawn Knock on Wood papers to Sizzix Mat Board, then running it through my Big Shot with Tim Holtz Alterations Cage Bird Die by Sizzix.

Since I die cut 3 sets, I moved the birds around till I liked how they looked on the cages. I then glued them to the cages using Art Institute Glue.

I inked the cages with Tim Holtz Distress Oxide Ink in Ground Espresso using a Ranger Ink Blending Tool. Add some twine to the bird cages.

I used Lawn Fawn Large Slimline Dies and Lawn Fawn Small Slimline Dies to create my layers from Maja Design papers - Vintage Summer Basics 1936, Vintage Summer Basics 1943 and Vintage Summer Basics 1903.


Using Penny Black Stamps - Special Thoughts - I chose the phrases I wanted to use, inked them with Lawn Fawn Black Licorice ink and stamped them on scraps of the same papers.

Creating cards from Bazzill cardstock, I used a Scor-Pal Scoring Board to create the creases in the cardstock, so the cards folded easily. Then I assembled the cards, mixing the layers. Using Mat Board elevates the bird cages to a 3 dimensional look on your cards.

This card could be sent to someone who is not feeling quite well.

This card could be sent to someone you are missing.

This card could be sent to someone to cheer them up.

There are lots of possibilities when you mix and match your stamps, dies and papers.
Thank you for visiting
Thursday, July 2, 2020
Framed Dimensional Cards
Hi everyone, Steph Ackerman here today with lots of fun products from the store. Please visit the store for all the fun products I've used today.



Thank you for visiting

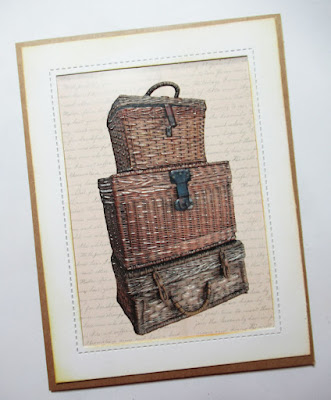
I used some fun 7Gypsies Adhesive Embellishments. I die cut a frame using Bazzill Marshmallow Cardstock with Lawn Fawn Stitched Rectangle dies. The edges were inked with Ranger Brushed Corduroy Distress Ink, and placed atop a scrap of pattern paper. Several stamps from Tim Holtz Tiny Text cling stamps were inked with Memento Tuxedo Black Ink and stamp around the panel. Add the panel to a Lawn Fawn Kraft card.

I used the Old Paint Brush for my first card, adding it to the card on an angle. Using Tutti Designs Nesting Ovals, I die cut white and kraft cardstock. Another phrase was stamped on the white layer and the ovals were then added to the card with Scrapbook Adhesives 3D foam squares for dimension, overlapping the paint brush.

For my second card, I used the 3 Wicker Woven Trunks. I really liked the packaging so I used it for the background, and placed another die cut panel on top.

Again, I stamped several stamps from Tim Holtz Tiny Text cling stamps with Memento Tuxedo Black Ink around the die cut panel. A third stamp was stamped on a strip of white cardstock, matted with kraft cardstock and added to the card with foam adhesives. The panel was then added to a Lawn Fawn Kraft card. Makes me want to pack my trunks and do some traveling.

Thank you for visiting
Thursday, January 30, 2020
Travel Cards with Stamperia Around the World
Hi everyone, Steph Ackerman here today with lots of fun products from the store. Please visit the store for all the fun products I've used today.


Thank you for visiting

Using the Sizzix Planks die, die cut Sizzix Mat Board. Place a stencil on each plank then ink with Ranger Distress Ink - Walnut Stain.

Using papers from Stamperia's Around the World paper collection, create the cards. Use Lawn Fawn Stitched Rectangle dies to die cut each main layer.

Mat each layer with cardstock. Tear ticket pieces from the same paper collection, ink with brown ink and mat with cardstock.

Determine their placement, then add the mat board pieces on each card. Vary the placement on each card for a different effect.

Die cut the words using Sizzix Shadow Scrip #3 from brown and cream cardstocks. Adhere them together using Tattered Lace Detail Adhesive and add to each card as shown.
Thank you for visiting
Thursday, December 12, 2019
Christmas Box Card
Hi everyone, Steph Ackerman here today with lots of fun products from the store. Please visit the store for all the fun products I've used today.

Cut Bazzill Gumdrop Cardstock to 6 1/2" x 12". Use the Scor-Pal Scoring Tool to score along the long edge at 2 3/4", 5 1/2", 8 1/4" and 11".

Rotate and score at 3 1/2". Cut along the score lines to the center line.

Select papers from the Maja Design Holiday in the Park 6" x 6" pattern pack. Cut papers to fit each flap as well as the back edge.

Cut 2 strips to fit inside the box as shelves.

Cut tags from the collection and adhere to the shelves.


The beauty of this box card is that it folds flat to fit into a standard envelope.
Thank you for visiting.
Saturday, June 8, 2019
Stamperia Voyages Fantastique gift box
I am excited to share an altered box using the Stamperia 12 x 12 Voyages Fantastiques paper collection. The Rubber Buggy carries these major name-brand craft supplies with fast delivery and wonderful customer services.
I have so much fun making these gift boxes like this Steam Puck gift box that will be given to my grandson's birthday. The sentiment is in the inside of the box and this will be filled with gifts and money.
I added Prima Marketing acrylic paints and waxes on the metal embellishments and used a hot glue gun to adhere the metal embellishment collections of Tim Holtz Idea-Ology Metal Mini Gears and Prima Marketing Finnabair Mechanical hardware to the box. THe gorgeous key hole is the Graphic 45 Ornate Metal Key Hole embellishment. The watch is from the Tim Holtz -Ideao-Ology Metal Watch set. I used the Beacon 3 n 1 Advanced glue to glue the Tim Holtz Idea-Ology Ephemera Expedition signs on the top of the box. A few embellishments like the blue stone and corner were found in my stash. I like going to thrift store and garage sales to pick up some crazy embellishments that I might find useful in the future like this gift box.

I used the Prima Marketing Finnabiar Art Alchemy Metallique Acrylic paints and Prima Marketing Art Alchemy Metallique waxes on the metal embellishments. I used the Tim Holtz Idea-Ology Alpha Time Chipboard Letters for the name.

 I typed the sentiment on brown paper and sponged distress inks from Ranger Antique Linen ink around the edges. I used left over pieces of the Stamperia paper and glued it on the inside of the box and used Beacon 3 n 1 Advance glue to glue the sentiment.
 |
| Stamperia 12 x 12 Voyages Fantastiques paper collection |


 |
| Back of box |

I hope I have inspired you try out these products available at The Rubber Buggy on-line store. My cards and projects are always posted on Saturday. Keep watching and thank you so much for those wonderful comments as well as suggestions.
Enjoy and Happy Crafting!
 |
Subscribe to:
Posts
(Atom)


