Showing posts with label sizzix. Show all posts
Showing posts with label sizzix. Show all posts
Thursday, September 16, 2021
Happy Moments
Hi everyone, Steph Ackerman here today with lots of fun products from the store.


I've used the Folk Flowers - SizzixThinlits Dies by Tim Holtz to create this card. I die cut it from white cardstock and used assorted Distress Oxide Inks - Weathered Wood, Dried Marigold, to add color to the panel.

I matted the panel with Simple Stories Cardstock, then wrapped it with sheer ribbon.

The panel was added to a yellow card with 3D Foam Adhesives for dimension. The sentiment was stamped with Lawn Fawn Black Licorice Ink, die cut with Lawn Fawn Small Stitched Circle Die, then matted with Lawn Fawn Large Stitched Circle Die.
Finally, baker's twine was tie to the ribbon.
Thank you for visiting
Thursday, June 10, 2021
You Brighten My Day with Simple Stories
Hi everyone, Steph Ackerman here today with lots of fun products from the store.


I wanted to create a bright and colorful card using one of the frames from the Simple Stories - Simple Vintage Farmhouse Garden Chipboard Frames set.

I wanted the frame to stand out but wanted some background dimension on the card so I used the Ciao Bella Blossom Stencil.

I used Ranger Distress Oxide Ink in Abandoned Coral, repeatedly moving the stencil around the card.

I poured Ranger Clear Embossing Powder over the stenciled design and used the Sizzix Making Essentials Anti Static Funnel Tray to catch the embossing powder. I usually get embossing powders and glitters everywhere, but this tray made it so easy to keep the embossing powder from exploding.

I think it made a wonderful background for the card.

I cut a panel of Simple Stories Vintage Farmhouse Garden to fit behind one of the frames, then adhered the panel to the card. Inside the card, I added another sheet of paper from this collection to finish.

The phrase was stamped with Lawn Fawn Black Licorice Ink, die cut with Lawn Fawn Small Stitched Circle Die and matted with a larger die.
Thank you for visiting
Thursday, September 24, 2020
Bird Cage Slimline Cards
Hi everyone, Steph Ackerman here today with lots of fun products from the store. Please visit the store for all the fun products I've used today.


I started by adhering Lawn Fawn Knock on Wood papers to Sizzix Mat Board, then running it through my Big Shot with Tim Holtz Alterations Cage Bird Die by Sizzix.

Since I die cut 3 sets, I moved the birds around till I liked how they looked on the cages. I then glued them to the cages using Art Institute Glue.

I inked the cages with Tim Holtz Distress Oxide Ink in Ground Espresso using a Ranger Ink Blending Tool. Add some twine to the bird cages.

I used Lawn Fawn Large Slimline Dies and Lawn Fawn Small Slimline Dies to create my layers from Maja Design papers - Vintage Summer Basics 1936, Vintage Summer Basics 1943 and Vintage Summer Basics 1903.


Using Penny Black Stamps - Special Thoughts - I chose the phrases I wanted to use, inked them with Lawn Fawn Black Licorice ink and stamped them on scraps of the same papers.

Creating cards from Bazzill cardstock, I used a Scor-Pal Scoring Board to create the creases in the cardstock, so the cards folded easily. Then I assembled the cards, mixing the layers. Using Mat Board elevates the bird cages to a 3 dimensional look on your cards.

This card could be sent to someone who is not feeling quite well.

This card could be sent to someone you are missing.

This card could be sent to someone to cheer them up.

There are lots of possibilities when you mix and match your stamps, dies and papers.
Thank you for visiting
Thursday, August 20, 2020
Seek and Travel Cards
Hi everyone, Steph Ackerman here today with lots of fun products from the store. Please visit the store for all the fun products I've used today.

I know we can't travel at the moment, but that doesn't stop us from thinking about traveling. I, for one, am so looking forward to the time when traveling is no longer an issue! The Sizzix Thinlets words were perfect for these cards and they each come with 2 layers. They were die cut from Maja Designs Vintage Ships and Lawn Fawn Kraft cardstock.

I've used Stamping Bella's Uptown Girls - Sunny is Stylish - for both my cards, coloring them with Copic Markers. Fussy cutting around their legs, I used the Lawn Fawn Stitched Rectangle die to die cut them. Weathered Wood Oxide Ink was inked around the edges before they were added to kraft cardstock.

The cards were created from kraft cardstock and a striped panel from Maja Designs were added next. A strip of Maja Designs was matted with kraft cardstock and added to the cards. The girls were added with Scrapbook Adhesives 3d Foam Squares for dimension. The words where then added to the imaged with Tattered Lace Detail Glue.
Thank you for stopping by.
Thursday, June 25, 2020
Floral Fantasy Cards
Hi everyone, Steph Ackerman here today with lots of fun products from the store. Please visit the store for all the fun products I've used today.


Use the same products to create 2 coordinating cards. Start by creating cards from Bazzill Rock Candy and Gumdrop cardstocks.

Cut 2 pieces of Maja Designs Vintage Summer pattern paper to 4" x 5 1/4". Ink the edges with Tim Holtz Mahogany Distress Ink. Use a Tutti Designs Oval die to cut an oval from the center of one of the panels. Stamp the cross pattern from Gabi's Daisies stamp set on Neenah white cardstock with Memento Tuxedo Black Ink. Adhere behind the die cut panel. Add drops of Liquid Pearls Merlot and Raspberry to the flower pieces.

Place 2 Tutti Oval dies on Simple Stories Brick cardstock and die cut. Pull apart the ovals. Use the outer piece to create the frame around the opening and place the center piece aside for the 2nd card. Use Sizzix Funky Foliage dies to die cut mushrooms, leaves and flowers from left over papers. Ink the mushrooms with Tim Holtz Old Paper Distress Ink before assembling. Adhere the flowers, leaves and mushrooms around the oval.
Add the panel to Brick cardstock then to the Gumdrop card. Stamp a phrase from the Tim Holtz Tiny Text stamp set on a scrap of the pattern paper, die cut with a small Tutti Designs oval and mat with a larger die. Add to the card with Scrapbook Adhesives.

For my 2nd card, I used the same Gabi's Daisies stamp, and stamped it on the left over oval from above using VersaMark Watermark stamp pad and Lawn Fawn White embossing powder. Heat set and adhere to a larger oval die cut from gray cardstock and place in the center of the panel.

Using the same papers, die cut additional flowers and leaves and place around the oval. Stamp another phrase from the Tiny Text stamp set. Die cut and mat with 2 additional larger layers.
Add the panel to the Rock Candy card with Scrapbook Adhesives for dimension. Add Merlot Liquid Pearls to the flower centers.
Thank you for visiting
Thursday, June 4, 2020
Summer Travel Treats
Hi everyone, Steph Ackerman here today with lots of fun products from the store. Please visit the store for all the fun products I've used today.


Thank you for visiting

Using Scor-Pal, I created a set of cards from Bazzill Jawbreaker Cardstock and Lawn Fawn Kraft Cardstock. I used papers from the Maja Design Life by the Sea and Sommartider collections to complete the cards. The top layers of the cards were die cut using Lawn Fawn Stitched Rectangle Dies.

I also created a coordinating set of gift bags which I'll fill with little odds and ends for the traveler. The top layers were die cut using Lawn Fawn Stitched Rectangle Dies.

I used Sizzix Thinlit Dies by Tim Holtz, die cutting the words from scraps of the pattern papers I used for the cards and gift bags. The mats were die cut from Bazzill Jawbreaker Cardstock.

Tattered Lace Detail Glue with it's fine tip was used to adhere the word layers together.
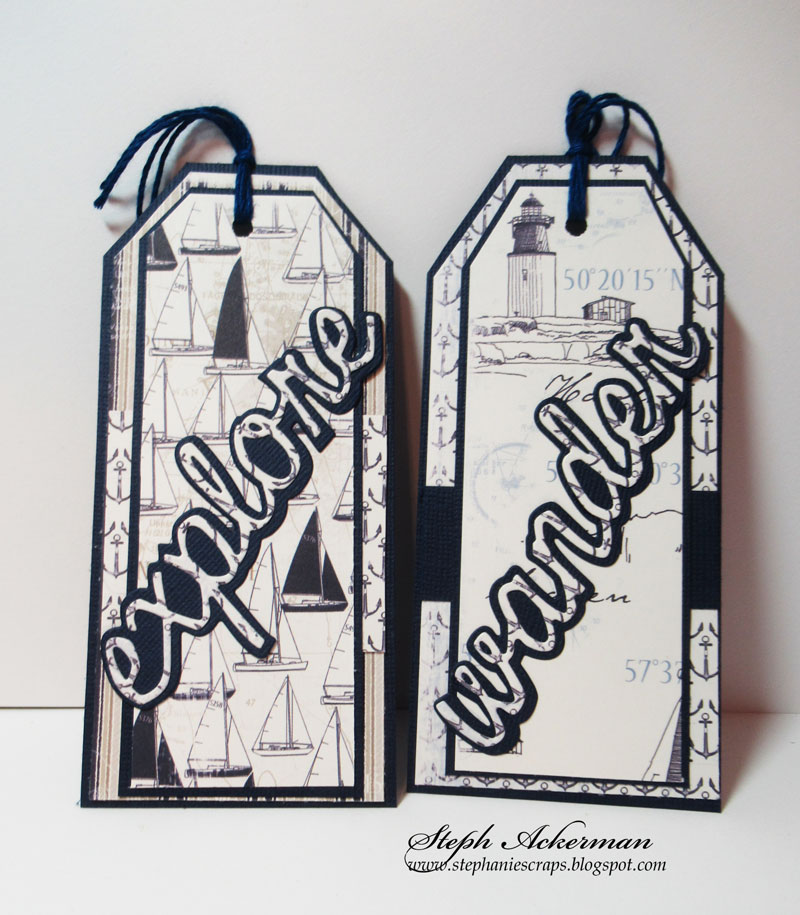
Creating tags from Bazzill Jawbreaker Cardstock, I added assorted layers and placed words on top. Twine was added to each tag.

Happy Summer from Lawn Fawn was die cut from Jawbreaker Cardstock and adhered across each card using the Tattered Lace Detail Glue.

This would be a nice set to give to someone planning on traveling this summer.

Fill the gift bags with little treats, or perhaps a pad and paper for doodling.
Thursday, March 19, 2020
Fly Butterflies
Hi everyone, Steph Ackerman here today with lots of fun products from the store. Please visit the store for all the fun products I've used today.


Thank you for visiting
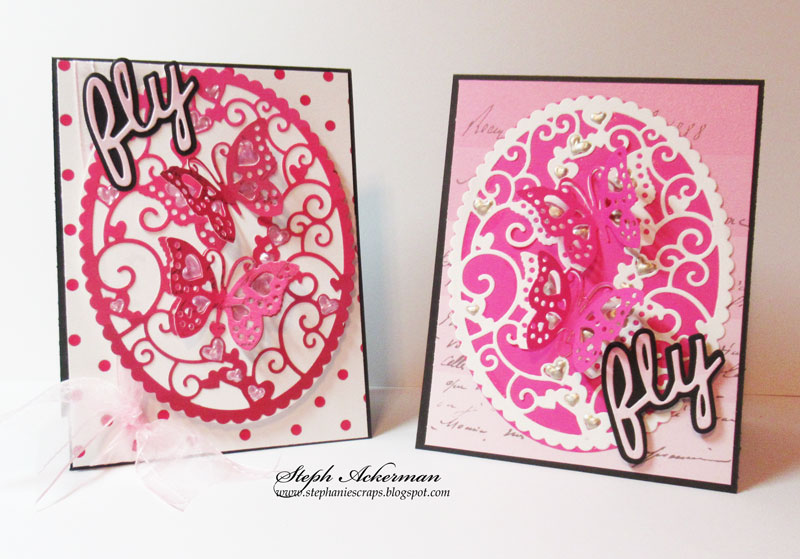
Today I'm using the Tutti Designs Butterfly Dance Die. This scalloped oval die has butterflies floating in the center. I wanted them to appear to be in flight, so I cut another set of butterflies and added them to the base die cut.

After die cutting the butterfly image from Bazzill Marshmallow cardstock, it was placed atop a larger oval die cut from Bazzill Candy Hearts cardstock.

Butterflies were fussy cut and added to the base image. After creating the card from Bazzill Licorice Twist cardstock, a panel from Dress My Craft's Whispering Love was adhered to the card. Fly, from Sizzix Shadow Script #3 was die cut from the same papers and added to the corner with Scrapbook 3D Foam Adhesives for dimension. Liquid Pearls in Platinum were added to the small hearts surrounding the butterflies.

My second card uses additional papers from Dress My Craft's Whispering Love. May Arts Sheer Pink ribbon was wrapped around the panel before it was added to the card.

Liquid Pearls in Raspberry, were added to the small hearts surrounding the butterflies.

Thank you for visiting
Thursday, February 20, 2020
Wander and Explore Panel
Hi everyone, Steph Ackerman here today with lots of fun products from the store. Please visit the store for all the fun products I've used today.

I found some left over wood panels in a local craft store after the holidays and knew they would work for a mixed media project.

I began by adding gesso to the panel. Once dry, I sprayed Tim Holtz Distress Oxide Spray Inks in Cracked Pistachio, Mermaid Lagoon and Iced Spruce across the panel. Heat set each color, then use Tim Holtz Dotted Layering Stencil with modeling paste as well as Tim Holtz Slate Layering Stencil with modeling paste to add dimension. Allow to dry thoroughly.


Then go to town with assorted embellishment, adding them around the panel. Once all the elements are down, add Prima Art Stones randomly about the panel.

Finish the panel by adding die cut words from Sizzix Thinlits, Shadow #3. Die cut each from Bazzill Marshmallow and Licorice Twist cardstocks. Place them randomly around the panel.
Thank you for visiting

I found some left over wood panels in a local craft store after the holidays and knew they would work for a mixed media project.

I began by adding gesso to the panel. Once dry, I sprayed Tim Holtz Distress Oxide Spray Inks in Cracked Pistachio, Mermaid Lagoon and Iced Spruce across the panel. Heat set each color, then use Tim Holtz Dotted Layering Stencil with modeling paste as well as Tim Holtz Slate Layering Stencil with modeling paste to add dimension. Allow to dry thoroughly.

Using a script stamp with Memento Tuxedo Black Ink, stamp around the panel.


Finish the panel by adding die cut words from Sizzix Thinlits, Shadow #3. Die cut each from Bazzill Marshmallow and Licorice Twist cardstocks. Place them randomly around the panel.
Thank you for visiting
Subscribe to:
Posts
(Atom)


