Showing posts with label liquid pearls. Show all posts
Showing posts with label liquid pearls. Show all posts
Thursday, April 8, 2021
Stamping Bella Thanks Card
Hi everyone, Steph Ackerman here to share a sweet thank you card.
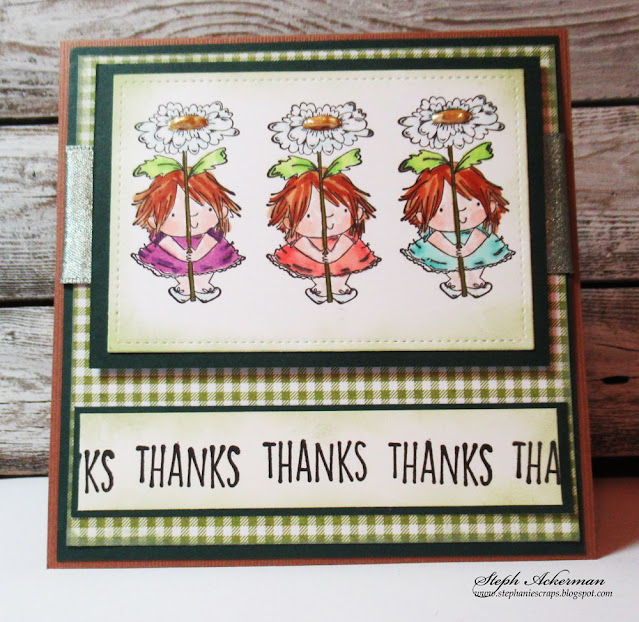


This Stamping Bella stamp set - Daisy Squidgy is so much fun to create with. The stamp set comes with 2 different sized images and a sentiment.

I stamped the smaller image three times on white cardstock, then die cut it with Lawn Fawn Small Stitched Rectangle Stackables. After coloring with Copic Markers, I added Liquid Pearls to the centers of the daisies. The panel was matted with Echo Park Dark Green Cardstock.

Creating a card from Echo Park Brown Cardstock, I wrapped a checked panel with ribbon and adhered the panel to the card.

Thanks was stamped repeatedly on a scrap of cardstock, then cut to fit the card.

Thank you for visiting
Thursday, September 10, 2020
Stamperia Designed Cards
Hi everyone, Steph Ackerman here today with lots of fun products from the store. Please visit the store for all the fun products I've used today.


Thank you for visiting
Stamperia has a line of decorative chips that can be used for assorted projects. I've used the Rose and Butterfly chips to create my cards today.

Start by inking the leaves and flowers with Copic Markers. Then lightly ink the lattice panel with Tim Holtz Squeezed Lemonade Ink. Use Tattered Lace Detail Glue to adhere the panel to the card base.

Using Liquid Pearls in Dazzle and Garnet, fill in the roses. Use Liquid Pearls in Electric to fill in the leaves. Place aside to dry. Once dry, I added some more liquid pearls to fill in the cavities.

Along the right side of the card, add a strip of Bazzill Gumdrop Cardstock. Ink the Stamperia Butterflies with Tim Holtz Tattered Rose Ink and adhere just the bodies to the cards, leaving the wings free. Hello Friend, from the Memory Box Bird Sanctuary Clear Stamp set was stamped on Marshmallow Cardstock with Lawn Fawn Black Licorice Ink, die cut and matted with Gumdrop Cardstock. It was added to the card with Scrapbook Adhesives for dimension.

For my second card, I chose to ink the roses with Tim Holtz Tattered Rose and Fired Brick Inks. The leaves were inked with Bundled Sage Ink.

Using Maja Designs Shades of Sweet Coral, Tear the panel and ink with Fired Brick before adhering to the card. Stamp the dots in Black Licorice Ink using a stamp from the Bird Sanctuary collection. Also stamp Hello friend on a scrap of the Coral paper. Assemble the card and adhere the roses and leaves. Place the sentiment across the bottom edge and place one of the left over leaves on the strip.

Thursday, August 13, 2020
Happy Fall Card
Hi everyone, Steph Ackerman here today with lots of fun products from the store. Please visit the store for all the fun products I've used today.

Fall will be here before we know it so I'm starting on fall cards for family and friends. Using a stamp from my stash I stamped it with Lawn Fawn Soot Ink. Then I colored the image with Copic Markers. Then, I used the Lawn Fawn Stitched Rectangle dies to die cut the image.


Fall will be here before we know it so I'm starting on fall cards for family and friends. Using a stamp from my stash I stamped it with Lawn Fawn Soot Ink. Then I colored the image with Copic Markers. Then, I used the Lawn Fawn Stitched Rectangle dies to die cut the image.

Before removing the die, I added color around the stamped image with Distress Oxide Inks in Speckled Egg and Dried Marigold using a Ranger Ink Blending Tool. This gives a nice line of color and a white band around the edge of the image.

I wanted to highlight the design so I adhered it to an orange burlap panel and frayed the edges.

The panel was matted to a wood background panel from Lawn Fawn Knock on Wood Paper Pad. This was then adhered to a white card.

Happy Fall is a Lawn Fawn Border Die, which was die cut from 7Gypsies Paper and adhered to the lower corner of the card using Tattered Lace Detail Glue.

To finish, I added Ranger Liquid Pearls and Nuvo Crystal Drops about the pumpkins.
Thank you for visiting
Thursday, June 25, 2020
Floral Fantasy Cards
Hi everyone, Steph Ackerman here today with lots of fun products from the store. Please visit the store for all the fun products I've used today.


Use the same products to create 2 coordinating cards. Start by creating cards from Bazzill Rock Candy and Gumdrop cardstocks.

Cut 2 pieces of Maja Designs Vintage Summer pattern paper to 4" x 5 1/4". Ink the edges with Tim Holtz Mahogany Distress Ink. Use a Tutti Designs Oval die to cut an oval from the center of one of the panels. Stamp the cross pattern from Gabi's Daisies stamp set on Neenah white cardstock with Memento Tuxedo Black Ink. Adhere behind the die cut panel. Add drops of Liquid Pearls Merlot and Raspberry to the flower pieces.

Place 2 Tutti Oval dies on Simple Stories Brick cardstock and die cut. Pull apart the ovals. Use the outer piece to create the frame around the opening and place the center piece aside for the 2nd card. Use Sizzix Funky Foliage dies to die cut mushrooms, leaves and flowers from left over papers. Ink the mushrooms with Tim Holtz Old Paper Distress Ink before assembling. Adhere the flowers, leaves and mushrooms around the oval.
Add the panel to Brick cardstock then to the Gumdrop card. Stamp a phrase from the Tim Holtz Tiny Text stamp set on a scrap of the pattern paper, die cut with a small Tutti Designs oval and mat with a larger die. Add to the card with Scrapbook Adhesives.

For my 2nd card, I used the same Gabi's Daisies stamp, and stamped it on the left over oval from above using VersaMark Watermark stamp pad and Lawn Fawn White embossing powder. Heat set and adhere to a larger oval die cut from gray cardstock and place in the center of the panel.

Using the same papers, die cut additional flowers and leaves and place around the oval. Stamp another phrase from the Tiny Text stamp set. Die cut and mat with 2 additional larger layers.
Add the panel to the Rock Candy card with Scrapbook Adhesives for dimension. Add Merlot Liquid Pearls to the flower centers.
Thank you for visiting
Monday, April 3, 2017
Nautical is Amazing

Hi ... Bev here today. I am totally loving all this Nautical scrapping. I have amazing photos, great paper colours, accents and with a touch of Creative Embellishment stamping and a few chipboards it looks amazing for sure. I am using papers from The Rubber Buggy Maja Design Sommartider Collection.
Supply List:
The Rubber Buggy Products
Paper: Maja Design Sommartider
Chipboards: Creative Embellishment Nautical Lighthouse, Nautical 6 Piece Set, Spider Web Panel
Stamp: Creative Embellishment Distressed Corner
Other: Sew Easy Ink Roller, burlap pieces, black pen

For this page I started with a background paper with edges and added some upper and lower borders. I then added some spiratic stamping. for the background.

I am using more than 1 photo again so I am matting a circular matted fish photo and the other photos needed a touch of rustic so I got the spider web chipboard and some pieces of burlap. It is a great base for this type of sports photos. The upper corner has some enamel dots and the sew easy roller make great accent lines.

This nautical wheel was inked to dark brown and then I added liquid pearls to pop the whole/circles. Also added a few more enamel dot accents.

This awesome fish photo is highlighted with the fabulous chipboard panel left in it's natural state.

This amazing tall lighthouse was inked with a few colours to get the details of the layers to show.. Black accents were the finishing touch.


Monday, June 6, 2016
Apple of my Eye using Heartfelt Creations Classic Sunflower Collection

Hi ...it's Bev. How is your day going? I have been crafting with the Heartfelt Creations Classic Sunflower Collection. This collection is from The Rubber Buggy. What fabulous designs, colours and the sunflower accents whether single and flat or fussy cut and popped up for depth and 3D looking are all amazing.
This is a page of the 2 youngest Grand Children in what is their yearly fall family photo session. Love taking photos for them and then creating memories for their albums.
Supply List:
Paper: Classic Sunflower Collection
Markers: Copics
Accents: stickles, Liquid Pearls
Other: burlap, ribbon

In the close ups you get to view the details better. This section shows and copic coloured chipboard accents, the layers of paper and the fun clustered layers and accents of tickets, burlap and a cute tied bow make of ribbon.
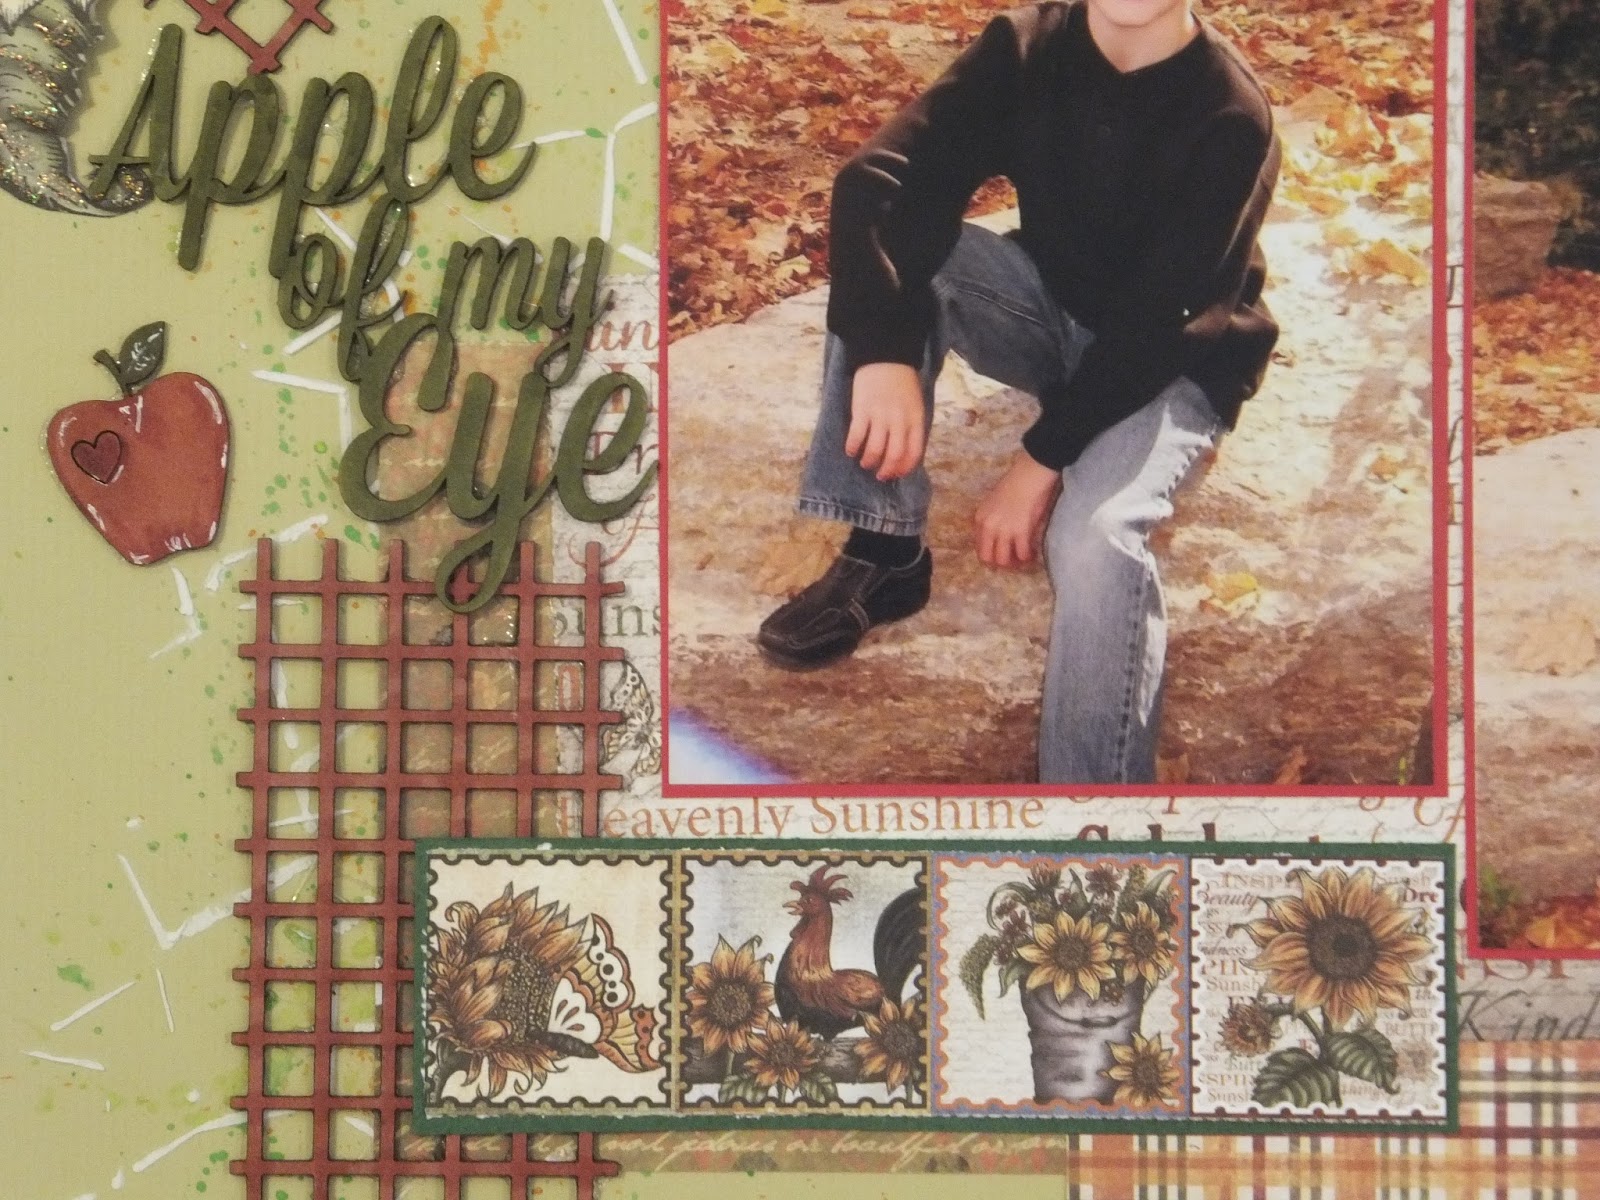
The title is copic coloured chipboards with some added signo white gel markings. There is a fun border accent of paper looking stamp size images.

The central section is the photos with a matting to pop them off the page.


Thanks for visiting and see you again soon.

Subscribe to:
Posts
(Atom)