Wednesday, May 31, 2017
Vintage Cards with Netra
7:48 AM
Vintage lover? Me too !
I am so into the vintage style at the moment.
I decided to use 49th and Market papers and Tim Holtz die cuts.
You'll love the combination.
For this first card I used tiny ephemera pieces. I just tucked them
in under the edges. I also used the Wild Flower Die by Tim Holtz...a fave.
For this card I used some Prima Flowers and a metal butterfly.
I also stamped directly onto the patterned paper to create my
own ephemera.
I hope you enjoyed. Be sure to mix and match your favorite companies.
You're sure to create a stunner.
Products Used
Prima Color Philosophy Inks (hands down a must have)
Thank you for visiting
Tuesday, May 30, 2017
Pointsettia Tilda's Versatility
2:49 PM
Hi it's Jennifer here with a Magnolia Card.
I though I would do something different I have looked
at this stamp since I got it and Loooooved it the only
thing was it was a bit late for Christmas and it kept saying
Bumble Bee to me so this week I turned her into a Bumble Bee
next week I will turn her back into to Christmas ready for
Christmas in July and show you how versatile she is. You
can also look at your other Christmas Stamps and see if you
could use them for different occasions through out the year too.
So the stamp I have used is Pointsettia Tilda. I have used
Papers from Lawn Fawn Water Colour Wishes and Prima
I also contemplated using the Pion Papers To My Valentine.
Also one of my favorite is Dohickey Leaf and Swirl Die.
The Flowers are a mix from Wild Orchid Flowers.
Pearls are Melissa Frances ones coloured with Copics.
Copics used
Face - E0000, E000, E00, E01, E11, E13, R20
Hair - E25, E27, E29, E30
Flower - C03, C01, C0
Yellow Strips and Flower Centre - Y11, Y15, Y18, YR23
Black Stripes - C3, C5, C7, N9
The Rubber Buggy Shop and don't forget to visit us on Facebook
look for the Videos down the side too, Instragram and the
Rubber Buggy Design Team Blog where there's a post nearly
everyday from one of the team.
look for the Videos down the side too, Instragram and the
Rubber Buggy Design Team Blog where there's a post nearly
everyday from one of the team.
Happy Crafting
Jennifer
Monday, May 29, 2017
Super fun projects using Maja Design Sommartider Collection
12:00 AM
Today at The Rubber Buggy I am thrilled to share a few projects using Maja Design Sommaritider Collection and many other accents.
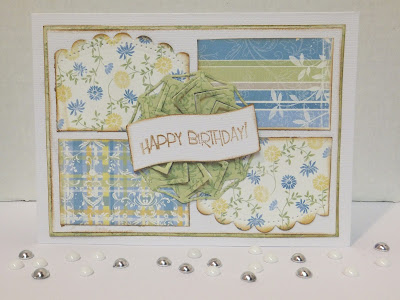
Up first is a cute birthday card that any one would love.. lots of different shapes, inked edges and a stamped sentiment.
This super cute pillow box is great for any small fun surprise for any child, for a gift box on the table for parties or for small size gifts too.
And up last is a super fun tag with great background stamping, stenciling and fabulous layer topped with some decorated chipboard.
Supply List:
Paper: Maja Design Sommaritider
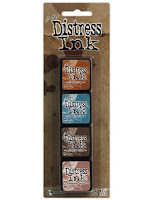
Ink: Tim Holtz ranger mini pads
Dies Spellbinders
Other: cardstock, stamp/die sentiment, Creative Embellishments small word sentiments, trim, ribbon, flowers, pillow box template, pearls
Ink: Tim Holtz ranger mini pads
Dies Spellbinders
Other: cardstock, stamp/die sentiment, Creative Embellishments small word sentiments, trim, ribbon, flowers, pillow box template, pearls
Thanks for stopping by today....see you again soon.
Saturday, May 27, 2017
My Wishes For You
12:00 AM
Welcome back and I am excited to share with you some of the gorgeous Heartfelt Creations dies and stamps that was purchased at The Rubber Buggy on-line store.
This card measures 7" x 7" on the outside. The gold metallic card stock measures 7" x 7" and the cream frame measures 6 1/4" x 6 1/4".
Supplies:
Heartfelt Creations Fleur Border Die
Heartfelt Creations Sunrise Lilies stamp set
Heartfelt Creations Sunrise Lilies die set
Heartfelt Creations Wishes Stamp set
Heartfelt Creations Deluxe Flower Shaping tool set
Blue Fern Studio Autumn Anthology Penmanship paper
3D Scrapbook Adhesive
Go Green Artquest Mini Prills
My Sweet Petunia Misti - Regular size
Copic Markers
Ranger Archival Ink Pad - Sepia
Ranger Archival Ink Pad - Olive
Ranger Lavender Field Ink
Memento Black Tuxedo Ink
Instructions:
I used two square dies to made the cream frame. I cut four borders using the small corner border in the Heartfelt Creations Fleur Border die set and adhere the die cuts on the back of the cream frame. I used the 3D Scrapbook Adhesives 3D foam tape on the back of the frame to adhere to the Blue Fern Studio Autumn Anthology Penmanship paper.
I stamped using Ranger Sepia ink and die cut out two of the small Heartfelt Creations Sunrise Lilies with white shimmer paper. I sponged Ranger Lavender ink on the tips of each petal and used Copic Marker YG05 for the center. Shape the flowers using a flower shaping tool like the Heartfelt Creations Deluxe Flower Shaping set. I die cut two of the small stamens in the Heartfelt Creations Sunrise Lilies die set with yellow/green paper. I added glue to each tip of the stamen and dipped the stamen in the Go Green Artquest Mini Prills. Let dry for about 10 minutes.
I stamped the Heartfelt Creations Stamp Wishes sentiment and flower set except for the lily with Ranger Olive. I had to use just scissors to cut out the two flower sets since I didn't have the Heartfelt Creations Sunrise Lily Bouquet die set that would have been easier to use. I colored the flower sets with Copic Markers.
If you seen my other cards before, you would have seen the Heartfelt Creations Stamp Wishes sentiment since I love this so much. "My Wish For You" was stamped in front of the card.
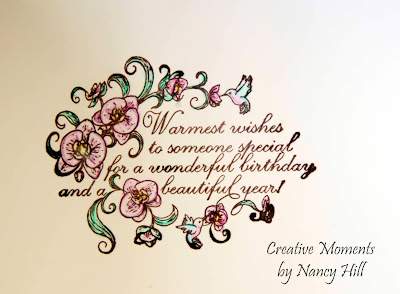
I cut out a 7" x 7" cream paper and stamped this gorgeous Heartfelt Creations Stamp Wishes sentiment using the My Petunia Misti Stamp tool with the Memento Black Tuxedo ink and colored the flowers and birds with colored pencils since I wanted the details to show up more. I adhere it to the inside of the card.
The Rubber Buggy Design Team has something new to share with you each day. Pop in and see for yourself what is being shared by this talented group of inspiring designers!!
Have a fabulous crafting day!
I'll be back again next Saturday with a new card or project.
In the meantime, here are all The Rubber Buggy quick links you will need:
Thank you again for stopping by
Nancy Hill
Thursday, May 25, 2017
Prima Gal Cards
8:00 AM
Hi everyone, Steph Ackerman here today working with a bunch of products from the Rubber Buggy Store. Have you checked out the store lately? It has so many wonderful new products.
I created 3 different Prima Gal cards using the Photoplay Julie Nutting French Flea Market collection.
My next card uses another print from the Photoplay pack and the left over scrap from my first card. All were matted with Bazzill Candy Bar cardstock. The phrase is also from one the sheets in the paper pack and I simply die cut the oval shape. The Prima girl was colored with Copic Markers, then fussy. She was placed on the oval with foam adhesives.
And my final card incorporates two papers from the Photoplay paper pack, each matted with Bazzill Candy Bar cardstock. The phrases are also from one the sheets in the paper pack. I placed them on top of a die cut oval. The Prima girl was colored with Copic Markers, then fussy. She was placed on the oval with foam adhesives.
Thank you for visiting
I created 3 different Prima Gal cards using the Photoplay Julie Nutting French Flea Market collection.
The colors in this paper pack are amazing and coordinate so well together. I began by inking the word paper with brown ink, matting it with Bazzill Candy Bar cardstock, then added a Spellbinders die cut oval in the center. I stamped and colored the Prima girl with Copic Markers, then fussy cut her. The phrase is from one the sheets in the paper pack and the girl was added on top with foam adhesives.
My next card uses another print from the Photoplay pack and the left over scrap from my first card. All were matted with Bazzill Candy Bar cardstock. The phrase is also from one the sheets in the paper pack and I simply die cut the oval shape. The Prima girl was colored with Copic Markers, then fussy. She was placed on the oval with foam adhesives.
And my final card incorporates two papers from the Photoplay paper pack, each matted with Bazzill Candy Bar cardstock. The phrases are also from one the sheets in the paper pack. I placed them on top of a die cut oval. The Prima girl was colored with Copic Markers, then fussy. She was placed on the oval with foam adhesives.
Three different cards from one paper pack and there is plenty of paper left to create some more cards.
Thank you for visiting
Wednesday, May 24, 2017
How Do You Journal? with Netra
5:49 AM
So excited to talk to you today!
I am very passionate about writing
and journal keeping.
When I saw that the 7 Gypsies came up with
Spiral Notebooks, I had to get one.
This is the one I choose. I love it.
I wont do anything to the front.
They are very beautiful and I can't wait to get another.
These are the inside pages of the Architextures Spiral Bound Ledger Book 5"X7"
I decorated my first page and I used some of my favorites from
The Rubber Buggy Shop.
The Tim Holtz Die Cuts Packs
are a must have.
They go so well with a vintage theme and are perfect for journal decoration.
I also added some stamped images from
Tim Holtz Stamp Sets using the new (wonderful) Prima Color Philosophy Inks.
I hope you like this journal decoration.
Thank you for visiting
Products Used
Tuesday, May 23, 2017
Up and Away
5:06 PM
Hi it's Jennifer here and today I created a Shaker Card
using this Beautiful Stamp and Sentiment
The dies I have used to create the frame are
Stitched Rectangle Frame inside the
Fancy Scalloped Rectangle Stackables to add a nice feature
where as last fortnight I layered them.
I have used Distress Ink Pads Picked Raspberry, Festive Berries
and Peacock Feathers for the Background.
I have used Glossy Accents over the balloons to give dimension.
I have popped in the shaker matching Sequins to my inks.
I have then layered it on aqua Bazzill and then on to a white
card base.
I have popped in the shaker matching Sequins to my inks.
I have then layered it on aqua Bazzill and then on to a white
card base.
All these products and more are avaliable at the
The Rubber Buggy Shop and don't forget to visit us on Facebook
look for the Videos down the side too, Instragram and the
Rubber Buggy Design Team Blog where there's a post nearly
everyday from one of the team.
look for the Videos down the side too, Instragram and the
Rubber Buggy Design Team Blog where there's a post nearly
everyday from one of the team.
Happy Crafting
Jennifer
Monday, May 22, 2017
"Family" using Photoplay Fresh Picked Collection
12:00 AM
Hi ... Bev here today at The Rubber Buggy. I chose Photoplay Fresh Picked collection with fun bright colors, floral print flowers and even more flowers from Petaloo worked perfect together.
These photos are of my family and the grand kids..... always one of my favourite things to scrap is my family. The addition of lots of chipboard, stickers, use of a stamp and a flair button completes my page.
Supply List:
The Rubber Buggy Products
Ink: Tim Holtz mini pads, Stickles
Chipboards: Creative Embellishments Flourish Butterfly Set. Family Banners, Sunflower Border
Stamp: Creative Embellishments Half Tone Circle
Button: Creative Embellishments Flair Season's Change
Other: cardstock, Petaloo flowers, gel dots, bead heart
To start this page I ink stamped and textured the corners.
Next I matted the photos and pulled, cut and layered my proposed paper placement.
After inking and colouring all the chipboards I placed them onto the page.
Some paper accents from the collection were added for depth and colour. Coloured chipboards were added and flowers too.
Here we view s bit of the title, matted heart with bead centre and butterfly accent.
This amazing floral chipboard was coloured in multi tones, added stickles for sparkle and then some clusters of flowers were added.
More flowers clustered, a flair button and a great paper collection tag accent this corner.


Thanks for visiting today... sure hope to see you again soon.
Sunday, May 21, 2017
Thinking of You
9:35 PM
Hi Everyone it's Jennifer with a late post this week as
we all haven't been well at our house with colds.
So I have created a sympathy card in water colour.
I have used this Beautiful stamp set
and using Tim Holtz Water Colour Paper
I have stamped the flower in
Silver Pearl Embossing Powder and the
sentiment in Black Embossing Powder. I have then
coloured it in using Distress Markers and Distress Inkpads
using the colours Barn Door, Festive Berries, Fired Brick,
Worn Lipstick, Forrest Moss, Bundled Sage and Peeled Paint
using the Tim Holtz Water Brush Detailer
I layered it on Red and Black Bazzill and finished it of with
a scatter of clear sequins.
Just keeping it simple.
All these products and more are avaliable at the
The Rubber Buggy Shop and don't forget to visit us on Facebook
look for the Videos down the side too, Instragram and the
Rubber Buggy Design Team Blog where there's a post nearly
everyday from one of the team.
look for the Videos down the side too, Instragram and the
Rubber Buggy Design Team Blog where there's a post nearly
everyday from one of the team.
Happy Crafting
Jennifer
Subscribe to:
Comments
(Atom)
Total Pageviews

Powered by Blogger.


-
▼
2017
(282)
-
▼
May
(24)
- Vintage Cards with Netra
- Pointsettia Tilda's Versatility
- Super fun projects using Maja Design Sommartider C...
- My Wishes For You
- Prima Gal Cards
- How Do You Journal? with Netra
- Up and Away
- "Family" using Photoplay Fresh Picked Collection
- Thinking of You
- Splash and Bubbles Birthday Card
- Baby Card using Maja Design Papers
- Sending My Love
- Vintage Planner Decoration with Netra
- Florida using Simple Stories from The Rubber Buggy
- Mother's Day Card for Daughter
- Relaxation in Every sip
- #StayWild Layout with Netra
- Tilda with Spring Pallet
- A Laugh is a Smile that Burst using Blue Fern Stud...
- Flowering Dogwood Happy Birthday Card
- On Your Big Day......
- "Hello Spring" Spring Card with Netra
- Stamping Bella Style
- Special Moments at The Rubber Buggy
-
▼
May
(24)


