Lawn Fawn Smores Treat Bag
Each card measures 4" x 5 1/2". I sponged the Ranger Distress inks: Distress Oxide Chipped Sapphire, Distress Oxide Blueprint Sketch and on one, Distress Oxide Faded Jeans on the sky and used the Uni-ball White pen for some of the stars. The silver stars were cut out with the Lawn Fawn Starry Skies die for each card and adhered with Beacon 3-in-1 Advanced glue. I found some older plaid paper collection to cut out the tent. I fussy cut the critters and colored with Copic Markers. I added the Lawn Fawn Forest Tree border to the background along with the Lawn Fawn Grassy Border.
The shooting star is still from the Lawn Fawn Starry Skies die set. This time, I sprayed some water after sponging on the Ranger Distress for the sky. Since I made a big boo boo on part of the sky, I just cut out a circle for a moon and glued it over the mistake. I added the Lawn Fawn Bear Sweet Den stamp set to this card. I adhered the Lawn Fawn Stitched Hillside Border to the background. I cut out the camp sign from the Lawn Fawn Build A Camp Site with dark brown and cream cardstock. I just used the CAMP die and cut it through one of the dark brown cardstocks after cutting out the CAMP with the cream cardstock. I glued the cream colored letters of CAMP in the sign. I just die cut an addition dark brown and cut off the arrow on the die cut sign and glued the two signs together to get the other end to match of the sign. The adorable hat on the bear is from the Lawn Fawn Dad and Me stamp set.
Travel Tags with Blue Fern Studios
Ciao Bella and Stamperia Take Your Time
Welcome back and Nancy, here. With so many colorful flowers, butterflies and dragonflies everywhere, I was inspired to create a shabby chic card using the gorgeous Ciao Bella Microscomos paper with the Stamperia Take Your Time stencil. 
Supplies: Purple and white cardstock, Ciao Bella Microscomos paper, Stamperia Take Your Time Stencil and Stamperia Gold Paste, Wild Orchid Craft flowers and flower stamin, , Handmade cream seam binding bow, NUVO White Blizzard glitter paste and a scallop doily.
Ciao Bella Stenciled Cards
Tunnel Card tutorial
Welcome back and Nancy, here. I love making cards but I always try to give them an interesting twist. This card looks regular on the outside but inside, there is a 3D surprise when you open it. A tunnel card lets you build up dimensional scenes on your paper craft projects, and it works really well to create fun-filled scenes. 
You can also make a tunnel card like I did with no scene l with the sentiment to make the wow factor when opening up the card.

Front of card 
Front of Card
Before gluing the sentiment or image to the inside, lay your tunnel piece (W shape) over the top of the sentiment or picture to visualize where you exactly want to see through the tunnel.
When your card base/inside sentiment is ready to go, turn the tunnel card stock over (important!) and glue just the outer panels on the back.
After adhere one side of the W to the inside of the card on the side, glue the other side of the W and then fold the card to stick the other side. This will align the part that pops out in the center with folding the card.This inside of the tunnel card was made with the Graphic 45 Catch Of the Day paper. Since my card was a little bit more that 12" in length, I was short on each side after gluing the W Shape. Therefore, I cut out and added borders from the Graphic 45 Catch of the Day collection to each end of the card. I wanted a porthole as a the tunnel but needed to be an oval shape to see the lighthouse well.
Tips: You can also play with where you'd like to place your embellishments around or inside the tunnel window. My biggest problem with cards like this is knowing when to stop!
So get crafting and have a fabulous day and thanks for visiting.
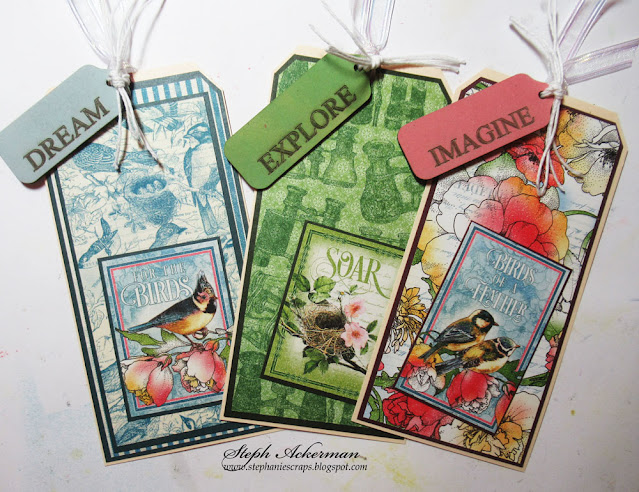
Graphic 45 Bird Watcher Tags
Zuri Design Dragon Fly Shabby Chic Card
 |
| Zuri Design Mould-Wings in Wind |
 |
| Tutti Design Celebrate |
 | |
| Stamperia Hortensia is available 12" x 12" or 8" x 8" So get crafting and have a fabulous day and thanks for visiting. The Rubber Buggy has the crafting supplies for your next project. So have fun crafting this weekend with these products. My cards and projects are always posted on Saturday. Keep watching and thank you so much for those wonderful comments as well as suggestions. Enjoy and Happy Crafting! |


