Thursday, August 20, 2015
Home Sweet Home
Hi everyone, Steph Ackerman here on this lovely Thursday. It's brutally hot here in New York and this card reminds me of day where the wind just rustles your hair.

Do you need to create an assortment of cards quickly? Well look no further than Graphic 45 pattern papers to start you on your way.
I've used Graphic 45's Home Sweet Home paper pad for this card. At 8" x 8", this pad is perfect for card making. I simply cut apart the main image, inked the edges with black ink and matted it with red and black cardstock before adding it back to the card.

For dimension, I fussy cut the sentiment, matted it with black cardstock, then added it to the card with foam adhesives. Can't you feel the breeze blowing?
Thank you for visiting

Do you need to create an assortment of cards quickly? Well look no further than Graphic 45 pattern papers to start you on your way.
I've used Graphic 45's Home Sweet Home paper pad for this card. At 8" x 8", this pad is perfect for card making. I simply cut apart the main image, inked the edges with black ink and matted it with red and black cardstock before adding it back to the card.

For dimension, I fussy cut the sentiment, matted it with black cardstock, then added it to the card with foam adhesives. Can't you feel the breeze blowing?
Thank you for visiting
Wednesday, August 19, 2015
Gorjuss Girl Doll Stand with Netra
He all !! I hope this week is being good to you !!
I have been having a very productive week so far.
I even got a chance to squeeze in some crafting.
So, If you have not been by the Rubber Buggy store you may have missed
the new addition of Gorjuss Girl Stamps !! I love those image soo much.
Even the packing is super pretty. There are many to choose. Did I mention the Price ??
Less than $8. For Rubber stamps. Now, you know that's a steal.
I was able to snag the image called "New Heights".
I colored her with my Colored pencils and Copics. Added her to some thick paper and embellished the "ground" she was standing on. Such a cute cute, project.


Thank you for visiting
Tuesday, August 18, 2015
December daily, ready - set - go!
Hi everyone!
Pi here with a post on preparation :)
I'm taking on a big big project this year. If you follow me, you'll know how much I love love Christmas. So this year I'm planning to take on a December daily. I love this idea of documenting such a magical time and I've watched endless videos of different styles. This year I'm trying something that I was inspired by Nicolejones911. She makes a December daily/project life, please watch her awesome work HERE.
I don't have the space of the time to make a special album for just December as I've seen many do. So I'll be using 12x12 pocket pageprotectors to go with my usual project life album. Only I'm changing the spread from weekly to daily. I'm using Lawn Fawn Snowy day collection from 2014 as my main inspiration. I've already cut the 12x12 papers in to 4x6 cards. For the 3x4 I'll cut up one of those as I go. Please have a look at some of the supplies I've put together, but I'll expect to add things as I go depending on the mood - plus, I have another box of Christmas supplies that is still hidden deep in the closet. You just wait until I get my hands on those goodies - LOL!

To start, I wanted the numbers for the days to look the same through out the month and I run until the 31st of Dec, so I thought I give it a go to make my own numbers - what a great way to actually use all my fancy tools - LOL! I'll admit, it took a while - but I'm so happy with the result. I'll do this for next year as well. I cut the numbers from heavy cardstock, both bazzill and neenah from the store will work great. The color is up to you, I used white, but the embossing powder will cover it. You might be able to save time here, if you have a more efficient method than me. But I just embossed half the number at the time, by simply dipping my number in the jar directly and then turning it after heat embossed it and repeated the process. I've had this embossing powder forever, it's gorgeous, I expected to make quite a dent, since I used it for so many numbers, but no...
Products from The Rubber Buggy:
Lawn Fawn 12x12 Snowy days collection kit
Magnolia 12x12 Vintage Christmas Snowy wood
Magnolia 12x12 Vintage Christmas Red Noel
Magnolia 12x12 Vintage Christmas Ice princess
Ranger embossing powder gold tinsel
Lawn Fawn stamp set Milo's ABC
Lawn Fawn stamp set Deck the halls
MFT die-namic Let it snowflake set
Thank you for visiting!
I hope you tune in for more Dec daily, it might seem like a long way to go. But I've learned that it tends to sneek up on you faster then you know it.
Pi here with a post on preparation :)
I'm taking on a big big project this year. If you follow me, you'll know how much I love love Christmas. So this year I'm planning to take on a December daily. I love this idea of documenting such a magical time and I've watched endless videos of different styles. This year I'm trying something that I was inspired by Nicolejones911. She makes a December daily/project life, please watch her awesome work HERE.
I don't have the space of the time to make a special album for just December as I've seen many do. So I'll be using 12x12 pocket pageprotectors to go with my usual project life album. Only I'm changing the spread from weekly to daily. I'm using Lawn Fawn Snowy day collection from 2014 as my main inspiration. I've already cut the 12x12 papers in to 4x6 cards. For the 3x4 I'll cut up one of those as I go. Please have a look at some of the supplies I've put together, but I'll expect to add things as I go depending on the mood - plus, I have another box of Christmas supplies that is still hidden deep in the closet. You just wait until I get my hands on those goodies - LOL!

To start, I wanted the numbers for the days to look the same through out the month and I run until the 31st of Dec, so I thought I give it a go to make my own numbers - what a great way to actually use all my fancy tools - LOL! I'll admit, it took a while - but I'm so happy with the result. I'll do this for next year as well. I cut the numbers from heavy cardstock, both bazzill and neenah from the store will work great. The color is up to you, I used white, but the embossing powder will cover it. You might be able to save time here, if you have a more efficient method than me. But I just embossed half the number at the time, by simply dipping my number in the jar directly and then turning it after heat embossed it and repeated the process. I've had this embossing powder forever, it's gorgeous, I expected to make quite a dent, since I used it for so many numbers, but no...
Products from The Rubber Buggy:
Lawn Fawn 12x12 Snowy days collection kit
Magnolia 12x12 Vintage Christmas Snowy wood
Magnolia 12x12 Vintage Christmas Red Noel
Magnolia 12x12 Vintage Christmas Ice princess
Ranger embossing powder gold tinsel
Lawn Fawn stamp set Milo's ABC
Lawn Fawn stamp set Deck the halls
MFT die-namic Let it snowflake set
Thank you for visiting!
I hope you tune in for more Dec daily, it might seem like a long way to go. But I've learned that it tends to sneek up on you faster then you know it.
Monday, August 17, 2015
Blue Fern Sketch and using Paisley & Vine Collection

Hi Bev here today at The Rubber Buggy . I am using Blue Fern Studios Paisley & Vine collection along with the Blue Fern Studios sketch of the month.

Supply List:
The Rubber Buggy Products:Paper: Blue Fern Studios Paisley & Vines
Doily:Unique
Stamp: Blue Fern Studios Deja Vu, Halftone
Chipboard: Blue Fern Studios Daisies Collage
Markers: copics
Ink: Tim Holtz Ranger
Sketch: Blue Fern Studios sketch
Other: Bella Creations timeless twine, signo white gel pen, micron 01 black pen, SVG cut files, cricut cut title, ranger stickles, ranger glossy accents

In this close up I used the matted doily to lighten up this section from the dark print background to place the copic coloured chipboard and finished with stickles for glitter.

In this section show case with the pop of red in the cricut cut title and the SSS SVG scalloped cut file and also added some red twine tied off in a bow. The title has glossy accents to give it a shiny finish.

A better view of the scalloped border with twine accent. And here is the closer look at using the Halftone stamp on the right side.

So many of us have lots of stamps that we usually use on cards only.. well not any more. Think outside the box and use those that could be a perfect accent on our layouts too. Here is one of the journal size tags from the paper collection and rather than writing on it I stamped it with Blue Fern Studios Deja Vu and also Halftone. It was a perfect accent.


Thanks for stopping by.. I love sharing with you. See you again soon.

Friday, August 14, 2015
Happy Birthday Celebrate!!
Hi everyone!!
Noe here to give you some crafting inspiration with "The Rubber Buggy" products!!
Today, one card to congratulate a birthday... A Celebrate Card, to give someone special!!

If you read me weekly you know that I love playing with my Distress inks and make my own backgrounds for my cards... so this time wouldn´t be different!!

I tryed new tecnique for me... different dies cuts are embedded in the cardstock, and I like the result! Look!!


It requires patience go placing small pieces of cardstock, but worth it!
Products used in this card:
- Abandoned Coral Distress Paint.
- Tangerine Dream Dylusion Spray.
- Happy Birthday Lawn Fawn Border Die
- Strictly Sentiment1 Stamps Wplus9
- Decor Celebrate Poppystamps Cratf Die
- Jet Black Archival ink
- Stamping Supplies
Have a great day!!
Thank you for visiting
Thursday, August 13, 2015
Flirty Girl
Hi everyone, Steph Ackerman here on this lovely Thursday.
Today I'm using my beloved Prima doll stamps. I adore them and love creating legal sized cards for friends. I've used Olive, a sassy gal with a flirty skirt and free flowing hair.

Using Bazzill cardstock, I created the card. I cut the cardstock too narrow, so I rescored it and added a ribbon between the layers for a different effect.

Olive was colored with Copic Markers and then fussy cut. She was added to the card with foam adhesives for dimension.
Thank you for visiting
Today I'm using my beloved Prima doll stamps. I adore them and love creating legal sized cards for friends. I've used Olive, a sassy gal with a flirty skirt and free flowing hair.

Using Bazzill cardstock, I created the card. I cut the cardstock too narrow, so I rescored it and added a ribbon between the layers for a different effect.

Olive was colored with Copic Markers and then fussy cut. She was added to the card with foam adhesives for dimension.
Thank you for visiting
Wednesday, August 12, 2015
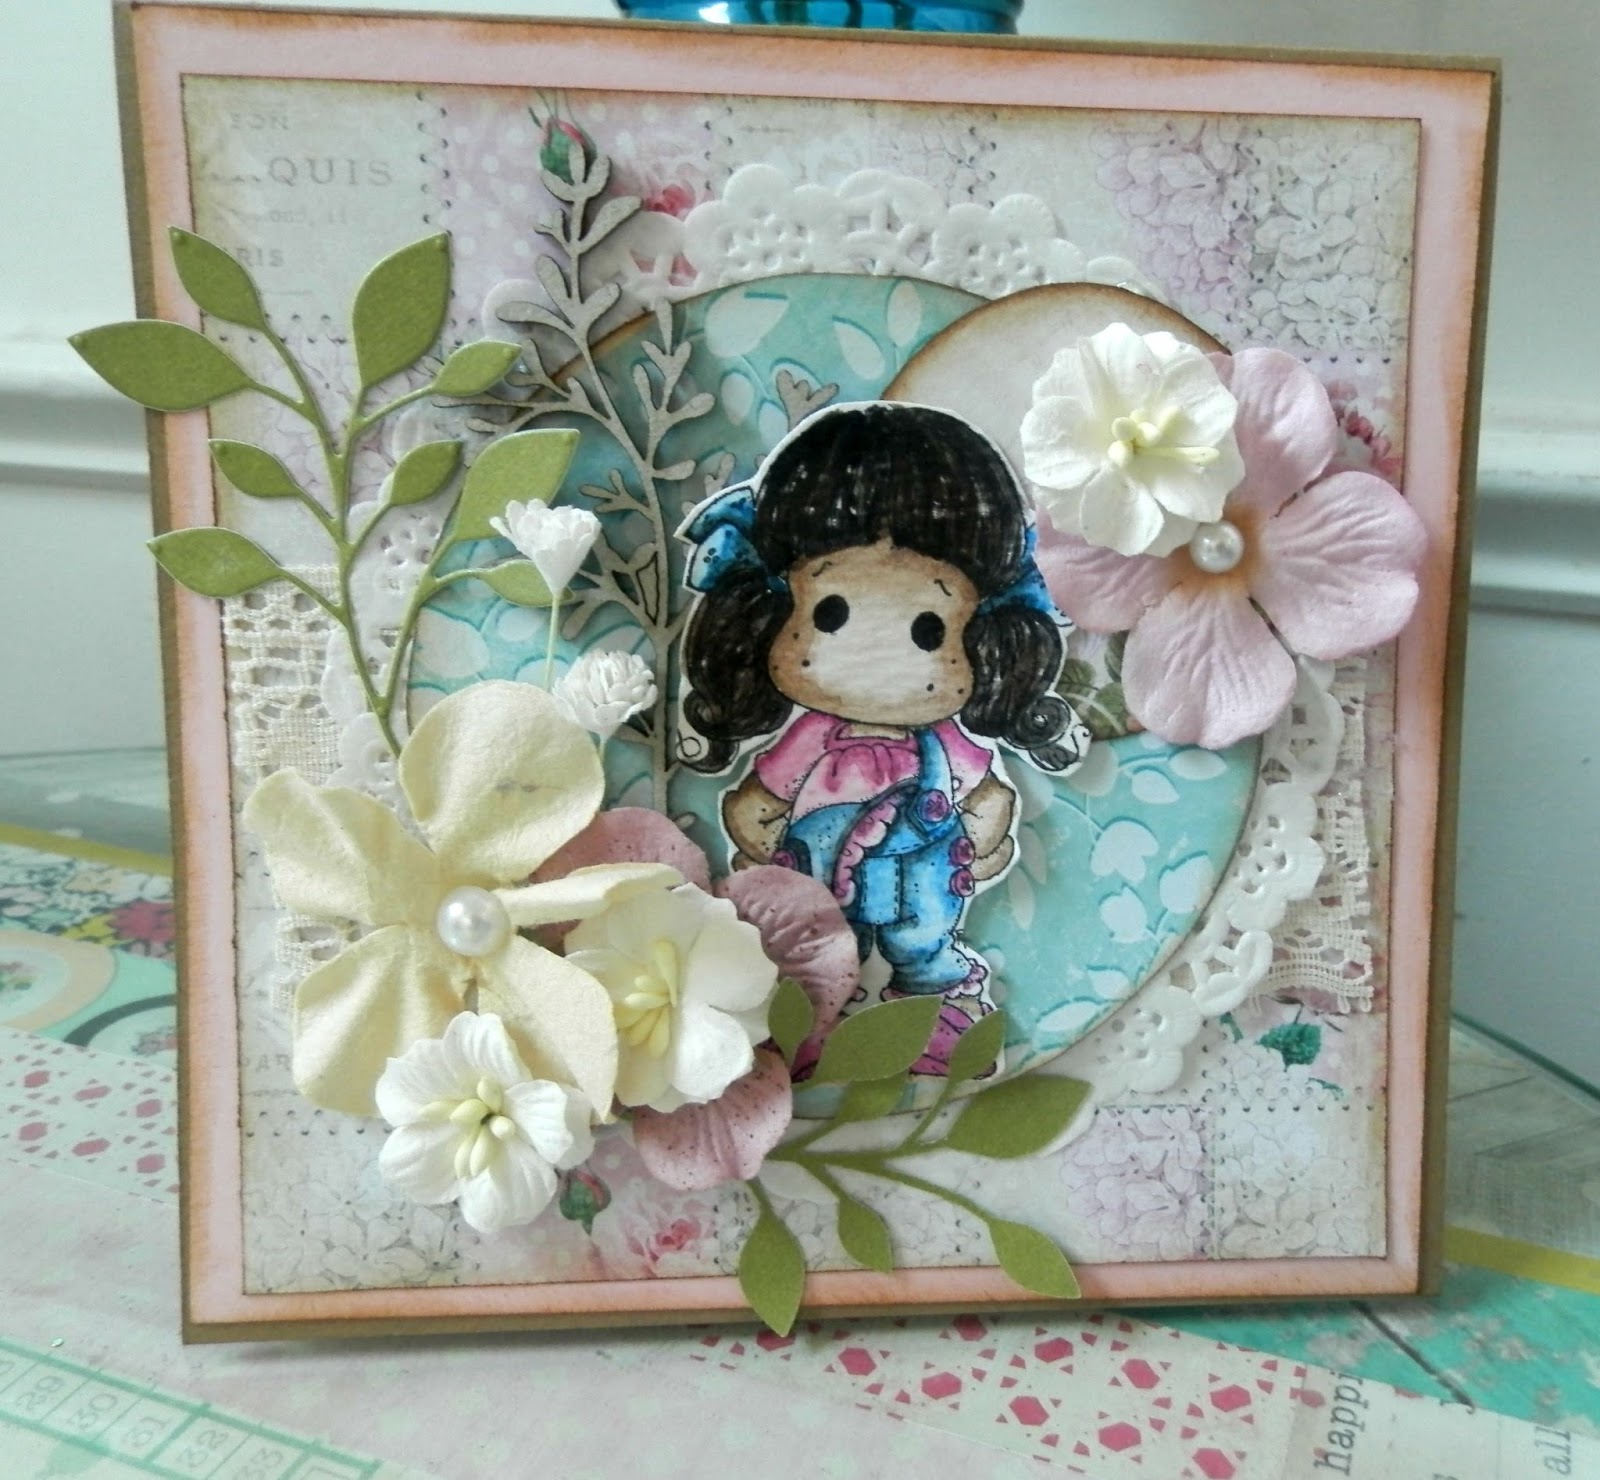
Summer Tilda Card with Netra
Hey everyone !!! I hope you all are well.
Today I am sharing a card using Tilda with Summer Pants.
I have wanted to use this image for the longest time its just so cute.
I water colored her on Ranger Water Color Cardstock.
I also used some new papers from Lemon Craft and lots of
goodies from my Rubber Buggy stash.
My card base is Neenah Kraft paper. This paper is a must have. Its so thick and smooth.
They are sooo dreamy and awesome quality.
Thank you for visiting
Subscribe to:
Posts
(Atom)


