Saturday, June 20, 2020
Fairy Wishes
Welcome back and Nancy, here. Come find the magic of creating with the Graphic 45 Fairy Wishes collection! I am excited to share with you my cards made with the new Graphic 45 Fairy Wishes collection. This beautiful collection is filled with images of fairies, florals, and yellow butterflies that flutter about with backgrounds of soft pink and purple violets galore.
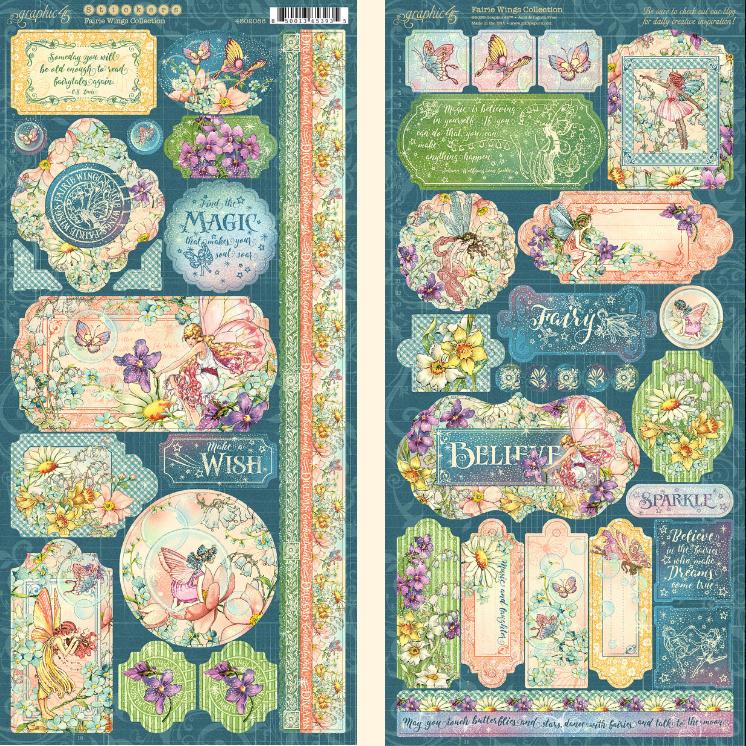
The Graphic 45 Fairy Wishes collection 12" x 12" paper pad includes two pages of stickers. Make sure to check out The Rubber Buggy site for the additional Graphic 45 Fairy Wishes papers and embellishments that you will want to purchase that coordinate with the collection as well.


 |
| Dress My Crafts-Sequins-Pink Celebration |


I cut out the sentiment from this paper on the left and fussy cut the fairies and flowers from the other paper in this pad and adhered to the card using the Beacon 3-in-1 Advanced glue. To frame the sentiment, I cut another sentiment and adhered in the center around the purple and dark blue frame.


 | |
|
I had so much fun making these cards and hope you will too. So have fun crafting this weekend with these products. My cards and projects are always posted on Saturday. Keep watching and thank you so much for those wonderful comments as well as suggestions.
Enjoy and Happy Crafting!
|
Thursday, June 18, 2020
Tropical Thank You Cards
Hi everyone, Steph Ackerman here today with lots of fun products from the store. Please visit the store for all the fun products I've used today.


Thank you for visiting

Using Heartfelt Creations Tropical Hibiscus stamps and coordinating dies, create the flowers using Bazzill Cardstock and Lawn Fawn Peach Fuzz Ink.

Use the Heartfelt Creations Deluxe Flower Shaping Tool to shape the flowers.

Create a square card from Lawn Fawn Kraft cardstock. Cut Bazzill Marshmallow Cardstock slightly smaller and die cut the center using a Tutti Designs Oval die. Add the die cut panel to the card. Die cut the white oval using the next size down die and die cut the peach frame using 2 dies to create the frame.

Using Memento Tuxedo Black Ink, stamp thank you on the white oval and place in the opening. Adhere the leaves to opposite sides of the card using Tattered Lace Detail Glue. Adhere the flowers on top.

Create a second card from Bazzill cardstock. Cut 7Gypsies Garden Words to size and mat with Bazzill Marshmallow cardstock before adhering to the card.

Using 2 sizes of the Tutti Designs Nesting Ovals, die cut both colors of cardstock and adhere to the card. Stamp thank you slightly off center. Adhere 2 sets of leaves and the flowers to the corner of the card.
Finish by adding Nuvo Drops to the flower centers.
Thank you for visiting
Saturday, June 13, 2020
Lawn Fawn Magic Iris
Welcome back and hope you are having a wonderful weekend. Nancy, here, and I created my own tutorial for you to print out and follow if you are doing the Lawn Fawn Magic Iris for the first time. The Rubber Buggy has all of the supplies and products you will need for crafting this card.
I would highly recommend you to view the Lawn Fawn tutorial, click here, as well. I still had problems with assembling the Magic Iris after watching the Lawn Fawn tutorial so I thought I would do a written tutorial for you with lots of photographics and also go over some of the tips and technique that helped me since I had a few throw-aways and this can become very frustrating when the Magic Iris can't open up after hard work assembling all three layers.


 |
| Lawn Fawn Magic Iris Die Set |
 |
| Lawn Fawn A Bug Deal Stamp |

Lawn Fawn Magic Iris Circle Scalloped Add-On
Since I had the Lawn Fawn Scallop Circles die set, I used it for this card.
Additional supplies: Beacon 3-in-1 Advanced Glue, Lawn Fawn Grassy Border Die, 1/2" Wide Scor-Tape, Mini Glue Dots, Scrapbook Adhesive ED Foam

Step #1: Cut out 3 circles, 3 green tabs, 3 brown tabs, 1 orange tab and 1 red tab. NOTE: I have colored each section a different color to make it easier for you to follow the steps. Unfortunately, I have added other photos of my other Magic Iris since the photos came out clearer. Normally, I would have cut all the die cuts in white 80lb cardstock but used different colored circles for better guiding you through this assembly. I numbered each circle for each layer.


Step #2: Take this die and align along the center of the circle and die cut.


Step #9: Lay the white or blue circle on top of the orange circle. Take each brown tab and adhere to the top the blue or white circle. NOTE: Make sure to not get glue or tape stuck on the inside of the layers as well as don't get the tabs wrapped tightly on the next circle.

Step #11. You can stamp the image of the circle cut out of the Magic Iris and adhere in the center of the Magic Iris on the frame. I did it different on my second card and traced the center of the Magic Iris on the frame of my card, stamped my sentiment and then glued the Magic Iris on top of the sentiment. Optional: I used foam adhesive tape to adhere the Magic Iris on the frame after gluing the Magic Iris Scalloped Circle on the Magic Iris.
I had so much fun making these cards and hope you will too. So have fun crafting this weekend with these products. My cards and projects are always posted on Saturday. Keep watching and thank you so much for those wonderful comments as well as suggestions.
Enjoy and Happy Crafting!
 |
Thursday, June 11, 2020
Pretty in Purple Cards
Hi everyone, Steph Ackerman here today with lots of fun products from the store. Please visit the store for all the fun products I've used today.

Starting with the Prima Marketing Open Flower die, I decided to build 2 cards around it. Since it is an open flower, there is no backing, so to achieve the look I wanted, I die cut the flower from 3 layers of Pion Design's Purple cardstock in one pass and 3 layers of Pion Design's Lavender cardstock in one pass. Pulling off the top 2 layers, the third layer shows the impression of the die and remains intact.

Using the intact layer for the flower bases, I reassembled the flowers using Tattered Lace Detail Glue, adding the purple insets to the lavender layer and the lavender insets to the purple layer. Then I adhered the top layer, gluing just the center of the flower, leaving the edges free.


Thank you for visiting

Starting with the Prima Marketing Open Flower die, I decided to build 2 cards around it. Since it is an open flower, there is no backing, so to achieve the look I wanted, I die cut the flower from 3 layers of Pion Design's Purple cardstock in one pass and 3 layers of Pion Design's Lavender cardstock in one pass. Pulling off the top 2 layers, the third layer shows the impression of the die and remains intact.

Using the intact layer for the flower bases, I reassembled the flowers using Tattered Lace Detail Glue, adding the purple insets to the lavender layer and the lavender insets to the purple layer. Then I adhered the top layer, gluing just the center of the flower, leaving the edges free.

Create a card from purple cardstock. Using Lawn Fawn Stitched Rectangle dies, die cut Bazzill Marshmallow Cardstock. Assemble the card by adding a lavender layer behind the rectangle.

Using Heartfelt Creations Classic Rose dies and coordinating stamps, create 4 sets of leaves on Bazzill Gumdrop Cardstock using Lawn Fawn Walnut Ink. Place 2 sets of leaves along the bottom of the card.

Add a brad to the flower center and place the flower on top of the leaves.

Finish the card by stamping a stamp from Stamperia's Enjoy stamp set, stamp it on Marshallow Cardstock and die cut with a Tutti Designs Nesting Oval die. Die cut a larger purple oval and slip it behind the leaves. Add to the card with Scrapbook Adhesives.

Alternate the colors for the 2nd card and adhere 2 sets of leaves in the upper corner. Again, add a brad to the flower center and place it on top of the leaves.

Stamp and die cut the same sentiment, adding it to the card with Scrapbook Adhesives.
Thank you for visiting
Saturday, June 6, 2020
Ahoy, Matey
Arrrrgh you ready for adventure? Nancy, here, to share a card made with the Lawn Fawn Ahoy, Matey stamp and Lawn Fawn Ahoy, Matey die set. This adorable stamp set has adorable pirates with a treasure chest and a treasure map where X marks the spot!


I stamped with the Memento Tuxedo Black ink and colored with Copic Markers. I cut out the
Lawn Fawn Stitched Hillside dies with brown and blue cardstock. I added some dark brown ink that was watered down with a little water and tapped it with a brush to get the brown sprinkles. I stamped the dark blue waves using the waves in this Lawn Fawn Ahoy, Matey stamp set.
I used an sharp blade to cut through the brown sandy cardstock for the treasure chest and one palm tree.
I did my clouds with the beautiful Ranger Distress Tumbled Glass Ink which I use for almost all of the sky scenes in my cards and Lawn Fawn Puffy Cloud Border die which could be substituted for the Lawn Fawn Cloud Stencil.. I just love using the Picket Fence Studio brushes for sponging now.

Before adding the pivot die, I sponged on Distress Oxide ink pads to make the sky and Distress brown inks for the big map. I just used a black ink pen for the stitching in the map.

I added the Lawn Fawn Pivot Popup Die Set for the inside of the card. This set includes everything you need to create a four-panel pop-up scene that twists open inside your card! Use the included hills, trees, and clouds to decorate your scene with the panels as a starting point to create your own pop-up masterpiece! This panel can be used on a portrait or landscape side of the card. You will need to watch the video on assembling the pivot before you begin. Lawn Fawn made a video that goes through the steps. Click on Here to take you to this video.
I adhered the card using the Beacon 3-in-1 Advanced glue.
 |
| Lawn Fawn Pivot Popup Die Set |
I hope I have inspired you try out these products available at The Rubber Buggy on-line store. My cards and projects are always posted on Saturday. Keep watching and thank you so much for those wonderful comments as well as suggestions.
Enjoy and Happy Crafting!
Enjoy and Happy Crafting!
|
Thursday, June 4, 2020
Summer Travel Treats
Hi everyone, Steph Ackerman here today with lots of fun products from the store. Please visit the store for all the fun products I've used today.


Thank you for visiting

Using Scor-Pal, I created a set of cards from Bazzill Jawbreaker Cardstock and Lawn Fawn Kraft Cardstock. I used papers from the Maja Design Life by the Sea and Sommartider collections to complete the cards. The top layers of the cards were die cut using Lawn Fawn Stitched Rectangle Dies.

I also created a coordinating set of gift bags which I'll fill with little odds and ends for the traveler. The top layers were die cut using Lawn Fawn Stitched Rectangle Dies.

I used Sizzix Thinlit Dies by Tim Holtz, die cutting the words from scraps of the pattern papers I used for the cards and gift bags. The mats were die cut from Bazzill Jawbreaker Cardstock.

Tattered Lace Detail Glue with it's fine tip was used to adhere the word layers together.
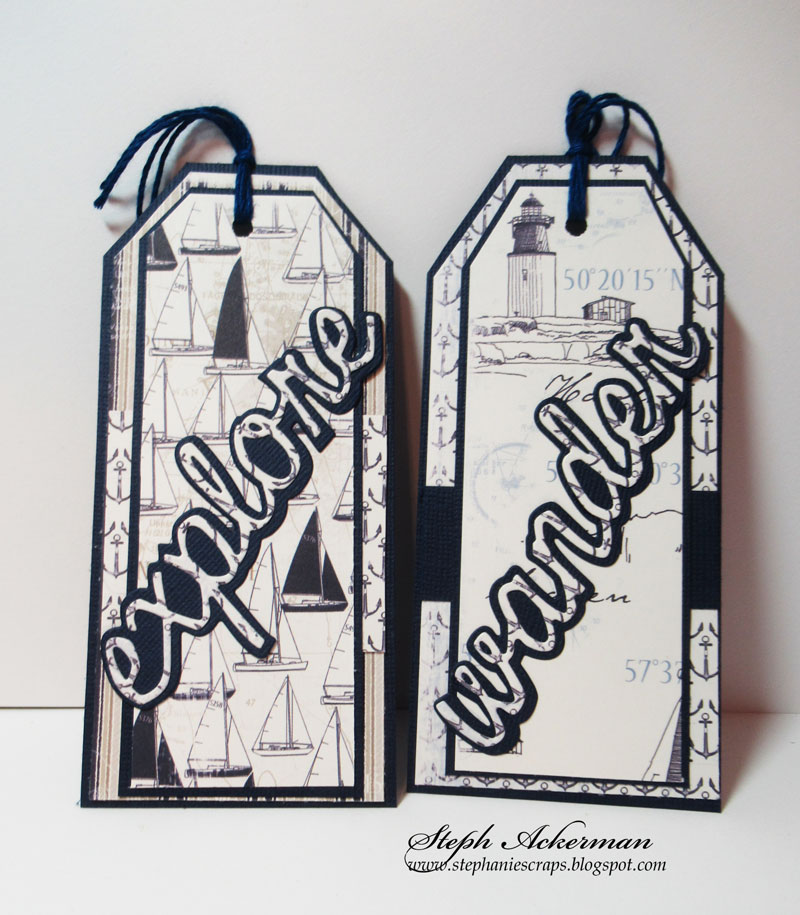
Creating tags from Bazzill Jawbreaker Cardstock, I added assorted layers and placed words on top. Twine was added to each tag.

Happy Summer from Lawn Fawn was die cut from Jawbreaker Cardstock and adhered across each card using the Tattered Lace Detail Glue.

This would be a nice set to give to someone planning on traveling this summer.

Fill the gift bags with little treats, or perhaps a pad and paper for doodling.
Subscribe to:
Posts
(Atom)


