Saturday, June 6, 2020
Ahoy, Matey
Arrrrgh you ready for adventure? Nancy, here, to share a card made with the Lawn Fawn Ahoy, Matey stamp and Lawn Fawn Ahoy, Matey die set. This adorable stamp set has adorable pirates with a treasure chest and a treasure map where X marks the spot!


I stamped with the Memento Tuxedo Black ink and colored with Copic Markers. I cut out the
Lawn Fawn Stitched Hillside dies with brown and blue cardstock. I added some dark brown ink that was watered down with a little water and tapped it with a brush to get the brown sprinkles. I stamped the dark blue waves using the waves in this Lawn Fawn Ahoy, Matey stamp set.
I used an sharp blade to cut through the brown sandy cardstock for the treasure chest and one palm tree.
I did my clouds with the beautiful Ranger Distress Tumbled Glass Ink which I use for almost all of the sky scenes in my cards and Lawn Fawn Puffy Cloud Border die which could be substituted for the Lawn Fawn Cloud Stencil.. I just love using the Picket Fence Studio brushes for sponging now.

Before adding the pivot die, I sponged on Distress Oxide ink pads to make the sky and Distress brown inks for the big map. I just used a black ink pen for the stitching in the map.

I added the Lawn Fawn Pivot Popup Die Set for the inside of the card. This set includes everything you need to create a four-panel pop-up scene that twists open inside your card! Use the included hills, trees, and clouds to decorate your scene with the panels as a starting point to create your own pop-up masterpiece! This panel can be used on a portrait or landscape side of the card. You will need to watch the video on assembling the pivot before you begin. Lawn Fawn made a video that goes through the steps. Click on Here to take you to this video.
I adhered the card using the Beacon 3-in-1 Advanced glue.
 |
| Lawn Fawn Pivot Popup Die Set |
I hope I have inspired you try out these products available at The Rubber Buggy on-line store. My cards and projects are always posted on Saturday. Keep watching and thank you so much for those wonderful comments as well as suggestions.
Enjoy and Happy Crafting!
Enjoy and Happy Crafting!
 |
Thursday, June 4, 2020
Summer Travel Treats
Hi everyone, Steph Ackerman here today with lots of fun products from the store. Please visit the store for all the fun products I've used today.


Thank you for visiting

Using Scor-Pal, I created a set of cards from Bazzill Jawbreaker Cardstock and Lawn Fawn Kraft Cardstock. I used papers from the Maja Design Life by the Sea and Sommartider collections to complete the cards. The top layers of the cards were die cut using Lawn Fawn Stitched Rectangle Dies.

I also created a coordinating set of gift bags which I'll fill with little odds and ends for the traveler. The top layers were die cut using Lawn Fawn Stitched Rectangle Dies.

I used Sizzix Thinlit Dies by Tim Holtz, die cutting the words from scraps of the pattern papers I used for the cards and gift bags. The mats were die cut from Bazzill Jawbreaker Cardstock.

Tattered Lace Detail Glue with it's fine tip was used to adhere the word layers together.
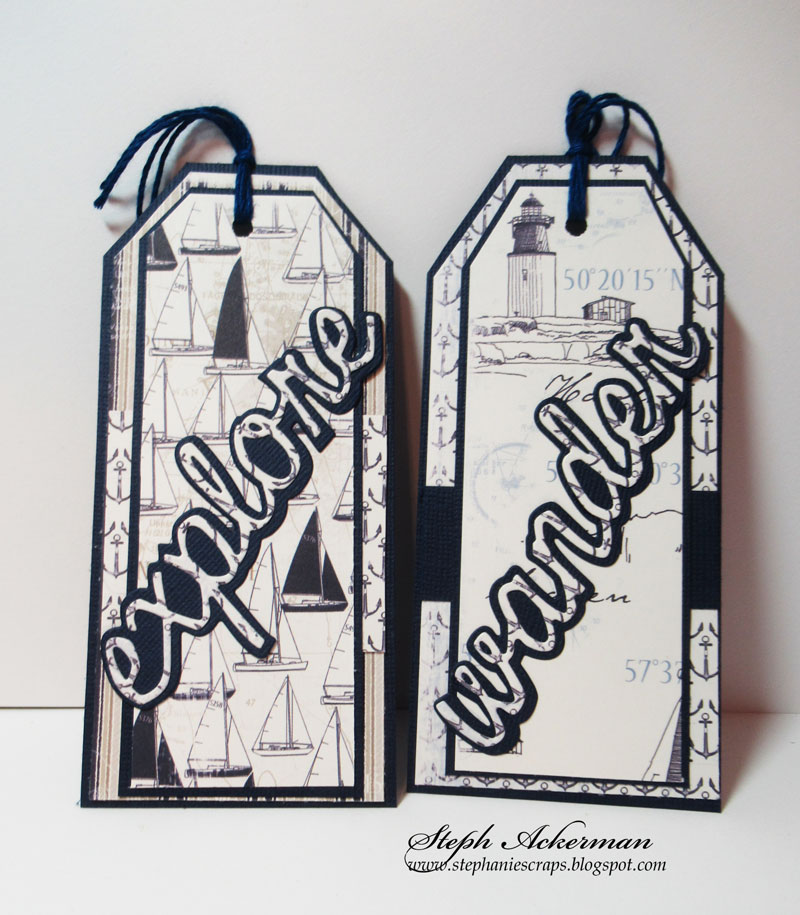
Creating tags from Bazzill Jawbreaker Cardstock, I added assorted layers and placed words on top. Twine was added to each tag.

Happy Summer from Lawn Fawn was die cut from Jawbreaker Cardstock and adhered across each card using the Tattered Lace Detail Glue.

This would be a nice set to give to someone planning on traveling this summer.

Fill the gift bags with little treats, or perhaps a pad and paper for doodling.
Saturday, May 30, 2020
Cocktail Hour
Hello to all of The Rubber Buggy bloggers family. Thanks for joining us and it's Saturday so I think we should all drink to that like the Stamping Bella Curvy Girl With Cocktail stamp. How beautiful is her maroon dress and she looks like she is giving a toast to someone. The Rubber Buggy has this adorable stamp and other supplies available at fast delivery and wonderful customer service to have your day a fun-filled crafting day.


Stamping Bella Curvy Girl With Cocktail Stamp Collection


The background paper is from the Graphic 45 Forward Forward Patterned and Solid paper collection which contains patterned and solid paper of 8 beautiful colors and designs in a variety of vibrant colors.


I am loving this new arrival at The Rubber Buggy of the Donna Downey Signature Stencil - Bubbles along with their other stencils. I used the Picket Fence Studio brush with Distress Oxide ink with various parts of this stencil to get this background. If you apply light colors of Distress ink to the background, you can then stamp these girls with Memento Tuxedo Black ink and then color her with Copic Markers.


I had so much fun making these cards and hope you will too. So have fun crafting this weekend with these products. My cards and projects are always posted on Saturday. Keep watching and thank you so much for those wonderful comments as well as suggestions.
Enjoy and Happy Crafting!
|
Thursday, May 28, 2020
Dress My Craft Cards
Hi everyone, Steph Ackerman here today with lots of fun products from the store. Please visit the store for all the fun products I've used today.

Dress My Crafts has some wonderful paper collections and I've used Whispering Love for my cards today. This paper pad has 24 sheets of single sided papers.


Dress My Crafts has some wonderful paper collections and I've used Whispering Love for my cards today. This paper pad has 24 sheets of single sided papers.

For my birthday card, I used Lawn Fawn Stitched Circle Dies, Lawn Fawn Zig Zag dies and Happy Birthday Line Die which were die cut from Bazzill Licorice Twist and Marshmallow cardstocks.

The background is a combination of different papers in this collection which have been torn and a strip of Licorice Twist placed between the layers.

A Penny Black birthday stamp was inked with Memento Tuxedo Black Ink and stamped on the white circle. She was then colored with Copic Markers, matted with the Zig Zag die and added to the card with Scrapbook 3D Foam Adhesives. Ranger Liquid Pearls in Merlot were added to the cupcake. To finish, the Happy Birthday phrase was added to the top of the card.

My 2nd card is a 5 1/2" square card from Bazzill Licorice Twist Cardstock. A sheet from the same collection was added to the card and the roses were fussy cut from another sheet. For emphasis, the roses were matted with pink cardstock and again fussy cut creating a pocket.
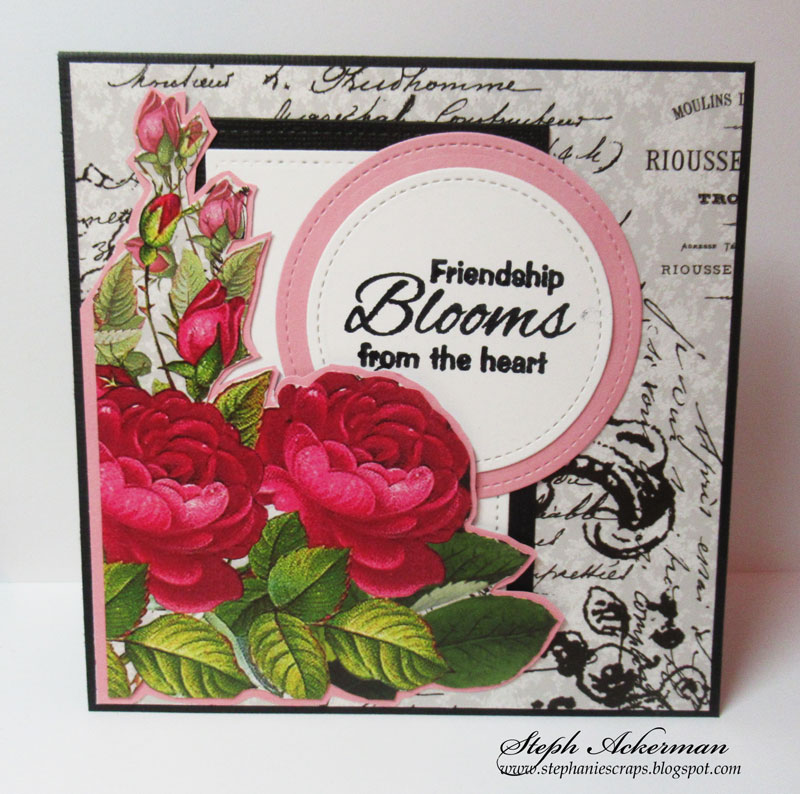
Using Lawn Fawn Stitched Rectangle Dies, Bazzill Licorce Twist and Marshmallow cardstocks were die cut and then slipped behind the roses. The phrase from Art Impressions Watercolor Stamp set was stamped on Marshmallow cardstock with Memento Tuxedo Black Ink, then die cut with Lawn Fawn Stitched Circle dies. It was also slipped behind the roses.

Thank you for visiting
Saturday, May 23, 2020
Stamping Bella Curvy Girl Gardener
Welcome back and Nancy, here, excited to share a fun card made with the Stamping Bella Curvy Girl Gardener stamp set available at The Rubber Buggy. This is the perfect time of year for a card that has the gardening theme since so many people are now planting their flowers and gardens this time of year. She is so adorable with her pot of flowers and flowers in her pocket and what a beautiful sentiment that is included in this stamp set.

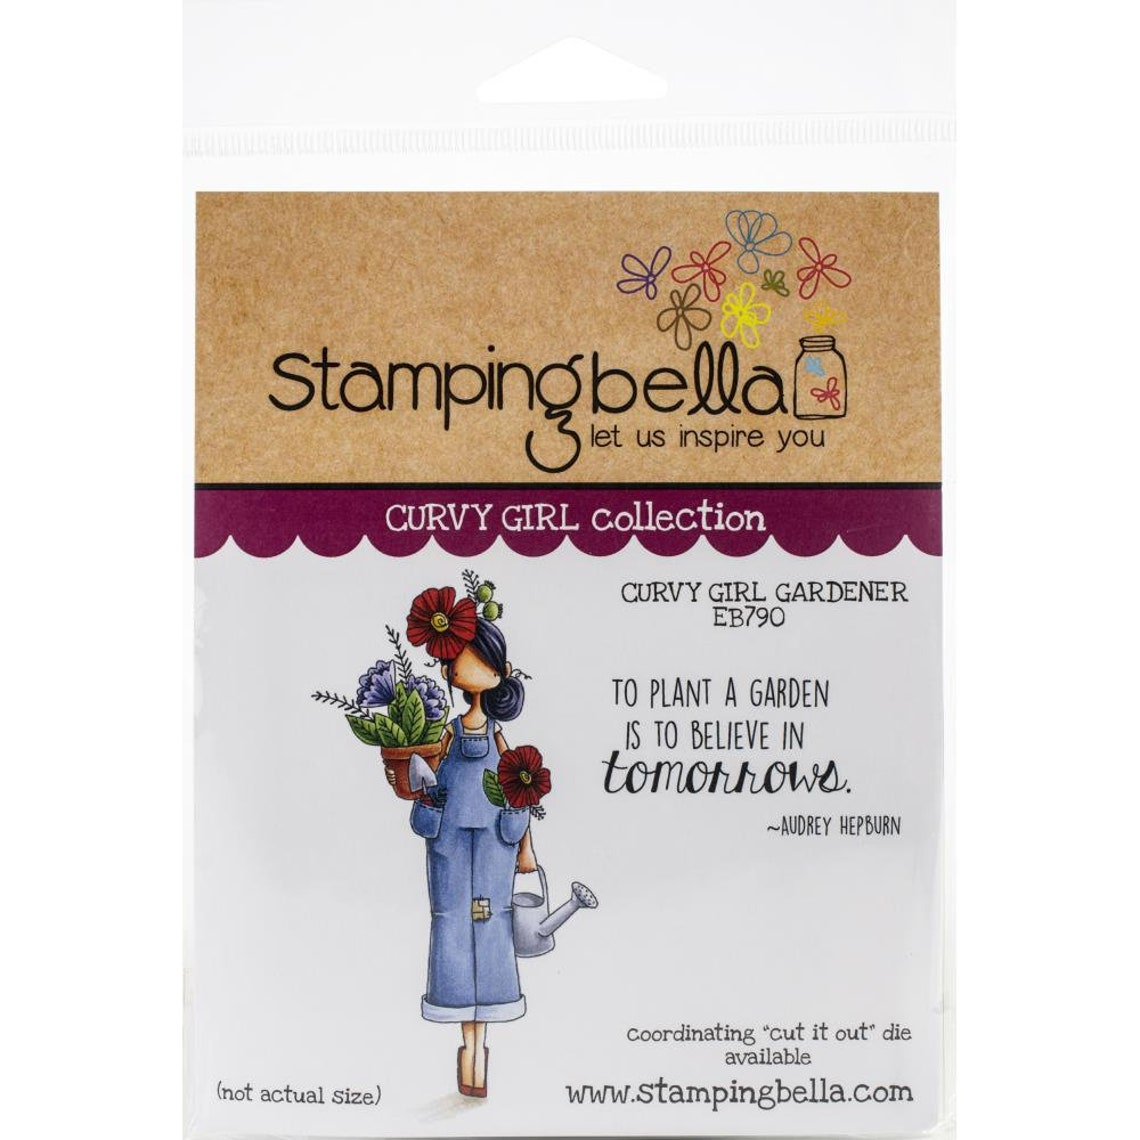 |
| Stamping Bella Curvy Girl Gardener stamp |
I stamped her with Memento Black Tuxedo ink and colored her with Copic Markers. I used my Brothers Scan and Cut to cut her out but you can also fussy cut her out.
I used the Picket Fence Studio Blender brushes and sponged the background with Ranger Distress Oxide ink Tumbled Glass and Squeezed Lemonade colors. You must always ink those brushes and tap the brushes on scrap paper a few times before sponging/brushing the colors on the paper to avoid the circles and stripes.

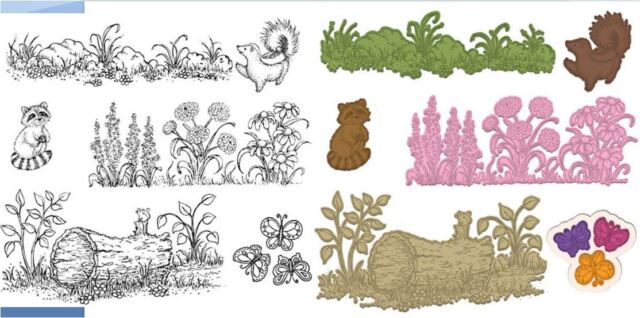
I stamped and die cut the flowers twice using the Heartfelt Creations Woodsy Wonderland and also colored with Copic Markers. I adhered the card with the Beacon 3 n 1 Advance Glue.
I had so much fun making these cards and hope you will too. So have fun crafting this weekend with these products. My cards and projects are always posted on Saturday. Keep watching and thank you so much for those wonderful comments as well as suggestions.
Enjoy and Happy Crafting!
|
Thursday, May 21, 2020
Anniversary Cards with Tutti Designs
Hi everyone, Steph Ackerman here today with lots of fun products from the store. Please visit the store for all the fun products I've used today.

I had small amounts of Prima Marketing Art Alchemy paints in Flame and Gold remaining so I decided to create some backgrounds by painting the left over paints on Strathmore Watercolor Paper. It doesn't look very pretty, but the resulting card definitely is!


I adhered Bazzill Marshmallow Cardstock behind the die cut panel giving emphasis to the die cut areas. The die cut panel was matted with pink cardstock.


Thank you for visiting

I had small amounts of Prima Marketing Art Alchemy paints in Flame and Gold remaining so I decided to create some backgrounds by painting the left over paints on Strathmore Watercolor Paper. It doesn't look very pretty, but the resulting card definitely is!

I created the card using Maja Designs Vintage Summer Basics 1910 with the Tutti Designs Bird Tapestry die. For definition, I cut the painted panel to fit behind the die.

I added brads to the flowers, then inked the edges of the panel with Lawn Fawn Sunflower Ink and then matted it with Bazzill Gold Coins Cardstock.

The panel was then added to Maja Design Vintage Summer Basics 1912 and Bazzill Gold Coins Cardstock. It was then added to a pink card with Scrapbook Adhesives 3D Foam Squares.

Nuvo Crystal Drops in Party Pink were added to the corner designs. The phrase, from Art Impressions Watercolor Cling stamps, was stamped with Memento Tuxedo Black Ink on a scrap of Vintage Summer Basics 1912 and pink cardstock.

My 2nd card was created using Maja Designs Vintage Summer Basics 1933 and the same Tutti Designs die. A totally different effect was created.


Vintage Summer Basics 1910 was added to a pink card and the phrase, from Art Impressions Watercolor Cling stamps was stamped with Memento Tuxedo Black Ink on Bazzil Marshmallow Cardstock.

I used a Tutti Designs Oval Die to die cut the phrase and a larger mat. It was added to the card with Scrapbook Adhesives 3D Foam Squares. Raspberry Liquid Pearls were added to the corners of the card.
Thank you for visiting
Saturday, May 16, 2020
Father's Day or Birthday
Welcome back and hope you are having a wonderful weekend. I made this birthday card for my son-in-law and wanted the steampuck theme. The steam puck is also great for your Father's Day card. If you are looking for vintage parts for your steam puck projects, The Rubber Buggy on-line store carries the supplies you will need from Prima Marketing, Tim Holtz, etc. The Rubber Buggy carries these major name-brand craft supplies with fast delivery and wonderful customer services.

 |
| Sizzix 3D Tim Holtz Mechanic Embossing Folder |

I cut out the excess edges of the gold metallic cardstock before gluing and adding the gears that were also covered with black gesso and various colors if these Prima Marketing Metallique waxes. I used a hot glue gun to adhere the gears to the card and used the Beacon 3-in-1 Advanced Glue. I typed the name Josh and printed it on cream cardstock and used my fingers to sponge on the Ranger Distress Collage Vintage Medium to give it more of the aged look but also Distress Ink Antique Linen would work as well. I cut it out and glued behind the Tim Holtz Idea-ology Ornate Label Frame which could be substituted with the new Tim Holtz Ideao-Ology Metal Adornament Plates that was also sponged with the Prima Marketing Aged Brass wax with my fingers.

I had so much fun making these cards and hope you will too. So have fun crafting this weekend with these products. My cards and projects are always posted on Saturday. Keep watching and thank you so much for those wonderful comments as well as suggestions.
Enjoy and Happy Crafting!
|
Subscribe to:
Posts
(Atom)


