Saturday, August 20, 2016
Christmas Snow Globe with Jolly Snowman
Welcome back and I am Nancy Hill, sharing with you every Saturday an exciting new die, stamp and supplies from the wonderful on-line store, The Rubber Buggy.

I made this step card using the two new releases from Tutti Designs - Snowglobe Expressions and the Jolly Snowman dies along with the gorgeous Poppy Stamp Die - Snowy Christmas and the new released stamp from Heartfelt Creations - Celebrate The Seasons - Gift Wrapped Present Stamp Set. Other supplies are Graphic 45 - Christmas Carol and Bazzill card stock.

I made this step card using the two new releases from Tutti Designs - Snowglobe Expressions and the Jolly Snowman dies along with the gorgeous Poppy Stamp Die - Snowy Christmas and the new released stamp from Heartfelt Creations - Celebrate The Seasons - Gift Wrapped Present Stamp Set. Other supplies are Graphic 45 - Christmas Carol and Bazzill card stock.
 |
| Tutti Designs Snowglobe Expression Tutti Designs Jolly Snowman |
 |
| Poppy Stamp Die - Snowy Merry Christmas Heartfelt Creations-Celebrate The Season - Gift Wrapped Present Stamp Set |
 |
| Inside of Card
I used the Tutti Designs Jolly Snowman along with the Heartfelt Creations-Celebrate The Season-Gift Wrapped Present stamp which was stamped using the Misti Stamp tool and embossed with silver embossing powder. For those that aren't familiar with the Misti Stamp tool, there are You-Tube video to get you started. I wasn't able to stamp well in the past until I invested in buying this valuable Misti Stamp tool that comes in 3 different sizes. Now, my stamping comes out well each time with this Misti Stamp tool from The Rubber Buggy.
This is called a step card and there are many tutorials on-line for cutting out a step card as well as step-card dies.
I always use Scor Tape to attach my bows and ribbons on my cards. In case I want to rearrange my bow, the Scor Tape remains sticky when I take the ribbons and bow off my card and reapply it to the Scor Tape..
Remember to visit The Rubber Buggy store to shop. You will be excited to hop on over to The Rubber Buggy Blog and The Rubber Buggy Facebook each day to see what the talented and creative designers have made with products from The Rubber Buggy store.
Thank you again for visiting me today. I will be sharing with you next Saturday another exciting project or card made using the wonderful Rubber Buggy supplies.
Nancy Hill
Designer for The Rubber Buggy
|
Friday, August 19, 2016
Cats in circle
Hi everyone!!
I´m late!!! So sorry... Here Noe with a short post to show you my weekly project! It´s turn to my favourites cats!! Yes, Mr. Holtz Crazy Cats!! :) Look!!

Products used in this card:

Thank you for visiting
I´m late!!! So sorry... Here Noe with a short post to show you my weekly project! It´s turn to my favourites cats!! Yes, Mr. Holtz Crazy Cats!! :) Look!!

Products used in this card:
- Crazy Cats Tim Holtz Rubber Stamps.
- Crazy Talks Tim Holtz Rubber Stamps.
- Circle Stackables Dies Lawn Fawn.
- Watercolor Pencils Earth Tones Prima Marketing
- Distress Watercolor Cardstock
- Banner die.- Something like THIS.

Thank you for visiting
Thursday, August 18, 2016
Thank You Tommy
Hi everyone, Steph Ackerman here today with a Thank You card.
I love these elongated Mixed Media Stamps from Prima Marketing and today I'm using Tommy. He was colored with Copic Markers and then fussy cut. Since I wanted him to stand out, I matted him with Bazzill Cardstock and again fussy cut him.

The card measures approximately 4" x 9" onto which I added Garden Fresh paper from the Graphic 45 Home Sweet Home Collection. A strip of black card was added across the center and the fussy cut Tommy was added on top with Foam Adhesives for dimension.

One of the tags from the Home Sweet Home collection - My Sunshine - was added to the right of Tommy and a stamped Thank You from Wild Rose Studio's Circle Greetings was die cut and added on top.
Wouldn't this be a perfect card to give to the men in your lives?
Thank you for visiting
I love these elongated Mixed Media Stamps from Prima Marketing and today I'm using Tommy. He was colored with Copic Markers and then fussy cut. Since I wanted him to stand out, I matted him with Bazzill Cardstock and again fussy cut him.


One of the tags from the Home Sweet Home collection - My Sunshine - was added to the right of Tommy and a stamped Thank You from Wild Rose Studio's Circle Greetings was die cut and added on top.
Wouldn't this be a perfect card to give to the men in your lives?
Thank you for visiting
Wednesday, August 17, 2016
Planning with Netra
Hi everyone !
With the planner craze in full effect... I am hooked.
Each week I take my scrapbooking supplies and
ponder on how they can be used in my planner.
This week I used the Heaven Sent paper by Prima.
I am in love with the colors. I also used some the
Creating in Faith Stamps. They have become a staple.
I hope you all will enjoy planning and coming up
with new ways to use supplies in your stash.
Xo, Netra

Thank you for visiting
Tuesday, August 16, 2016
Ready Set Snow

Hi it's Jennifer here with with a Bright and Early post for
The Rubber Buggy
I have used a lot of the products from the Lawn Fawn series
Ready Set Shake. I have then teamed them up with the
Lawn Fawn - Critters in the Snow Stamp Set. I am
loving this one as there is lots of Cute Animals in it'
I am sure you will see a few more Christmas Cards
from me using this Set!
I have Coloured the Penguins, Igloo, Shaker Base,
Merry Christmas Sign all in Copics. I also coloured the
Pearls to match the Card.
I am loving the way the background in the Shaker is in the set
and creates this instant
Snow Scene .
Penguins - C5, C7, N9
Beaks and Flippers - Y31, YR15, YR23,
Sign and Shaker Base - E40, E42, E43, E44
All these products can be found at the
The Rubber Buggy Shop and dont forget to visit us on Facebook look for the Videos
down thew side too, Instragram and the Rubber Buggy Design Team Blog
where there's a post nearly everyday from one of the team.
A List of all the Goodies I have used and quick links :)
Enjoy your Crafting Week Everyone!
Jennifer
Monday, August 15, 2016
Live Love Laugh using Blue Fern Studio Tranquility

The Rubber Buggy products have been perfect for them.... slightly vintage while elegant and soft. This collection is Tranquility from Blue Fern Studios. The 123 Challenge this month also worked well with this layout.
Supply List:
The Rubber Buggy Products
Paper: Blue Fern Studio Tranquility Peaceful
Stencils: TCW 467s Live Love Laugh, 554s Butterfly Collage
Ink: Tim Holtz ranger
Die Cut: Memory Box Square Links Die
Accents: Stickles
Other: punch mini 8, sticker alpha, flowers, beads, cardstock, recollection die cut

Colour: Chocolate
Word: Explore
Technique: Squares
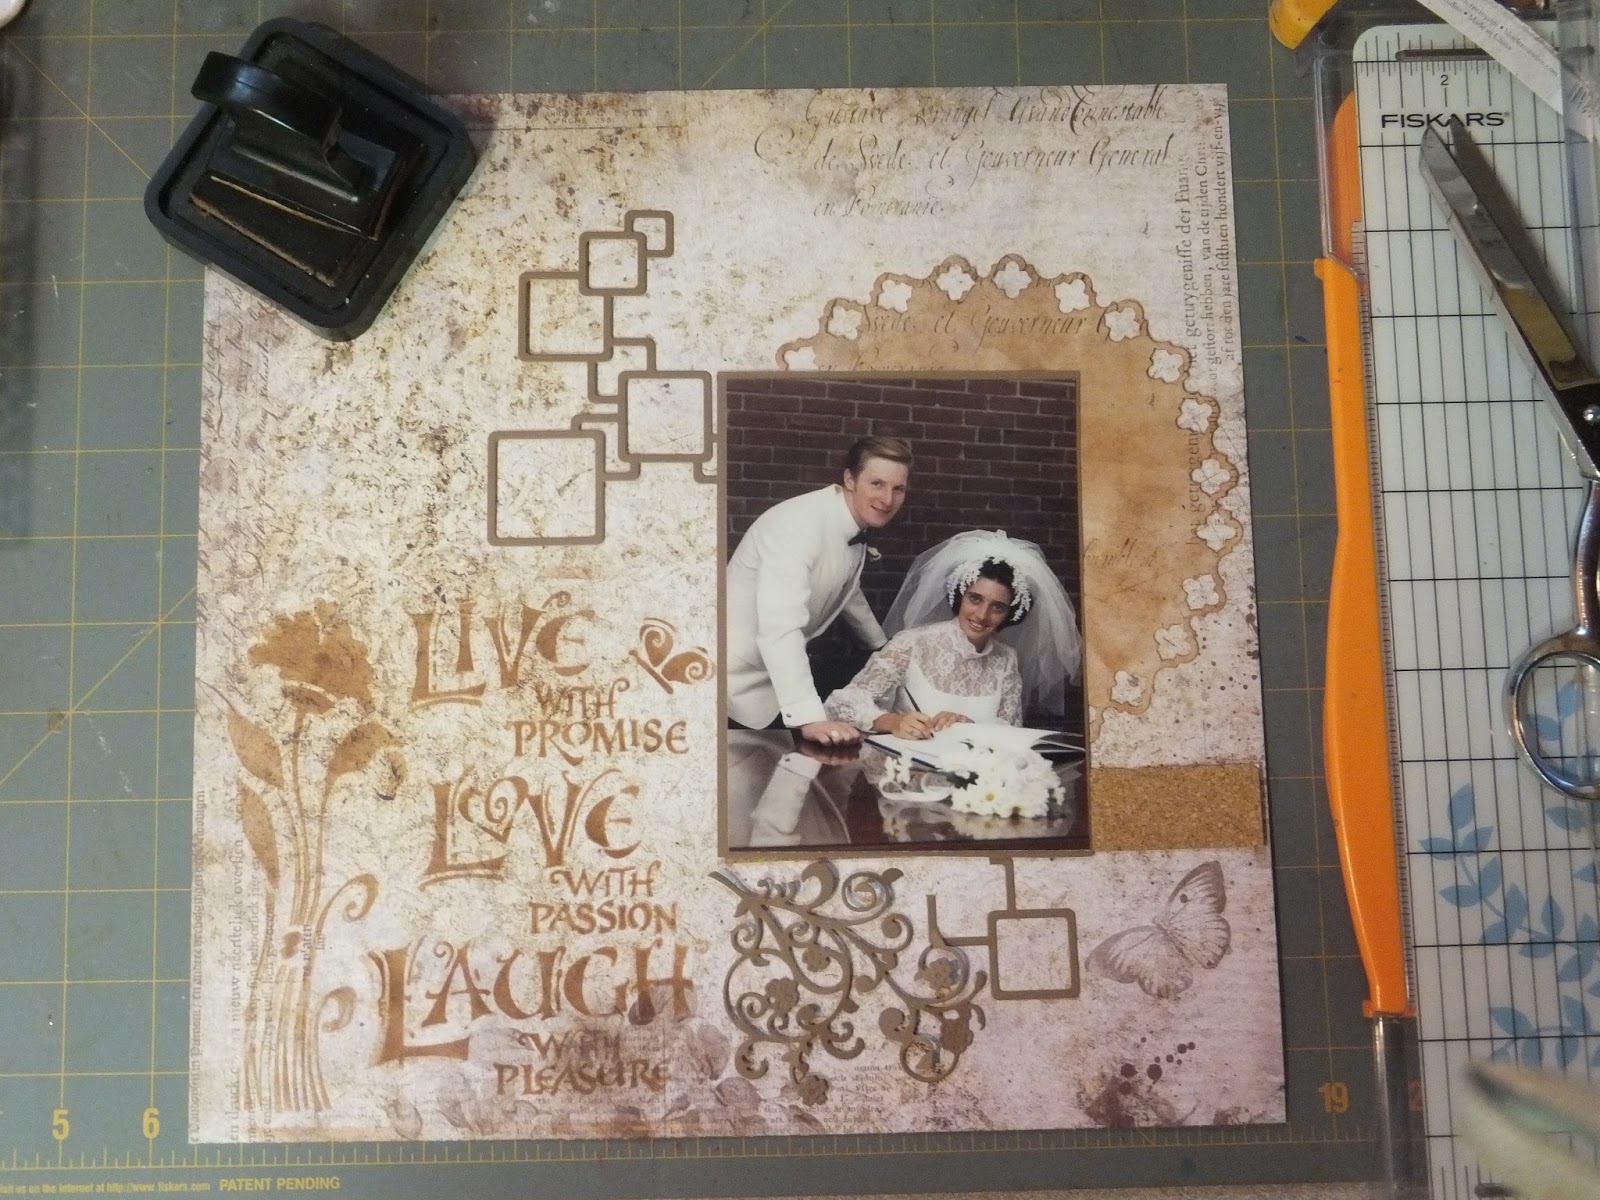
Here are some of the details about my page. I started by laying out the papers. cutting the border circle. matting the photo, die cutting the squares and leaves and stenciling the live love laugh. I then inked the whole outer edge.

In this section you can see the added stenciled corner and some misc. gold accents.

This section showcases a fun cluster of burlap flower, misc flowers with bead centre and the die cut flourish accent and the small alpha words including the challenge word "explore".

Stenciling adds such a great look to any projects... adds depth and colour.

I added stickles to pop the flowers and add that touch of bling. Also added some bead accents.

The finished central section showcasing my wedding photo is perfect. .. slightly rustic vintage with a touch of elegance and charm.


Thanks for visiting.. .. hope to see you again soon.

Sunday, August 14, 2016
Farrah Loves Flashdance

Hi Everyone it's Jennifer here with a Sweet Card
I Created for my Daughters Girlfriend
turning 18. I thought this Gorgeous Stamp from
Stamping Bella Uptown Girls - Farrah Loves Flashdance
would be just perfect!

I have used the Sentiment Stamp from another
as it had the perfect sentiment.
The White Venice Lace -Bow Lace you will notice is white so I
used my Black 100 Copic to turn it Black.
The pearls I coloured in with the Pink Copic.
The flowers are a mix from Wild Orchid Flowers and I have edged
all my papers in Lawn Fawn Mermaid Ink.
The flowers are a mix from Wild Orchid Flowers and I have edged
all my papers in Lawn Fawn Mermaid Ink.
All these products can be found at the
down thew side too, Instragram and the Rubber Buggy Design Team Blog
where there's a post nearly everyday from one of the team.
A List of all the Goodies I have used and quick links :)
Happy Crafting Everyone
Jennifer
Subscribe to:
Posts
(Atom)


