Showing posts with label Ranger Perfect Pearls. Show all posts
Showing posts with label Ranger Perfect Pearls. Show all posts
Thursday, April 2, 2020
Welcome Burlap Panel
Hi everyone, Steph Ackerman here today with lots of fun products from the store. Please visit the store for all the fun products I've used today.
What are you doing while you are waiting out the current pandemic? I've been going through my stash and organizing everything and pulling out products I want to use. This burlap panel is the result of just gathering supplies.

Using a burlap panel, I inked it with Ranger Distress Ink in Walnut Stain using a Ranger Ink Blending Tool. I cut Graphic 45 papers to fit, tearing the top layer and adding strips of Bazzill Licorice Twist Cardstock to help the panel pop. With so many different Graphic 45 papers available, any of them would be perfect for the center of this panel. I used US Art Quest Perfect Paper Adhesive to adhere the papers to the burlap panel.


Then I assembled the panel with burlap tags, paper tags (similar to the 7 Dots Studio tags), assorted flowers and clothes pins.


Thank you for visiting
What are you doing while you are waiting out the current pandemic? I've been going through my stash and organizing everything and pulling out products I want to use. This burlap panel is the result of just gathering supplies.

Using a burlap panel, I inked it with Ranger Distress Ink in Walnut Stain using a Ranger Ink Blending Tool. I cut Graphic 45 papers to fit, tearing the top layer and adding strips of Bazzill Licorice Twist Cardstock to help the panel pop. With so many different Graphic 45 papers available, any of them would be perfect for the center of this panel. I used US Art Quest Perfect Paper Adhesive to adhere the papers to the burlap panel.

I found some metal words at the Dollar Store, so I inked welcome with Ranger Embossing Ink and added color with Ranger Perfect Pearls in Forever Green and Perfect Copper. The embossing ink was a great foundation for adhering the perfect pearls. Allow to set for a few minutes, then brush away the excess.

Then I assembled the panel with burlap tags, paper tags (similar to the 7 Dots Studio tags), assorted flowers and clothes pins.
Welcome was added to the panel with US Art Quest Perfect Paper Adhesive as well as Scrapbook Adhesives 3D Foam Adhesives to pop it up in the center.

Think about using whatever you have handy and see what you can create.
Thank you for visiting
Tuesday, November 26, 2019
Merry Christmas From All Of Us

Hi Everyone it's Jennifer here and I have used the
Oddball Snowman and the Lawn Fawn Peekaboo Backdrop
to Create this Shaker Card Christmas Card.
Oddball Snowman and the Lawn Fawn Peekaboo Backdrop
to Create this Shaker Card Christmas Card.
I have used 3 of my favorite Oxide Inks for backgrounds
Chipped Sapphire, Blue Print Sketch and Broken China.
I have then sprayed it using perfect pearls in a spray bottle of
water that gives it an Awesome Sparkle. I then did a white splatter
with watered down Copic Opaque White and a brush.
I glued the Mountains onto the bottom of it.
I glued the Mountains onto the bottom of it.

I coloured my Snowman up using
Copics
Copics
Snowman - C00, C0, C01, C3
Reds - R39, R37, R35, R32
Greens - G12, G16, G19
Orange - YR12, YR15, YR68
Black - C05, C07, C09
Reds - R39, R37, R35, R32
Greens - G12, G16, G19
Orange - YR12, YR15, YR68
Black - C05, C07, C09
I covered the back of the Die with a piece of Acetate and then
used 3D foam around all the edges to create a Shaker.
I then filled one section with white beads ar little foam balls.
3D Taped the Snowman on the front and a sentiment to finish it off.


Bazzill

I hope you all have a Great Crafting Week
Jennifer
Jennifer
Friday, September 27, 2019
Christmas with Lawn Fawn

Hi Everyone it's Jennifer here using one of the new stamp sets
from Lawn Fawn with these very Adorable Reindeers.
I created the night sky using Oxide Inks Broken China, Blueprint Sketch
and Chipped Sapphire and blended a background. I then sprayed it with
Perfect Pearls to give it a nice sparkle.
I layered the Merry Christmas 3 times using the Lawn Fawn Glue.
I used Copics to clour them up.
Reindeers - E51, E53, E55, E57, E79, C09
Sleigh - R32, R35, R37, Y06, YR23
Reins, Sack - YG01, YG03, YG17, YG23
Skin - E0000, E000, E00, E01, E11


Bazzill

I hope you all have a Great Crafting Week
Jennifer
Jennifer
Tuesday, September 10, 2019
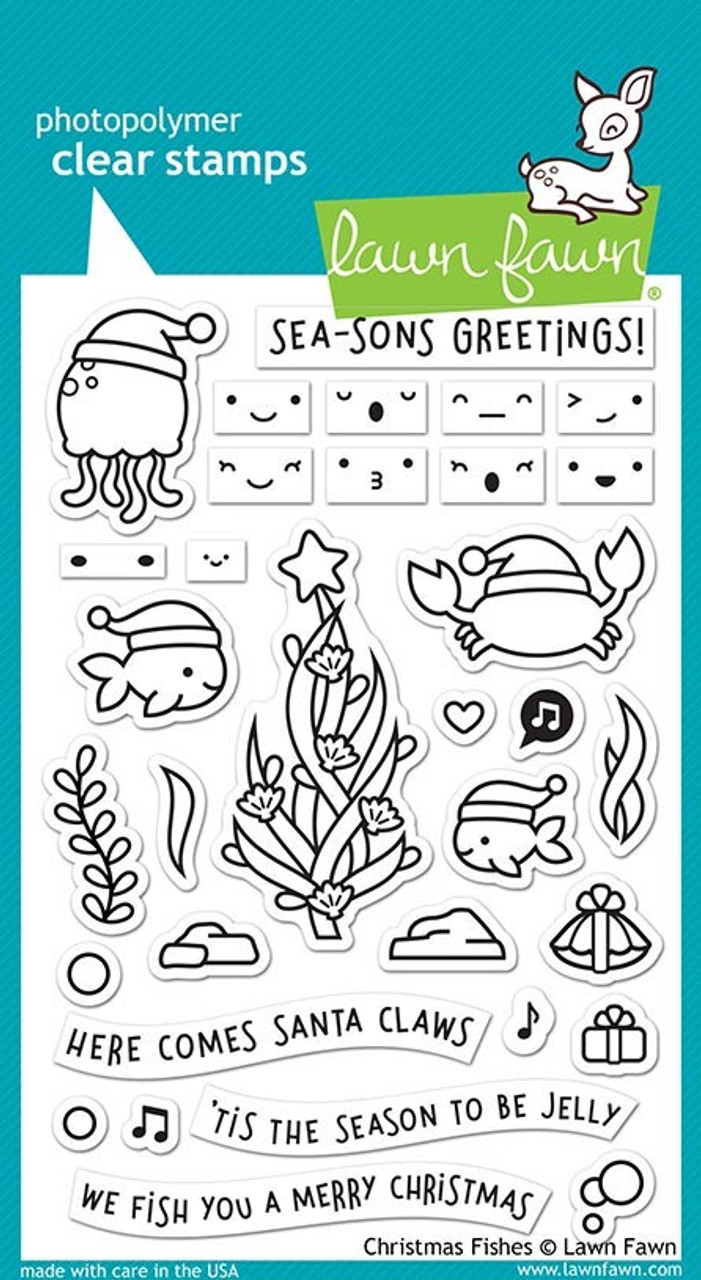
Sea-sons Greetings

Hi it's Jennifer here and this week I got to use the
New Release from Lawn Fawn and today I used
Christmas Fishes.
First I inked the backing piece of Card Stock and
sprayed it with perfect pearls to make it all shiny.
sprayed it with perfect pearls to make it all shiny.

Then I used a Circle Die and cut out 3 different sizes.

I coloured all the little Sea Creatures with lots of
coloured Copics and then decorated it.


Bazzill
I hope you all have a Great Crafting Week
Jennifer
Jennifer
Tuesday, August 29, 2017
Melanie The Modern Bride as a Bride

Hi it's Jennifer here with the Wedding Card I promised.
I have used Stamping Bella - Melanie the Modern Bride.
I have used Lemon Craft Paper the neutral coloured piece out
of the pack. I also used some silver glitter paper.
I have layered LF Fancy Scallop Rectangles ,
to raise each layer. I then cut a piece of White Cardstock and
using Pumice Stone Distress Ink and Oxide Ink Fossilized Amber I flicked
with water and mopped it off and then sprayed with
Perfect Pearls added to water to give it a lovely shine.
I also used the same tape on the back of my Image to raise her up
so she pop's off the page. I used 6 Melissa Frances Pearls to finish it off.
Copics
Face - E0000, E000, E00, E012, E11, R20
Hair, Flowers - E40, E41, E43, E44
Dress - W00, W0, W01, W02
Flower Centres, Ribbon - Y15, Y18, YR15
Leaves - YG11, YG61, YG67

Here she was as a Birthday Card. The same stamp two different ways.
I used mainly the same products too.
I used mainly the same products too.

All these products and more are available at the
The Rubber Buggy Shop and don't forget to visit us on Facebook
Rubber Buggy Design Team Blog where there's a post nearly
everyday from one of the team.
Happy Crafting
Jennifer
Sunday, August 27, 2017
Melanie The Modern Bride

Hi it's Jennifer here with a card I created using a bride stamp
I will be using this card as a Birthday Card. I have used
Lemon Craft Paper and matched my copics to colour her up.
Copic's used are
Face - E000, E000, E00, E01, E11, R20
Hair - E50, E51, E53, E55
Dress, Shoes, Flowers - BG0000, B00, BG01, BG02, BG05, BG07
Flowers, Ribbon - Y15, Y18, Y21
The frame I created using two dies cutting one inside the other at the
same time, The LF Fancy Scallop Rectangles and
I then cut a piece of White Cardstock and
using Broken China Oxide Ink and Fossilized Amber I flicked
with water and mopped it off and then sprayed with
Perfect Pearls added to water to give it a lovely shine.
I have then used 3D tape double thickness to raise the frame.
I also used the same tape on the back of my Image to raise her up
so she pop's off the page. The Melissa Frances Pearls I coloured
with matching Copics.
So I will be back on Tuesday and show you how I then used this
Stamp as a wedding card.

All these products and more are available at the
The Rubber Buggy Shop and don't forget to visit us on Facebook
Rubber Buggy Design Team Blog where there's a post nearly
everyday from one of the team.
Happy Crafting
Jennifer
Tuesday, February 21, 2017
Dragon Flying

Hi it's Jennifer here with my card for the week and I
have used this great stamp from
I have Inked the background using Distress Ink Pads
Twisted Citron, Mustard Seed and Broken China. I have then
Sprayed it with Perfect Pearls to give it a nice shine.
I then made a mix of assorted sequins to match and turned
it into a Shaker Card.
The Dies I used were from Lawn Fawn Stitched Circle Frames
and Small Stitched Circles the 3rd smallest.

I have stamped the butterflies out and placed them all over
the card and a few sequins for sparkle. I did use Wink of Stella Clear
on the Butterflies to glitter them up.
I used the same dies on the inside and a sentiment from
Copic Colours used
BG000, BG01, BG02, BG05, BG07
Y11, Y15, YG11, YG13

All these products and more are avaliable at the
The Rubber Buggy Shop and don't forget to visit us on Facebook look for the Videos
down the side too, Instragram and the Rubber Buggy Design Team Blog
where there's a post nearly everyday from one of the team.
Happy Crafting
Happy Crafting
Jennifer
Tuesday, September 13, 2016
Eve Under The Mistletoe

Hi it's Jennifer here with Tuesdays Post.
Today I have used this Fabulous Stamp
I have used Distress Ink Pads Festive Berries sprayed
with Perfect Pearls and just squished my paper in it to create
this great background. I have covered half the Sentiment
with Washi Tape so it only stamped part of it. I have embossed
it in White Emboss Powder .
The scattered Snownflakes are from the Lawn Fawn - Mini Snowflake Dies
I have also used Sequins to sparkle up the background.
I have coloured her in Copics colours used are
E0000, E000, E00, E01, E11
R20, R35, R37, R59
E50, E51, E53, E55
C0, C01, C03

All these products and more are avaliable at the
down the side too, Instragram and the Rubber Buggy Design Team Blog
where there's a post nearly everyday from one of the team.
Enjoy your Crafting Week Everyone!
Jennifer
Wednesday, July 13, 2016
Hello Chum

Hi Everyone this week I decided to do a Male Card using this Awesome
Stamp and Die Set Called Hello Chum .
I have Inked the backgrounds using Broken China, Chipped Sapphire and
Evergreen Bough. I have then sprayed Ranger Perfect Pearls
added to water over it to give a nice shine. Its very hard to photograph
the gorgeous shine which reflects off the sequins.

Copics used
C0, C01, C03, C05, C07, C09
R24, R27, R29
B23, B24, B26

This is the inside just to finish it off nicely.
Subscribe to:
Posts
(Atom)


