Happy Halloween with Magnolia WItch Tilda
Halloween Gift or Treat Card With Graphic 45 Midnight Tales
The card measures 5 1/2 x 7" and it is a tri-fold meaning three pages. I always use heavy weight white poster board to prevent any warping since my cards have layers and weight from the embellishments. I wrap the cards with saran wrap before sliding the card in a bubble envelope so that some of the embellishments don't stick through the envelope and get ruined in the mailing.
I cut out two 10 3/4" x 7" frame and scored at the 5 1/2" and 6" for each panel. I glued each side together on the panels to form the three sides.
Now the fun begins of the layers and embellishments. I am using the Graphic 45 Midnight Tales Ephemera and Journal cards for most of the pages along with four sides of the Graphic 45 Midnight Tales cardstocks. I found some solid orange, purple and black cardstock to frame the journal cards.
Also, I made earlier the moon using epoxy resin in the Prima Marketing mould-Nocturnal Elements and colored it with Prima Marketing Redesign Brass wax. I handmade the purple flower using the Graphic 45 Tags and Flower Die set and sponged on Distress purple ink. The leaves were cut out using the Heartfelt Creation Classic Rose Vine die set. I used the Dress My Craft Pink Celebration Sequins and 28 Lilac Lane Shaker Mix - Safari Sunrise. along with the gorgeous glass looking Stamperia Glamour Green Sparkles around the cut out Enchanting Banner from the collection and adhering it with Beacon 3-in-1 Advanced glue. I fussy cut a pumpkin from a journal card and used my fingers behind the pumpkin to form a 3D and just glued behind the edges of the pumpkin to the card to emphasize the pumpkin.I made the inside pocket using solid black cardstock and cut a 6 1/2" x 6" and scored the length on each side on the score line at 1/4" and 1/2" and for the height, score at 3" and 3 1/2". The front measures 5 1/2" length and 3" height. Fold the score lines and glue to form the box. Glue to the card.
I covered four sides since the right side folds inside the card and there wasn't anything on it so it looks more complete have to do this side when it is taken out of the envelope and opening it up.
So get crafting for Halloween for your little spooks and goblins and hope this will inspire you with ideas and supplies all available at The Rubber Buggy.
Stained Glass Poinsettia
Shabby Chic Baby Girl Easel Card
Supplies:
- 5mm flat back pearls
- Oval doily or doily die
- Wild Rose baby girl Printed Panel
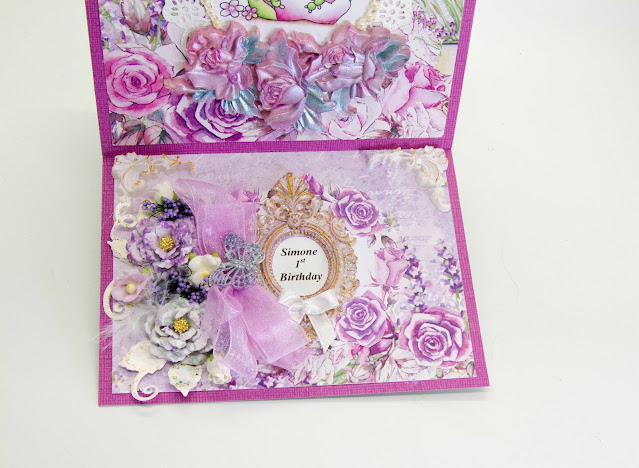
- Prima Marketing Butterfly Spell and Prima Marketing Mermaid Sparkle and Prima Marketing White Pearl acrylic paints
- Prima Marketing Rose Gold Wax
- Beacon 3-n-1 Advanced glue
- Purple cardstock
- Heavy weight white cardstock
- NUVO Crystal Winter Blizzard Glitter Drops
- Metal corner and metal butterfly embellishments
- You've seen the tutorial and photo and now you need to try it! Please share you experience and a photo of your easel card on The Rubber Buggy Brigade Group Facebook. Enjoy making some wonderful cards.
- So get crafting and have a fabulous day and thanks for visiting.The Rubber Buggy has the crafting supplies for your next project. So have fun crafting this weekend with these products. My cards and projects are always posted on Saturday. Keep watching and thank you so much for those wonderful comments as well as suggestions.Enjoy and Happy Crafting!
Happy Moments
Shabby Chic Barn Shaped Card
Welcome back and Nancy, here, to share another barn shape card but this time it is a shabby chic barn shape card. I created a step-by-step with a printable template that I made for you to make your next barn shape card. The Rubber Buggy has these supplies available and these cards were made with the Graphic 45 Farm House collection and Simple Story Vintage Garden and Farm cut out that are in packages . 
Here are two barn shaped cards with fun farm animals and good ole home grown vegetables inside each card. 
Fall Themed Friendship Card
Baby Infant Explosion Box
Each side of the white cardstock is covered with 4" square of Stamperia Little Boy papers along with the triangle corners that were cut corner to corner from a 4" square to fit each triangle.
I dotted certain areas with clear glue and slide with a pen the clear stars and golden hearts from Dress My Crafts Pink Soda jar of sequins, stars and hearts. Then I glued the string of pearls across the hot air balloon and added these die cut sentiments from an old die set.
I took these buttons and painted some white gesso and painted a light brown paint to blend in with the background. The adorable gold hearts and clear sequins that have shine with light are from the Dress My Crafts Pink Soda jar of embellishments. The baby bed was die cut with white metallic or shimmer cardstock.
I set the Prima Marketing Gungy frame with epoxy resin. I had it dry over night and sprayed with primer or white gesso will also work. I painted the Prima Marketing Gungy frame with Prima Marketing White Pearl Metallic acrylic paint which gives it a shimmer and let dry and then sponged on with my fingers the Prima Marketing Gold Rose wax in areas of the mould to bring out the gorgeous details.


